Why This Delish Map Berry Crisp Will Be Your New Go-To
I’ve made countless crisps over the years, and this particular Berry Crisp recipe has earned a top spot in my recipe box for a few simple reasons. It’s truly special, and I think it will become a cherished recipe in your home, too.
- Effortless Preparation: My recipe prioritizes ease without sacrificing flavor. You won’t find any complicated techniques here, making it perfect for both new and experienced bakers.
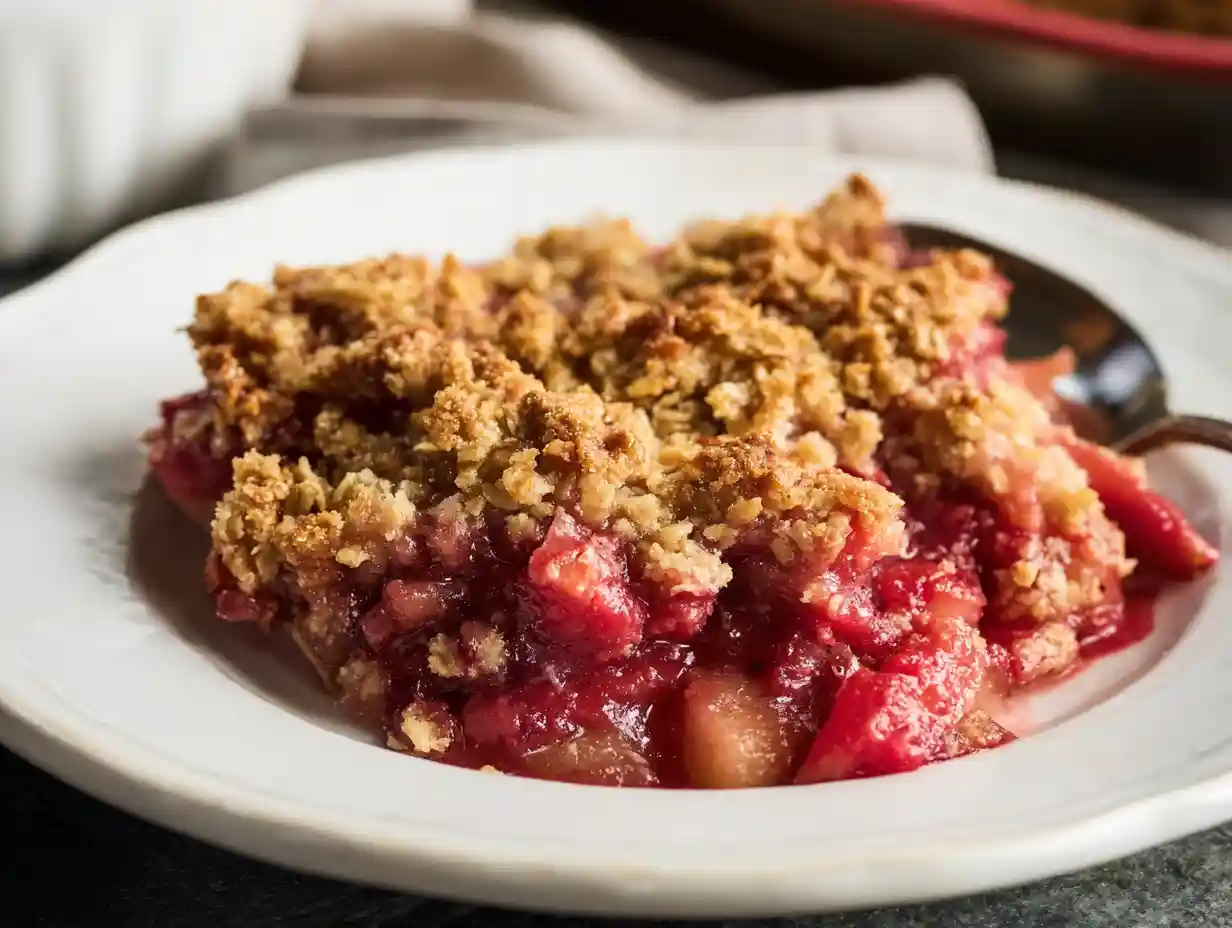
- Perfect Sweet-Tart Balance: The combination of raspberries, blackberries, and blueberries creates a harmonious blend of sweet and tart, ensuring every bite is bursting with vibrant fruit flavor.
- Unique Softer Topping Texture: Unlike some crisps that require cutting in cold butter, my recipe uses melted butter for the topping. This creates a wonderfully soft, slightly chewy, and incredibly flavorful crumble that I find utterly irresistible. It’s a delightful contrast to the juicy berry filling!
- Maximum Flavor, Minimal Fuss: I’ve carefully balanced the ingredients to ensure you get a robust, comforting flavor profile with the least amount of effort. It’s comfort food at its finest, made simple.
Table of Contents

Amazing Berry Crisp: Easy, Sweet & Tart Perfection
Ingredients
Equipment
Method
- Preheat oven to 350 degrees F.
- Make the topping first by combining the oats, flour, sugar, brown sugar, cinnamon and salt. Stir to combine.
- Pour in the melted butter and stir to incorporate. Set aside.
- In another bowl add the frozen berries, flour, sugar, salt, lemon juice and vanilla extract and toss gently to combine.
- Pour mixture into an 8×8’’ or similar size casserole dish or pie plate. Glob the topping ingredients evenly over the top (I say “glob” because the mixture will be softer than your normal dry crumble topping, because of the melted butter).
- Bake for 40-45 minutes until the topping is golden brown and berries are bubbling around the edges.
- Remove from the oven, place on a wire rack, and allow to cool for at least 7-10 minutes before serving. Serve with a scoop of vanilla ice cream, if desired.
- Cover leftovers and store in the refrigerator for up to 5 days.
- You might also love easy homemade apple crisp!
Nutrition
Tried this recipe?
Let us know how it was!Fresh vs. Frozen: Mastering Your Berries for the Perfect Berry Crisp

When it comes to making a spectacular Berry Crisp, the choice between fresh and frozen berries is often a discussion point. For this recipe, I specifically call for frozen berries, and I’ll explain why, along with how you can adapt if you prefer fresh.
Frozen berries are my secret weapon here because they release just the right amount of juice as they bake, creating a wonderfully thick and saucy filling without becoming watery. There’s no need to thaw them beforehand; I toss them straight into the filling mixture! Plus, they’re convenient and accessible year-round, which I love. For this Berry Crisp, I use a delicious mix of raspberries, blackberries, and blueberries. The raspberries bring a bright tartness, the blackberries offer a deep, earthy sweetness, and the blueberries add a lovely pop of juiciness and subtle sweetness. Together, they create a beautifully balanced flavor profile that sings of summer.
If you choose to use fresh berries, I recommend giving them a very gentle wash and patting them thoroughly dry to prevent excess moisture. While fresh berries are wonderful, they can sometimes release more liquid, so be prepared for a slightly looser filling, or consider adding an extra teaspoon of flour or cornstarch to the filling mixture.
Gather Your Ingredients for a Heavenly Berry Crisp
Before we dive into the fun part, let’s make sure you have all the beautiful ingredients ready to go. I’ve separated them for the topping and the filling to make things super clear for you.
For the Topping:
- 1 cup old-fashioned rolled oats (I really recommend old-fashioned for that perfect chewy texture; quick oats can get a bit mushy!)
- 1 cup all-purpose flour
- 1/4 cup granulated sugar
- 3/4 cup light brown sugar
- 1 teaspoon ground cinnamon
- dash of salt
- 2/3 cup unsalted butter (melted) (I specify unsalted so I can control the saltiness in the recipe, but if you only have salted, just omit the dash of salt from the topping.)
For the Berry Filling:
- 4 1/2 cups frozen berries (raspberries, blackberries and blueberries)
- 1/4 cup all-purpose flour
- 1/4 cup granulated sugar
- 1/4 teaspoon salt
- 1/2 teaspoon lemon juice
- 1 teaspoon vanilla extract
Step-by-Step: Crafting Your Delicious Berry Crisp
Now for the best part: making this incredible Berry Crisp! I’ve laid out the steps clearly so you can follow along with ease.
- Preheat oven to 350 degrees F.
- Make the topping first by combining the oats, flour, sugar, brown sugar, cinnamon and salt. Stir to combine.
- Pour in the melted butter and stir to incorporate. Set aside.
- In another bowl add the frozen berries, flour, sugar, salt, lemon juice and vanilla extract and toss gently to combine.
- Pour mixture into an 8×8’’ or similar size casserole dish or pie plate. Glob the topping ingredients evenly over the top (I say “glob” because the mixture will be softer than your normal dry crumble topping, because of the melted butter).
- Bake for 40-45 minutes until the topping is golden brown and berries are bubbling around the edges.
- Remove from the oven, place on a wire rack, and allow to cool for at least 7-10 minutes before serving. Serve with a scoop of vanilla ice cream, if desired.
- Cover leftovers and store in the refrigerator for up to 5 days.
- You might also love easy homemade apple crisp!
Expert Tips for the Best Berry Crisp Texture and Flavor
I want your Berry Crisp to be absolutely perfect, so I’ve gathered some of my best tips to ensure fantastic results every time. Knowing what to look for makes all the difference!
When I say bake until “golden brown and bubbling,” I mean it! The golden-brown topping is your visual cue for doneness, indicating a beautifully toasted, flavorful crumble. The bubbling around the edges of the berries is crucial; it means the fruit juices are thickening, creating that luscious, saucy filling we all crave. Don’t pull it out too early, or your filling might be too runny.
Remember, my crisp topping uses melted butter, which gives it a unique, softer, and chewier texture compared to crisps made with cold, cut-in butter. This rich, buttery brown sugar and cinnamon combination is what makes this particular Berry Crisp so wonderfully comforting. For the filling, that bubbling action is key to ensuring the flour thickens the juices properly without becoming gummy.
Finally, choosing the right baking dish size, an 8×8-inch pan or a similar pie plate, is important. This ensures a great crisp-to-filling ratio, where every spoonful gets a good amount of both the juicy berries and the delicious topping. It also helps with even baking, preventing a soggy middle or unevenly cooked edges.
Troubleshooting Your Berry Crisp: Common Issues & Quick Fixes
Even the most seasoned home bakers can encounter a hiccup or two. Don’t worry; I’m here to help you troubleshoot common Berry Crisp issues so you can always achieve a delicious outcome.
What if my berry filling is too watery? If you find your filling is too thin, it likely needed more time to cook down and thicken. Next time, I would suggest baking it for an additional 5-10 minutes, making sure you see vigorous bubbling around the edges. For an immediate fix, you could gently scoop out a small amount of liquid, mix it with a teaspoon of cornstarch or tapioca starch, and then stir it back into the warm filling.
What if my topping isn’t crispy enough? If your topping is still pale after the recommended baking time, don’t fret! Sometimes ovens vary. Try baking it for another 5-10 minutes, keeping a close eye on it. For an extra golden crunch, you can even turn on the broiler for just 1-2 minutes at the very end, but watch it constantly to prevent burning.
How do I prevent a soggy bottom? A soggy bottom usually happens when the crisp is undercooked or if the berries release too much liquid too quickly. Ensuring your crisp bakes until the berries are truly bubbling and the topping is golden brown is the best prevention. If you’re using fresh berries that might be extra juicy, an additional teaspoon of flour or a tablespoon of cornstarch mixed with the berries can help absorb excess moisture.
Serving Ideas Beyond Ice Cream for Your Berry Crisp
While a scoop of vanilla ice cream is a classic and utterly delightful pairing for this Berry Crisp, I love exploring other ways to enjoy it! Expanding your serving options can elevate the experience even further.
For a tangy contrast that beautifully cuts through the sweetness of the berries, I often reach for a dollop of crème fraîche. Its slight sourness is just divine! Alternatively, a swirl of plain or vanilla Greek yogurt offers a lighter, healthier option that still feels indulgent.
If you’re feeling a little fancy, a drizzle of homemade vanilla custard sauce makes this Berry Crisp feel like a gourmet dessert. For those who love extra texture, a sprinkle of toasted pecans or slivered almonds adds a lovely nutty crunch that complements the soft topping perfectly. Don’t be afraid to get creative; your taste buds will thank you!
Make-Ahead & Storage for Your Berry Crisp
I know how helpful it can be to prepare things in advance, and this Berry Crisp offers some great make-ahead options! Plus, knowing how to store and reheat it properly means you can enjoy it for days.
You can definitely prep components of this Berry Crisp ahead of time. I like to prepare the topping mixture completely and store it in an airtight container in the refrigerator for up to 3 days. For the berry filling, I’d suggest mixing the frozen berries with the other filling ingredients just before baking, as leaving them mixed for too long might cause the berries to release too much liquid.
As per my recipe, cover any leftovers and store them in the refrigerator for up to 5 days. When you’re ready to enjoy it again, I recommend reheating individual portions in the microwave for a quick warm-up, or in a preheated oven at 300°F (150°C) for about 10-15 minutes, until warmed through. This helps maintain a bit of that lovely topping crispness.
For freezing, you have a couple of options. You can freeze the baked and cooled crisp by wrapping it tightly in plastic wrap and then foil; it will keep for up to 3 months. Thaw overnight in the refrigerator and reheat as above. You can also freeze the unbaked crisp; assemble it in your baking dish, cover tightly, and freeze. When ready to bake, you can bake it from frozen (it will just take an additional 15-20 minutes) or thaw it in the fridge first. However, I caution that freezing unbaked berries with a thickener can sometimes result in a slightly more watery filling upon baking, so I prefer freezing the topping separately.
Delicious Berry Crisp Variations & Dietary Swaps
I always encourage experimenting in the kitchen, and this Berry Crisp is a wonderful canvas for creativity! Here are some ideas for variations and dietary adjustments to make it truly your own.
| Variation / Swap | Description / Instructions |
|---|---|
| Nutty Topping | Add 1/2 cup chopped pecans, walnuts, or almonds to the oat topping mixture for extra crunch and flavor. |
| Spiced Berry Fill | Introduce 1/4 teaspoon ground nutmeg or a pinch of cardamom to the berry filling for an aromatic twist. |
| Citrus Zest Boost | Add 1 teaspoon of orange or lemon zest to the berry filling for a brighter, more complex flavor profile. |
| Gluten-Free | Substitute regular rolled oats with certified gluten-free rolled oats and all-purpose flour with a 1:1 gluten-free baking flour blend. |
| Dairy-Free/Vegan | Use a high-quality vegan butter (stick form works best) in place of unsalted butter for both topping and filling (if applicable). Ensure any accompaniments are also dairy-free/vegan. |
FAQs About Berry Crisp
I get a lot of wonderful questions from fellow home cooks, so I thought I’d answer a few common ones about crisps right here for you.
Can I use all one type of berry?
Absolutely! While I love the mix of raspberries, blackberries, and blueberries for balance, feel free to use 4 1/2 cups of your favorite single berry, like all blueberries or all raspberries. The texture and sweetness might vary slightly, but it will still be delicious.
What’s the difference between a crisp and a crumble?
This is a great question! Often, the terms are used interchangeably, but traditionally, a crisp topping contains oats, like mine does, giving it a slightly crispier texture (hence the name!). A crumble topping is usually just flour, butter, and sugar, creating a more streusel-like, crumbly texture without the oats.
Why is my crisp topping soggy?
A soggy topping can happen if the crisp is underbaked, or if there’s too much moisture coming from the fruit. Make sure you bake it long enough for the fruit to bubble vigorously and the topping to turn golden brown. Using frozen berries as I do helps control moisture, and ensuring your dish isn’t overcrowded helps with evaporation.
Can I make this in individual ramekins?
Yes, you absolutely can! Divide the berry filling and topping among 6-8 oven-safe ramekins. The baking time will be slightly shorter, around 25-30 minutes, so keep an eye on them until they’re golden and bubbling. They make for such a charming individual dessert!
Your New Favorite Berry Crisp Awaits!
There’s something truly magical about a warm, bubbly Berry Crisp pulled straight from the oven. The aroma alone is enough to bring a smile to my face! I truly believe this recipe will become a beloved staple in your kitchen, offering comforting warmth and vibrant fruit flavors with remarkable ease. It’s perfect for sharing with loved ones or savoring on a quiet evening in.
I can’t wait for you to try this delightful Berry Crisp! Please, tell me, what’s your favorite berry combination for a crisp? Do you have any questions about the recipe, or even better, have you made it already? I’d absolutely love for you to leave a comment below and share your delicious results with me and the entire Delish Map community on social media! Happy baking, my friends!
Printable Recipe Card
Want just the essential recipe details without scrolling through the article? Get our printable recipe card with just the ingredients and instructions.