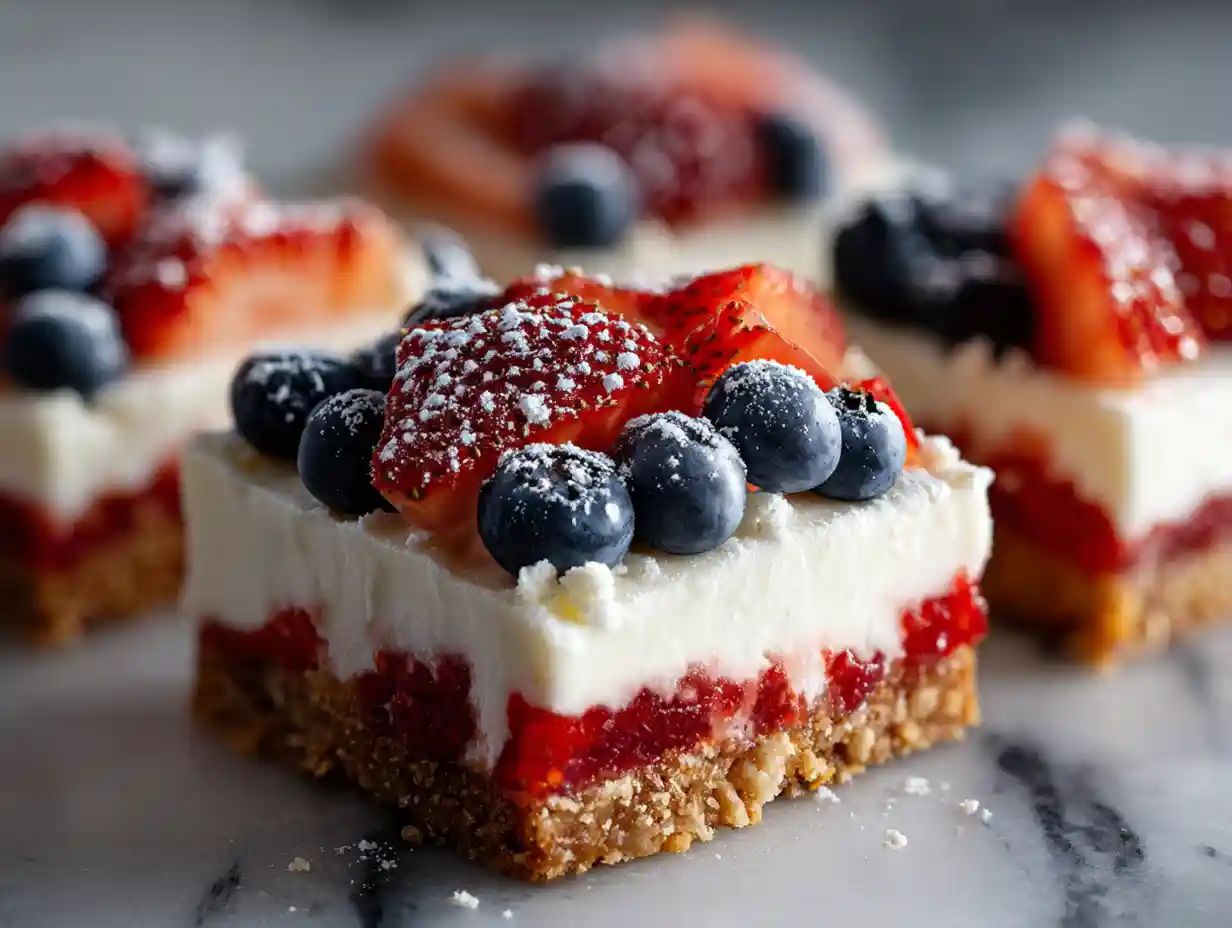
There’s something so incredibly special about gathering with loved ones to celebrate, especially during patriotic holidays like the Fourth of July or Memorial Day. For me, these moments are always made sweeter with a homemade treat, and that’s exactly why I adore these stunning No-Bake Flag Cheesecake Bars. They bring together everything I love: a creamy, rich dessert, vibrant fresh fruit, and an impressive, festive presentation that always brings smiles to faces.
While I know many flag desserts are no-bake, I truly believe that baking my cheesecake bars gives them an unmatched stability, a dreamy texture, and a depth of flavor that’s just perfect for sharing at any summer celebration. I promise you, these bars are worth every moment of baking; they’re pure joy in every bite.
Table of Contents
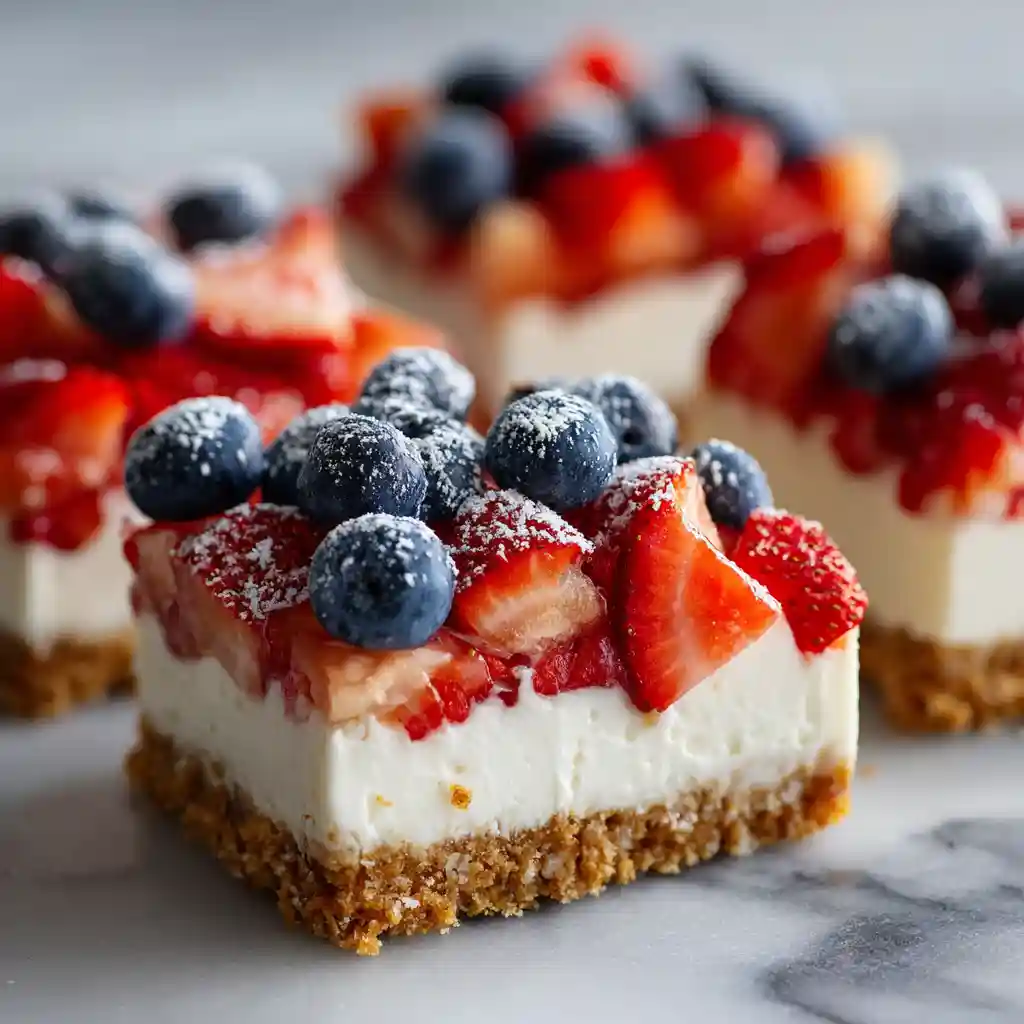

Stunning No-Bake Flag Cheesecake Bars
Ingredients
Equipment
Method
- Preheat the oven to 325 °F (167 °C) and lightly grease a 9”x13” pan.
- Place the graham crackers in a food processor fitted with an S-blade and process until you have uniform fine crumbs. You want them to resemble fine sand; any larger pieces can make the crust uneven or crumbly.
- Transfer to a mixing bowl and stir in the brown sugar and salt until combined.
- Stir in the butter until well combined. The mixture should feel like wet sand and hold together when you press it between your fingers. If it’s too dry, a tiny bit more melted butter can help.
- Pat evenly onto the bottom of the prepared pan. I like to use the bottom of a flat glass or a measuring cup to really press it down firmly and create a compact, even layer.
- Bake for 10 minutes and then remove to a wire rack to cool for at least 10 minutes while preparing the filling.
- In a large mixing bowl using an electric hand mixer, beat together the cream cheese and sugar until fluffy. This should take a few minutes, scraping down the sides of the bowl occasionally, until the mixture is light and airy.
- Add the vanilla, salt and sour cream and beat on low until combined.
- Add in the eggs, one by one, until combined. Be sure not to overmix. I stop mixing as soon as each egg yolk disappears into the batter. Overmixing introduces too much air, which can cause your cheesecake to puff up and then crack as it cools.
- Pour this into the crust, which has cooled for at least 10 minutes.
- Bake at 325 °F (167 °C) for 37-45 minutes or until the middle appears set. You’re looking for the edges to be slightly puffed and firm, while the very center might still have a slight wobble. It should resemble a very soft Jell-O jiggle, not a liquid wave.
- Remove from the oven, place on a wire rack, and let come to room temperature, about 2 hours, before chilling for 8+ hours. You can make the cheesecake portion up to 4 days in advance (and cover and refrigerate), but I’d recommend making the bars the day before serving so they’re as fresh as possible. Proper cooling and chilling are vital; this slow process prevents drastic temperature changes that can lead to cracks and allows the cheesecake to fully set and achieve its perfect creamy texture.
- Rinse and lay the berries out flat on a paper towel to dry. Pat them dry with more paper towel before decorating the bars. This step is super important to prevent any excess moisture from making your cheesecake soggy or diluting the berry flavor.
- Use the blueberries to create a US flag design on top of the bars. In the upper left corner, make a 7×5 section of blueberries for the “stars.” I like to arrange them in neat rows for a crisp look. For the raspberries, I recommend using a knife to very gently mark straight lines into the bars that will guide you where to put your raspberries. These light score marks help you keep your stripes perfectly straight and evenly spaced, giving your flag a professional, clean finish.
Nutrition
Tried this recipe?
Let us know how it was!Why You’ll Love These Festive No-Bake Flag Cheesecake Bars
I think you’re going to fall head over heels for these Flag Cheesecake Bars, and here’s why I just can’t get enough of them:
- Effortless Elegance: Creating a show-stopping dessert doesn’t have to be complicated. I’ve designed this recipe to be straightforward, ensuring you can achieve a gorgeous, patriotic presentation without any stress.
- Irresistibly Delicious: The combination of the buttery graham cracker crust, the rich, smooth cheesecake filling, and the burst of fresh berries is simply divine. It’s a flavor profile that everyone adores.
- Perfect for Celebrations: Whether it’s for the Fourth of July, Memorial Day, or any occasion that calls for a touch of red, white, and blue, these bars are the ultimate crowd-pleaser and a beautiful centerpiece.
- Make-Ahead Friendly: I always appreciate a recipe I can prepare in advance, and these cheesecake bars shine as a make-ahead dessert. This means less last-minute stress and more time enjoying your guests!
Essential Tools for Perfect Cheesecake Bars
Having the right tools on hand always makes baking a smoother, more enjoyable experience. For these Flag Cheesecake Bars, I find these items especially helpful:
- 9×13 inch Baking Pan: This size is ideal for creating bars that are easy to cut and serve, and it gives you a perfect canvas for your flag design.
- Electric Hand Mixer: I use my hand mixer to achieve that wonderfully fluffy cream cheese filling. It makes the job much quicker and ensures everything is perfectly incorporated.
- Food Processor: This is a game-changer for getting uniform, fine graham cracker crumbs for a perfectly textured crust. It saves so much time and effort compared to crushing by hand.
- Wire Rack: Essential for cooling your cheesecake bars evenly after baking. This helps prevent condensation and ensures a nice, even texture throughout.
Ingredients for Your Patriotic Flag Cheesecake Bars
I always say that great ingredients are the foundation of great food. For these Flag Cheesecake Bars, using fresh, quality components truly makes all the difference. I’ve included some of my personal notes to help you get the best results.
For the Graham Cracker Crust
I love a sturdy, flavorful crust, and this graham cracker base is just perfect. If you don’t have graham crackers, you can absolutely use vanilla wafers or even shortbread cookies; just make sure to process them into fine crumbs.
- 3 cups graham cracker crumbs (see notes)
- 1/3 cup brown sugar
- pinch salt
- 3/4 cup unsalted butter (melted, see notes)
For the Creamy Cheesecake Filling
Achieving a super smooth and luscious cheesecake filling is all about the temperature of your ingredients. Make sure your full-fat cream cheese, sour cream, and eggs are at room temperature; it helps everything blend together beautifully without lumps.
- 32 ounces full-fat cream cheese (room temperature, see notes)
- 1 cup granulated sugar
- 1 tablespoon vanilla extract
- 1/8 teaspoon salt
- 3/4 cup sour cream (room temperature)
- 4 large eggs (50 grams each out of shell, room temperature)
For the Vibrant Berry Topping
Fresh berries truly make this flag design pop! I always select the freshest, firmest raspberries and blueberries I can find. Look for plump, deeply colored berries that hold their shape well for the best appearance and flavor.
- 18 ounces fresh raspberries
- 1 1/4 cups fresh blueberries (see notes)
How to Make Your Flag Cheesecake Bars: Step-by-Step Instructions
I’ve broken down the process into easy-to-follow steps. Take your time, and remember that baking should be a joy, not a chore!
Prepare the Perfect Graham Cracker Crust
This crust is simple to make and forms the ideal base for our creamy cheesecake. Getting the crumbs fine and patting it evenly is key for a consistent texture.
- Preheat the oven to 325 °F (167 °C) and lightly grease a 9”x13” pan.
- Place the graham crackers in a food processor fitted with an S-blade and process until you have uniform fine crumbs. You want them to resemble fine sand; any larger pieces can make the crust uneven or crumbly.
- Transfer to a mixing bowl and stir in the brown sugar and salt until combined.
- Stir in the butter until well combined. The mixture should feel like wet sand and hold together when you press it between your fingers. If it’s too dry, a tiny bit more melted butter can help.
- Pat evenly onto the bottom of the prepared pan. I like to use the bottom of a flat glass or a measuring cup to really press it down firmly and create a compact, even layer.
- Bake for 10 minutes and then remove to a wire rack to cool for at least 10 minutes while preparing the filling.
Whip Up the Silky Cheesecake Filling
Creating a smooth, crack-free cheesecake filling is all about gentle mixing and ensuring your ingredients are at the right temperature.
- In a large mixing bowl using an electric hand mixer, beat together the cream cheese and sugar until fluffy. This should take a few minutes, scraping down the sides of the bowl occasionally, until the mixture is light and airy.
- Add the vanilla, salt and sour cream and beat on low until combined.
- Add in the eggs, one by one, until combined. Be sure not to overmix. I stop mixing as soon as each egg yolk disappears into the batter. Overmixing introduces too much air, which can cause your cheesecake to puff up and then crack as it cools.
Bake to Perfection and Chill
Patience is a virtue, especially when it comes to baking and chilling cheesecake. These steps are crucial for achieving that signature creamy texture and preventing cracks.
- Pour this into the crust, which has cooled for at least 10 minutes.
- Bake at 325 °F (167 °C) for 37-45 minutes or until the middle appears set. You’re looking for the edges to be slightly puffed and firm, while the very center might still have a slight wobble. It should resemble a very soft Jell-O jiggle, not a liquid wave.
- Remove from the oven, place on a wire rack, and let come to room temperature, about 2 hours, before chilling for 8+ hours. You can make the cheesecake portion up to 4 days in advance (and cover and refrigerate), but I’d recommend making the bars the day before serving so they’re as fresh as possible. Proper cooling and chilling are vital; this slow process prevents drastic temperature changes that can lead to cracks and allows the cheesecake to fully set and achieve its perfect creamy texture.
Decorate Your Flag Cheesecake Bars with Fresh Berries
This is where the magic happens and your cheesecake bars transform into a festive flag! Taking a little extra care with your berry placement will make all the difference.
- Rinse and lay the berries out flat on a paper towel to dry. Pat them dry with more paper towel before decorating the bars. This step is super important to prevent any excess moisture from making your cheesecake soggy or diluting the berry flavor.
- Use the blueberries to create a US flag design on top of the bars. In the upper left corner, make a 7×5 section of blueberries for the “stars.” I like to arrange them in neat rows for a crisp look. For the raspberries, I recommend using a knife to very gently mark straight lines into the bars that will guide you where to put your raspberries. These light score marks help you keep your stripes perfectly straight and evenly spaced, giving your flag a professional, clean finish.
Tips for the Best Flag Cheesecake Bars
I want you to have the most delicious and beautiful Flag Cheesecake Bars possible, so here are a few extra tips I’ve learned along the way:
- Room Temperature Ingredients: I really can’t stress this enough for the filling! Cream cheese, sour cream, and eggs blend so much more smoothly when they’re at room temperature, ensuring a lump-free and silky batter.
- Don’t Overmix: Once the eggs go in, mix just until they are combined. Overmixing incorporates too much air, which can lead to a puffed-up cheesecake that cracks as it cools.
- Patience with Chilling: The 8+ hour chilling time isn’t just a suggestion; it’s essential for the cheesecake to fully set and develop its perfect dense, creamy texture. I always plan to make these the day before I want to serve them.
- Dry Your Berries Thoroughly: Any excess moisture on your raspberries and blueberries can seep into the cheesecake, making it soggy. A good pat-down with paper towels is crucial.
- Make-Ahead Strategy: You can bake the cheesecake portion up to 4 days in advance. Just cover it tightly and refrigerate. I recommend decorating with fresh berries closer to serving time for the freshest look.
Substitutions and Variations for Your Cheesecake Bars
I love how versatile cheesecake bars can be! If you’re looking for other creamy dessert bars or want to switch things up a bit, here are some ideas. Remember, even a baked cheesecake filling is fundamentally different from a no-bake one; a no-bake often relies on gelatin or whipped cream for setting, which isn’t the same creamy texture I aim for here.
| Component | Substitution/Variation | Notes |
|---|---|---|
| Crust | Vanilla Wafers | Process into fine crumbs, then use the same butter and brown sugar ratios as the graham cracker crust. |
| Crust | Chocolate Cookies | Use chocolate sandwich cookies (Oreo-style) or chocolate wafers for a different flavor profile. |
| Berries | Strawberries & Blueberries | Slice strawberries into even pieces for the red stripes. Blueberries remain perfect for the “stars.” |
| Filling | Dairy-free Cream Cheese | Ensure you choose a full-fat, block-style dairy-free cream cheese alternative and bring it to room temperature. The texture may vary slightly. |
| Dietary | Gluten-Free | Use certified gluten-free graham crackers or your favorite gluten-free cookies for the crust. |
| Dietary | Keto-Friendly | For the crust, use almond flour mixed with melted butter and a sugar substitute. For the filling, use a granular erythritol blend or allulose in place of granulated sugar. Ensure full-fat cream cheese. |
Troubleshooting Common Cheesecake Bar Issues
Even the most seasoned home cooks encounter little hiccups sometimes! Here are a few common issues you might run into with cheesecake bars and my best advice for them.
- Cracked Cheesecake: This usually happens from overmixing, baking at too high a temperature, or a rapid cooling process. To prevent this, don’t overmix the eggs, ensure your oven temperature is accurate, and allow the cheesecake to cool slowly on a wire rack at room temperature before chilling.
- Uneven Crust: A lumpy or uneven crust is often due to not processing the crumbs finely enough or not pressing them firmly and evenly into the pan. Use a food processor for fine crumbs and a flat-bottomed glass to really compact the crust.
- Filling Didn’t Set: If your filling is still too jiggly after chilling, it likely didn’t bake long enough. Next time, look for edges that are set with just a slight, soft wobble in the very center. Ensuring your cream cheese is full-fat also contributes to proper setting.
- Soggy Berries: This is usually due to moisture from the berries or storing the decorated bars for too long. Always rinse and pat your berries thoroughly dry before placing them on the cheesecake. If storing for more than a day, it’s best to remove the fruit and add it back right before serving.
Make-Ahead and Storage Tips for Flag Cheesecake Bars
I always appreciate a dessert I can prepare in advance, and these bars are fantastic for that. Proper storage is key to keeping them fresh and delicious!
If you have leftovers, it’s best to remove the fruit if storing for more than 1 day to prevent it from getting soggy/moldy.
Undecorated cheesecake bars can be refrigerated in an airtight container for up to 4 days.
For longer storage of undecorated bars, you can wrap the chilled bars tightly in plastic wrap, then foil, and freeze them for up to 1 month. Thaw in the refrigerator overnight before decorating and serving. If you want to prepare the crust and filling separately in advance, you can bake and cool the crust, then store it covered at room temperature for up to a day, and the prepared cheesecake filling can be covered and refrigerated for up to 24 hours before baking.
Detailed Nutritional Analysis
I know many of you appreciate understanding the nutritional aspects of the recipes I share. While exact values can vary significantly based on the specific brands of ingredients you use and your precise portion sizes, I can give you a general idea for these Flag Cheesecake Bars.
Typically, a serving would provide a good amount of calories and fats, primarily from the cream cheese and butter, which contribute to the rich, satisfying taste. You can also expect carbohydrates from the graham crackers and sugars, along with some protein from the cream cheese and eggs. Fresh berries add a lovely boost of vitamins, particularly Vitamin C, and beneficial antioxidants. Remember, these bars are a celebratory treat, meant to be enjoyed! For more specific information on the nutritional content of cheesecake, consult authoritative food databases.
Frequently Asked Questions
I get lots of great questions about my recipes, and I love answering them! Here are some common ones about these Flag Cheesecake Bars:
Can I use frozen berries?
I don’t recommend using frozen berries for the flag topping, as they release a lot of moisture when they thaw, which can make your cheesecake soggy and the design less crisp. Fresh berries are definitely best here.
How long do Flag Cheesecake Bars last?
Undecorated, they last up to 4 days in the refrigerator in an airtight container. Once decorated with fresh fruit, I recommend enjoying them within 1-2 days for the best appearance and texture, as the fruit can soften over time.
Can I freeze these bars?
Yes, you can! I suggest freezing them before decorating. Wrap the chilled, unfrozen bars tightly in plastic wrap, then a layer of aluminum foil, and store in the freezer for up to one month. Thaw them overnight in the refrigerator before adding the fresh berry topping.
What kind of cream cheese is best?
I always use full-fat, block-style cream cheese. Low-fat or whipped cream cheese often contains more water or stabilizers that can alter the texture and setting of your cheesecake.
Why are my cheesecake bars cracking?
Most commonly, cracks are caused by overmixing the batter (especially after adding eggs), baking at too high a temperature, or cooling the cheesecake too rapidly. Make sure all your ingredients are at room temperature and try to cool the cheesecake slowly.
Conclusion
I hope you’re feeling as excited as I am to make these delightful Flag Cheesecake Bars! There’s truly nothing quite like presenting a beautiful, homemade dessert that brings joy to everyone around the table. The creamy texture, the vibrant berries, and that lovely patriotic design all come together to create a truly memorable treat.
I can’t wait to see your stunning creations! Please consider leaving a comment below if you try this recipe; I love hearing about your experiences and any questions you might have. You can also share your photos on Instagram and tag Delish Map; it absolutely makes my day to see what you’re cooking. And if you have any ideas for future recipes you’d love to see, don’t hesitate to let me know! Happy baking, my friends!
Printable Recipe Card
Want just the essential recipe details without scrolling through the article? Get our printable recipe card with just the ingredients and instructions.