There’s just something incredibly special about a meal that wraps you in a warm hug, isn’t there? For me, a steaming slice of homemade chicken pot pie instantly brings back memories of cozy family dinners, the kind where laughter fills the air and worries melt away. It’s a classic for a reason, a true American comfort food icon.
Today, I’m so excited to share my Buttery Chicken Pot Pie recipe with you, a dish that elevates the humble pot pie to something truly extraordinary.
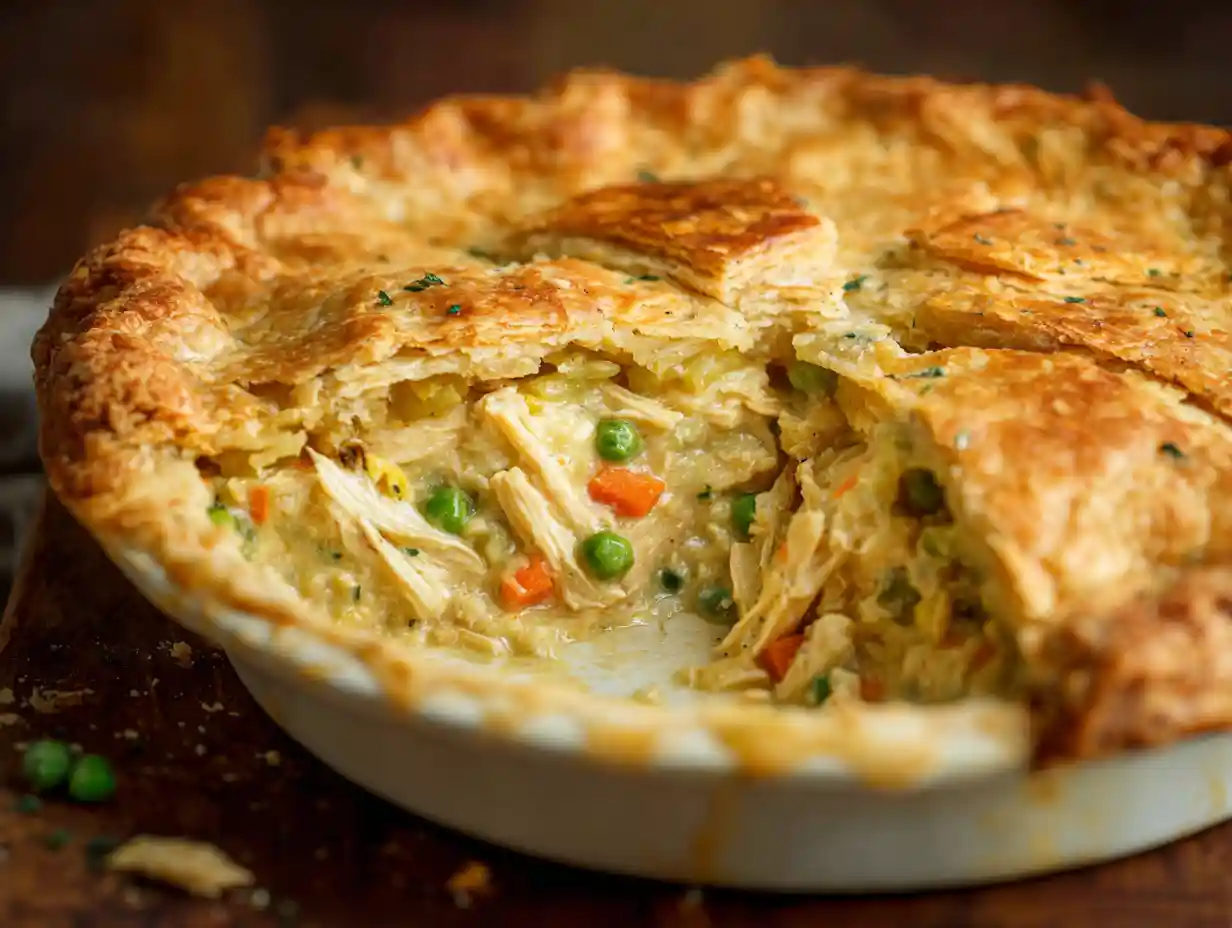
This recipe is a labor of love, designed to deliver maximum flavor with a surprisingly straightforward approach. You’ll find the entire process, from prep to table, to be a delightful culinary journey. I’ve leaned into the “buttery” aspect to create a rich, indulgent filling nestled under a golden, flaky crust that I think you’ll absolutely adore.
Table of Contents
Why You’ll Love This Buttery Chicken Pot Pie

I promise, this isn’t just any chicken pot pie. I’ve fine-tuned this recipe to bring you the best possible experience, and I truly believe it stands out from the rest. Here’s why I know you’re going to love it:
- Rich, buttery flavor: My recipe really embraces the warmth and depth that butter brings, making every bite incredibly satisfying.
- Perfectly balanced filling: I’ve carefully crafted the filling to ensure tender chicken and perfectly cooked vegetables mingle in a creamy, savory gravy.
- Easy to make: Despite its impressive taste, I’ve kept the instructions simple and the ingredients approachable, so any home cook can achieve delicious results.
The History of Chicken Pot Pie
I find it fascinating to learn about the origins of the dishes I love, and chicken pot pie has a rich history that stretches back centuries. Its roots can be traced to ancient civilizations, where meat pies were a practical way to feed many people. The Greeks were known for their meat-filled pastry shells, and the Romans took this concept and ran with it, creating elaborate pies with various fillings.
Fast forward to medieval Europe, and pies became a staple, often served with rich, thick crusts that sometimes served more as a cooking vessel than something to be eaten. Over time, as culinary techniques evolved, the crust became an integral, delicious part of the dish. When European settlers came to America, they brought their pie traditions with them, adapting them to available ingredients.
Chicken pot pie, as we know it today, emerged as a beloved comfort food, evolving through generations into the hearty, satisfying meal I enjoy making for my family now. For a quicker version of this dish, consider using leftover chicken and frozen vegetables; this can help to reduce prep time significantly. Because this recipe can be enjoyed any time of day, make sure to check out other great ideas in the Main Dishes category.
Ingredients for Buttery Chicken Pot Pie
Getting the right ingredients is the first step to a truly delicious pot pie. I always recommend using the best quality you can find; it really makes a difference.
- Homemade Pie Crust or All Butter Pie Crust (both recipes make 2 crusts, 1 for bottom and 1 for top)
- 1 pound (450g) skinless boneless chicken breast or thighs, cubed
- 1 cup (about 130g) sliced carrots (about 2 carrots)
- 1/2 cup (about 40g) sliced celery
- 1/3 cup (5 Tbsp; 71g) unsalted butter
- 1/3 cup (45g) chopped yellow onion (1/2 of a small onion)
- 1 teaspoon minced garlic
- 1/3 cup (41g) all-purpose flour
- 3/4 teaspoon salt
- 1/2 teaspoon freshly ground black pepper
- 1 teaspoon dried thyme leaves
- 1 and 3/4 cups (420ml) chicken broth/stock (I recommend reduced sodium for better control over saltiness)
- 2/3 cup (160ml) half-and-half* (this adds beautiful richness)
- 1 cup (125g) frozen peas
- egg wash: 1 large egg beaten with 1 Tablespoon (15ml) milk
- optional: sprigs of fresh thyme for garnish (I love how this makes the pie look extra special)
Step-by-Step Instructions for Buttery Chicken Pot Pie
Making this pot pie is a rewarding experience, and I’ve broken down each step to ensure your success. Take your time, and enjoy the process!
- Prepare either pie crust recipe through step 5, including chilling for at least 2 hours. I usually make the crust the night before to save time on the day I’m making the pie. The pie crust recipe makes 2 crusts, and you’ll be using both crusts for this recipe.
- In a large pot, combine chicken, carrots, and celery. Add enough water to cover the chicken and vegetables, then place over medium-high heat. Bring it to a boil, then allow it to boil for 10 minutes. Remove from heat, drain well, and set aside.
- In a large skillet over medium heat, combine the butter, onions, and garlic. Stirring occasionally, cook until the onions are translucent and the butter is lightly browning, about 5-7 minutes. Whisk in the flour, salt, black pepper, thyme, chicken broth, and half-and-half. Continue to cook and whisk until no flour lumps remain, then simmer over medium-low heat until thick. I simmer mine for 10 minutes. You really want it to be a very thick gravy; simmer longer if necessary, as a thin gravy will result in a watery pie. Taste and add more seasonings if you prefer; sometimes I add a little extra thyme for more herbaceous flavor. Remove from heat and set aside.
- Preheat your oven to 425°F (218°C).
- On a lightly floured work surface, roll out one of the discs of chilled dough (keep the other one in the refrigerator until you need it). Turn the dough about a quarter turn after every few rolls until you have a circle about 12 inches in diameter. Carefully place the dough into a 9-inch pie dish that’s 1.5–2 inches deep. Tuck the dough in with your fingers, making sure it is smooth and fits snugly into the dish. With a small sharp knife or kitchen shears, trim the extra overhang of dough and discard it.
- Spoon the cooked chicken and vegetable mixture evenly into the bottom pie crust. Scatter the frozen peas on top of the chicken and vegetables. Pour and spread the thick gravy evenly over the peas.
- Roll out the second half of the pie crust dough just as you did the first. Carefully cover the pie with the second crust and trim the extra overhang off the sides. Crimp the pie crust with a fork to seal the edges all the way around. With a small sharp knife, slice a few small slits in the top crust to allow steam to escape during baking. Using a pastry brush, brush the entire top crust and edges with the egg wash.
- Bake for 32–38 minutes or until the top of the crust is beautifully golden brown. After about 20 minutes of baking, be sure to cover the edges of the crust with aluminum foil or use a pie crust shield to prevent the edges from getting too brown. I find this step crucial for an evenly baked crust.
- Remove the pie from the oven and cool for at least 10 minutes before slicing and serving. This resting time allows the filling to set up perfectly. This recipe makes amazing leftovers; the filling is even thicker and more flavorful on the next day! Reheat as desired. Leftovers keep well in the refrigerator in an airtight container for up to 5 days.
Different Crust Options for Your Buttery Chicken Pot Pie
While I absolutely adore my homemade pie crust, I understand that sometimes you might want to try something different or just simplify the process. Here are a few other crust options you can consider, along with their pros and cons.
| Crust Type | Pros | Cons |
|---|---|---|
| Pie Crust | Classic flavor and texture, holds shape well, creates a substantial base. | Can be time-consuming to make from scratch, requires chilling. |
| Puff Pastry | Incredibly flaky and buttery, easy to use (store-bought options available). | Can be quite rich, doesn’t always hold shape as well as traditional pie crust. |
| Phyllo Dough | Very light and crispy, generally lower in fat than other crusts. | Can be fragile and requires careful layering with butter/oil between sheets. |
| Mashed Potato Topping | Comforting and flavorful, offers a great gluten-free option, hearty. | Softer texture, may not provide the same structural integrity as pastry crusts. |
Flavor Pairings: Choosing the Right Vegetables
My recipe includes classic carrots, celery, and peas, which are always a hit. However, I often like to experiment with other vegetables to add different dimensions of flavor and texture to my pot pie. It’s a wonderful way to personalize the dish!
Adding sliced mushrooms will give an incredible umami depth, perfect for those who enjoy a richer, earthier flavor profile. If you’re looking for a subtle sweetness and a touch of elegance, diced parsnips are a fantastic addition; they become wonderfully tender and impart a unique, sweet-nutty taste. For a pop of color and a slight peppery bite, I sometimes throw in some finely chopped bell peppers, particularly red or yellow ones.
You could also include small florets of broccoli or cauliflower, which add a lovely texture and boost the nutritional content. Remember to pre-cook any harder vegetables slightly before adding them to the filling to ensure they are tender in the finished pie.
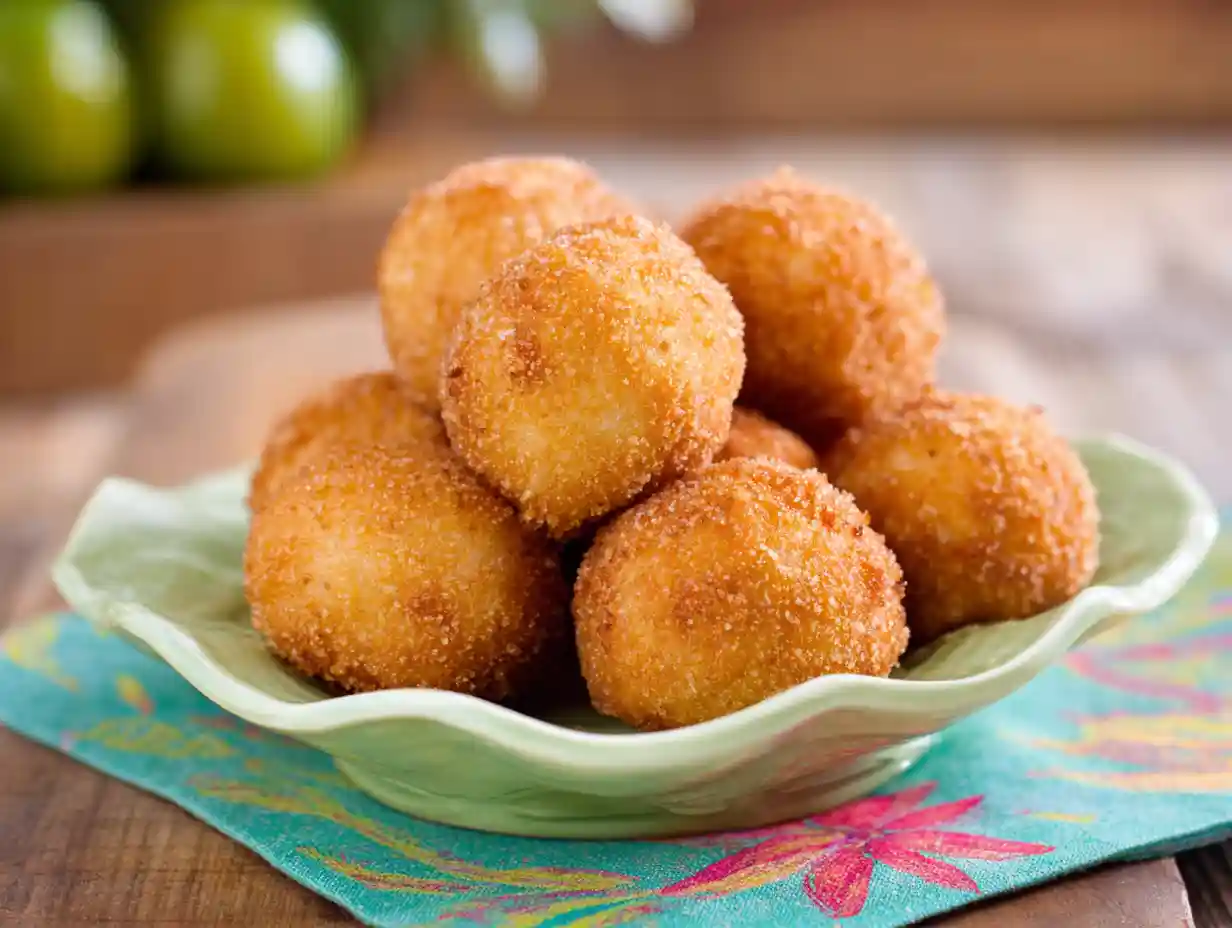
For those monitoring their fat intake, it’s worth noting that a typical serving contains a significant amount of fat. If you are searching for a great appetizer to serve before this dish, check out this Incredible Mini Jalapeno Popper Egg Rolls Recipe.
Make-Ahead and Freezing Instructions for Buttery Chicken Pot Pie
This pot pie is fantastic for meal prepping! You can prepare it ahead of time, which makes weeknight dinners so much easier.
To Make Ahead (unbaked): Assemble the entire pie, including the top crust and egg wash, but do not bake. Cover it tightly with plastic wrap and refrigerate for up to 24 hours. When ready to bake, remove from the fridge and let it sit at room temperature for about 30 minutes while your oven preheats. You might need to add an extra 5-10 minutes to the baking time.
To Freeze (unbaked): Assemble the pie as directed, covering it tightly with a double layer of plastic wrap, then a layer of aluminum foil. Freeze for up to 3 months. When you’re ready to bake, thaw the pie in the refrigerator overnight. Remove the plastic wrap and foil, brush with a fresh egg wash, and bake as instructed, possibly adding a few extra minutes to the baking time.
To Freeze (baked): Let the baked pie cool completely. Wrap individual slices or the whole pie tightly in plastic wrap, then in aluminum foil, and freeze for up to 3 months. To reheat, thaw overnight in the refrigerator. Reheat in a 350°F (175°C) oven until warmed through, about 20-30 minutes for slices, or longer for a whole pie. Covering it loosely with foil can prevent the crust from browning too much.
To prevent freezer burn, ensure your pie is wrapped very tightly, minimizing any air exposure. I sometimes use freezer-safe bags or containers for extra protection if freezing individual portions.
Scaling the Recipe
I love how versatile this recipe is! You can easily adjust the quantities to fit your needs, whether you’re cooking for one or feeding a crowd.
Halving the Recipe: If you’re making a smaller pie, simply halve all the ingredient quantities. You’ll use only one pie crust (for a top crust) if you’re making a pot pie with a bottomless crust or a smaller, individual pot pie. If you want a top and bottom crust for a small pie, you’d halve the recipe for a single crust. The cooking time will likely decrease slightly; I would start checking for doneness around 25-30 minutes. Make sure your gravy is still thick to avoid a watery filling.
Doubling the Recipe: For a larger gathering or to have plenty of leftovers, you can double all the ingredients. You’ll need two 9-inch pie dishes. The cooking time should remain similar, but keep an eye on both pies to ensure even browning. If your oven is crowded, you might need to rotate the pies halfway through baking to ensure even cooking. Always use a large enough pot and skillet to accommodate the increased volume of ingredients.
Making a Healthier Buttery Chicken Pot Pie
While this pot pie is undeniably comforting, I understand wanting to lighten things up sometimes. Here are a few ways I’ve adjusted it to be a bit healthier without sacrificing too much flavor.
- Reduce Fat: Instead of half-and-half, I sometimes use milk (1% or 2%) mixed with a tablespoon of cornstarch for thickening, or even plain Greek yogurt for a creamy texture and a protein boost. You could also reduce the butter slightly, perhaps using 1/4 cup instead of 1/3 cup, and supplement with a touch of olive oil.
- Increase Vegetables: This is my favorite way to boost nutrition! Beyond the carrots, celery, and peas, I love adding spinach, kale (finely chopped), bell peppers, green beans, or even diced sweet potato. Just make sure to blanch or sauté harder vegetables before adding them to the filling.
- Leaner Protein: While chicken breast is already lean, you could also use ground turkey or even chickpeas (for a vegetarian option) to change the protein source.
What to Do with Leftover Filling or Crust
I hate food waste, so I always try to think of creative ways to use up any leftovers. This recipe offers some fun possibilities!
If you have extra filling, it’s absolutely delicious on its own! I love serving it over baked potatoes or a scoop of fluffy rice for a quick and satisfying meal. You could also spoon it into ramekins, top with mashed potatoes or a biscuit, and bake for individual “mini” pot pies.
Leftover pie crust scraps are a delightful treat. I often gather them, roll them out, cut them into shapes, brush with melted butter, sprinkle with cinnamon sugar, and bake until golden brown. They make fantastic little “pie cookies” that are perfect with a cup of tea. Another idea is to cut them into strips, twist them, sprinkle with Parmesan cheese and herbs, and bake for savory breadsticks.
Troubleshooting Common Buttery Chicken Pot Pie Problems
Even experienced cooks encounter a snag now and then. Here are solutions to some common pot pie dilemmas I’ve faced myself:
- Soggy Bottom Crust: This is probably the most common complaint! To prevent it, I often “blind bake” my bottom crust for 10-15 minutes before adding the filling. Another trick I use is to place the pie dish on a preheated baking sheet when it goes into the oven. The direct heat helps crisp up the bottom.
- Runny Filling: If your filling seems too thin after simmering, don’t worry. I’ll make a quick cornstarch slurry (1 tablespoon cornstarch mixed with 1 tablespoon cold water) and whisk it into the simmering filling. Let it cook for another minute or two, and it should thicken right up.
- Burnt Crust: The edges of the crust often brown faster than the center. I always keep a roll of aluminum foil handy! After about 20 minutes of baking, when the edges start to look golden, I carefully tent the edges with foil or use a reusable pie crust shield. This protects them while the rest of the pie continues to bake.
Buttery Chicken Pot Pie Variations
The beauty of a classic like chicken pot pie is how easily you can adapt it to your preferences. I love playing with different flavors!
- Cheese: For an extra layer of richness, I sometimes stir in 1/2 cup of shredded cheddar, Gruyère, or even a sharp white cheddar into the hot filling just before pouring it into the crust. It melts beautifully and adds a fantastic tang.
- Spices: Beyond thyme, I enjoy experimenting with other warm spices. A pinch of nutmeg can add a subtle, sophisticated depth, while a dash of smoked paprika will impart a lovely smoky aroma and a hint of warmth. Curry powder could also be a surprisingly delicious addition for a different twist!
- Protein: While chicken is traditional, you can easily substitute it. For a vegetarian option, I love using chickpeas or cannellini beans instead of chicken. You could also use diced turkey, especially around Thanksgiving, or even leftover roasted beef for a hearty beef pot pie.
Serving Suggestions for Buttery Chicken Pot Pie
This Buttery Chicken Pot Pie is a meal in itself, but I always enjoy pairing it with a simple side to balance the richness and complete the meal.
A crisp green salad with a bright lemon vinaigrette is my go-to. The acidity and freshness of the salad cut through the richness of the pot pie beautifully, offering a lovely contrast in texture and flavor. I also enjoy a simple side of steamed green beans or asparagus, seasoned lightly with salt and pepper, which adds a fresh, vibrant element without overpowering the main dish.
Sometimes, especially when I’m feeling extra cozy, a side of warm, crusty bread is perfect for soaking up any extra gravy. For a healthier option, consider this recipe for a heart-healthy chicken pot pie.
FAQs about Buttery Chicken Pot Pie
I get a lot of questions about pot pie, and I’m always happy to share what I’ve learned!
What is the sauce made of in Buttery Chicken Pot Pie?
My pot pie sauce is a creamy, savory gravy made from unsalted butter, chopped yellow onion, minced garlic, all-purpose flour, salt, black pepper, dried thyme leaves, chicken broth/stock, and half-and-half. It’s cooked until wonderfully thick and rich.
What’s the Difference Between a Chicken Pie and a Chicken Pot Pie?
Traditionally, a “chicken pie” might refer to any pie with a chicken filling, often covered with a single crust or just a pastry top. A “chicken pot pie,” on the other hand, almost always implies a double crust; a bottom and a top crust encasing a hearty, gravy-based filling. My recipe falls squarely into the “pot pie” category with its lovely double crust.
Can I make this ahead?
Absolutely! You can assemble the entire pie (without baking) and refrigerate it for up to 24 hours. I even provide instructions for freezing it unbaked or baked, so it’s perfect for meal prep.
What to serve with chicken pot pie?
I love serving it with a crisp green salad tossed in a lemon vinaigrette to cut through the richness. Steamed green beans or asparagus also make a wonderful, simple side.
Conclusion
I hope you’re as excited as I am to bring this Buttery Chicken Pot Pie to your kitchen! It’s more than just a recipe; it’s a dish that embodies comfort, warmth, and the joy of a homemade meal. The flaky, golden crust combined with the rich, savory, and incredibly buttery filling makes every bite an absolute delight. I truly believe this recipe will become a beloved staple in your home, creating those precious, comforting moments around your table that I cherish so much.
I can’t wait to hear how it turns out for you! Leave a comment below to share your results, ask questions, or suggest your own variations! I can’t wait to see your Buttery Chicken Pot Pie creations!
Follow us on Pinterest for more delicious comfort food favorites!
The Ultimate Buttery Chicken Pot Pie Recipe
Ingredients
Equipment
Method
- Prepare either pie crust recipe through step 5, including chilling for at least 2 hours. I usually make the crust the night before to save time on the day I’m making the pie. The pie crust recipe makes 2 crusts, and you’ll be using both crusts for this recipe.
- In a large pot, combine chicken, carrots, and celery. Add enough water to cover the chicken and vegetables, then place over medium-high heat. Bring it to a boil, then allow it to boil for 10 minutes. Remove from heat, drain well, and set aside.
- In a large skillet over medium heat, combine the butter, onions, and garlic. Stirring occasionally, cook until the onions are translucent and the butter is lightly browning, about 5-7 minutes. Whisk in the flour, salt, black pepper, thyme, chicken broth, and half-and-half. Continue to cook and whisk until no flour lumps remain, then simmer over medium-low heat until thick. I simmer mine for 10 minutes. You really want it to be a very thick gravy; simmer longer if necessary, as a thin gravy will result in a watery pie. Taste and add more seasonings if you prefer; sometimes I add a little extra thyme for more herbaceous flavor. Remove from heat and set aside.
- Preheat your oven to 425°F (218°C).
- On a lightly floured work surface, roll out one of the discs of chilled dough (keep the other one in the refrigerator until you need it). Turn the dough about a quarter turn after every few rolls until you have a circle about 12 inches in diameter. Carefully place the dough into a 9-inch pie dish that’s 1.5–2 inches deep. Tuck the dough in with your fingers, making sure it is smooth and fits snugly into the dish. With a small sharp knife or kitchen shears, trim the extra overhang of dough and discard it.
- Spoon the cooked chicken and vegetable mixture evenly into the bottom pie crust. Scatter the frozen peas on top of the chicken and vegetables. Pour and spread the thick gravy evenly over the peas.
- Roll out the second half of the pie crust dough just as you did the first. Carefully cover the pie with the second crust and trim the extra overhang off the sides. Crimp the pie crust with a fork to seal the edges all the way around. With a small sharp knife, slice a few small slits in the top crust to allow steam to escape during baking. Using a pastry brush, brush the entire top crust and edges with the egg wash.
- Bake for 32–38 minutes or until the top of the crust is beautifully golden brown. After about 20 minutes of baking, be sure to cover the edges of the crust with aluminum foil or use a pie crust shield to prevent the edges from getting too brown. I find this step crucial for an evenly baked crust. (If you need instructions on how to make a pie crust shield out of foil, I have a post on my favorite pie baking tools that can help!)
- Remove the pie from the oven and cool for at least 10 minutes before slicing and serving. This resting time allows the filling to set up perfectly. This recipe makes amazing leftovers; the filling is even thicker and more flavorful on the next day! Reheat as desired. Leftovers keep well in the refrigerator in an airtight container for up to 5 days.
Notes
Tried this recipe?
Let us know how it was!Printable Recipe Card
Want just the essential recipe details without scrolling through the article? Get our printable recipe card with just the ingredients and instructions.