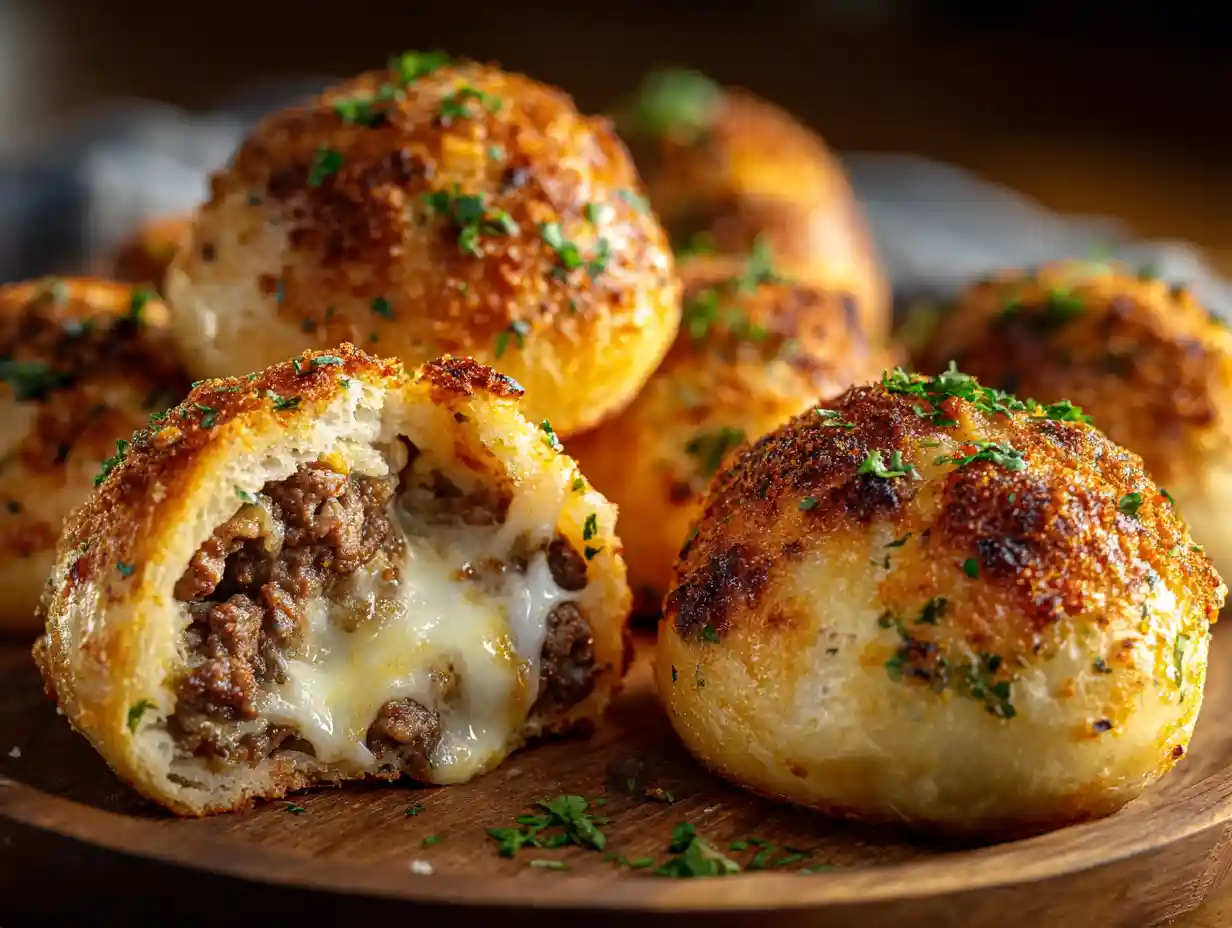
Oh, my goodness, I am so excited to share this recipe with you today! I’ve been perfecting these Garlic Parmesan Cheeseburger Bombs, and let me tell you, they are an absolute game-changer. Imagine all the delicious flavors of your favorite cheeseburger, tucked neatly inside a golden, buttery biscuit, with an extra punch of garlic and Parmesan. It’s pure comfort food magic!
I find myself making these whenever I need a quick, satisfying meal or a show-stopping appetizer for friends and family. They’re incredibly easy to put together, surprisingly versatile, and guaranteed to become a go-to favorite in your kitchen. Trust me, these Garlic Parmesan Cheeseburger Bombs are going to disappear fast!
Jump To
Why You’ll Love These Garlic Parmesan Cheeseburger Bombs

I truly believe these cheeseburger bombs are a special kind of recipe, and I know you’re going to fall in love with them just like I have. Here’s why they’re simply irresistible:
- Unbeatable Flavor in Every Bite: I adore how the savory ground beef and two cheeses blend perfectly with the subtle garlic and rich Parmesan. Wrapped in a flaky biscuit, it’s a flavor explosion that truly captures the essence of a comforting cheeseburger.
- Effortless to Make: As a busy home cook, I appreciate recipes that don’t demand hours in the kitchen. These bombs use simple ingredients and come together quickly, making them perfect for those busy weeknights or impromptu gatherings.
- Incredibly Versatile for Any Occasion: Whether I’m serving them as a fun appetizer for a party, packing them for lunch, or making them the star of a casual dinner, these garlic Parmesan cheeseburger bombs fit every scenario. They are always a crowd-pleaser!
- A Family Favorite, Guaranteed: I’ve seen firsthand how much everyone, from little ones to adults, adores these. They’re hearty, handheld, and just plain fun to eat, making mealtime a joy for the whole family.
Choosing Your Ingredients for the Best Garlic Parmesan Cheeseburger Bombs
I always say that good ingredients make for good food, and these cheeseburger bombs are no exception. Thoughtful choices here can really elevate your final dish!
For the ground beef, I typically reach for an 80/20 lean-to-fat ratio. I find it provides the best balance of flavor and juiciness without being overly greasy. If I’m looking for a slightly lighter option, I’ll sometimes use a 90/10 ground beef, or even ground turkey or chicken; just be sure to add a little extra seasoning to make up for the leaner meat. According to Texas A&M University’s Meat Science Section, the maximum fat content in ground beef is 30% (70% lean) by law. No water, phosphates, binders, or other meat sources may be added and still be labeled as ground beef.
When it comes to cheese, the blend of Parmesan and cheddar is what makes this recipe sing, offering both sharp, nutty notes and creamy, melty goodness. If I’m feeling adventurous, I might swap the cheddar for sharp Monterey Jack for a milder flavor, or even a smoked gouda for an extra layer of richness. These flavor combinations would be great in a Crockpot Hamburger Potato Casserole as well!
For the biscuit dough, the convenience of refrigerated dough is unmatched, and I usually go for a classic buttermilk biscuit variety for its tender, slightly tangy flavor. While a flaky biscuit dough works, I prefer the more consistent texture of a buttermilk biscuit for holding the filling. If I don’t have biscuits, crescent roll dough or even puff pastry can make fantastic alternatives, though they’ll give a slightly different texture to the finished bomb.
What You’ll Need: Ingredients
I like to have all my ingredients ready to go before I start cooking; it makes the process so much smoother! Here’s what you’ll need for these delicious bombs:
- 1 pound ground beef
- 2 cloves garlic, minced
- ½ cup Parmesan cheese, diced or shredded
- 1 cup cheddar cheese, cubed
- 1 can (16.3 oz) refrigerated biscuit dough (8-count)
- 2 tablespoons butter, melted
- 1 tablespoon fresh parsley, chopped (optional for garnish)
Essential Equipment
You don’t need a lot of fancy tools for this recipe, which I love! Here’s what I typically use:
- Large skillet
- Baking sheet
- Parchment paper (or non-stick spray)
- Rolling pin (optional, your hands work just fine!)
How to Make Garlic Parmesan Cheeseburger Bombs (Step-by-Step)
Making these bombs is genuinely so much fun, and I promise, each step is straightforward. Just follow along with me!
- Preheat the oven to 375°F. This ensures your oven is perfectly hot and ready to go for even baking.
- Line a baking sheet with parchment paper or lightly grease it. I always line my baking sheet; it makes for super easy cleanup and prevents any sticking!
- In a skillet over medium heat, cook the ground beef with the minced garlic until browned. Drain any excess fat. This is where all the wonderful savory flavor starts! Make sure to break up the beef as it cooks. Once it’s nicely browned, draining the fat is key for a less greasy bomb.
- Remove the skillet from heat and stir in the Parmesan and cheddar cheese until evenly combined. The residual heat from the beef will start to melt the cheese just enough to create a wonderfully cohesive filling. I love how gooey it gets!
- Flatten each biscuit into a circle using your hands or a rolling pin. Spoon a generous tablespoon of the beef mixture into the center of each biscuit. Fold the edges over the filling and pinch tightly to seal. This step is like wrapping a little present! I aim for about a 3-4 inch circle for each biscuit. Be sure to pinch those edges really well to keep all that delicious filling inside.
- Place the sealed biscuits seam-side down on the prepared baking sheet. Brush the tops with melted butter. Placing them seam-side down helps keep them from opening up. And oh, that melted butter on top? It’s what gives them that beautiful golden crust and extra flavor!
- Bake for 12–15 minutes, or until the tops are golden brown and the biscuits are cooked through. Keep an eye on them; ovens can vary. I look for that perfect golden hue.
- Let them rest for a few minutes. Garnish with chopped parsley if desired, and serve warm. Allowing them to rest helps the filling settle and makes them easier to handle. The parsley adds a fresh pop of color, which I always appreciate!
Air Fryer Instructions: A Quick Alternative
I love my air fryer for its speed and convenience, and it works beautifully for these Garlic Parmesan Cheeseburger Bombs!
- Prepare the bombs following steps 1-5 of the oven instructions, ensuring they are tightly sealed.
- Preheat your air fryer to 350°F (175°C). While it heats, I often spray the air fryer basket with a little non-stick spray.
- Brush the tops of the sealed bombs with melted butter. Just like with oven baking, this helps with browning and flavor.
- Place the bombs in a single layer in the air fryer basket, leaving space between them. I usually cook them in batches to ensure even cooking and browning.
- Air fry for 8-10 minutes, flipping halfway through. I check for a golden-brown exterior and make sure they feel cooked through.
- Let them rest for a few minutes before serving warm.
Expert Tips for Perfect Garlic Parmesan Cheeseburger Bombs Every Time
I’ve made these bombs countless times, and I’ve picked up a few tricks along the way that I’d love to share with you for perfect results!
- Preventing Leaks is Key: The most important part of sealing the bombs is making sure there are no gaps. After folding the edges over the filling, I like to gently moisten my fingertips with a little water and firmly pinch the seams together. I also gently roll the bomb in my hands to ensure it’s a tight, smooth ball.
- Dough Handling with Care: When flattening the biscuit dough, I try to work quickly and gently to prevent it from sticking or tearing. If you don’t have a rolling pin, using the palm of your hand works beautifully; just aim for an even thickness all around, roughly 3-4 inches in diameter.
- Achieving a Golden Crust: That melted butter brush on top is essential for a beautiful golden-brown exterior. I also make sure my oven rack is in the middle position for even heat distribution, which helps the tops get perfectly golden without burning the bottoms.
- Flavor Boosters for the Filling: To really elevate the beef mixture, I sometimes add a dash of Worcestershire sauce while it’s cooking; it gives it a fantastic savory depth. A pinch of smoked paprika or my favorite burger seasoning blend can also take the flavor to the next level. These extra flavors can make it similar to The Ultimate Slow Cooker Cowboy Casserole Recipe.
- Preventing Soggy Bottoms: If I’m making these ahead or if I have leftovers, I always ensure they are fully cooled before storing them. Trapped steam can lead to soggy bottoms, so giving them space to breathe on a wire rack for a few minutes after baking is a good habit.
- Make-Ahead Success: The beef and cheese mixture can be cooked and prepared up to two days in advance. Just store it in an airtight container in the refrigerator, and then it’s ready to spoon into the biscuits when you are!
Delicious Variations & Substitutions
I love how customizable these Garlic Parmesan Cheeseburger Bombs are! Here are some ideas to inspire your creativity:
First, let’s talk about “Meatball-Style” Bombs. This is a distinct variation where I season the ground meat, form it into small meatballs, and then cook them (either by browning in a pan or baking). I then wrap these pre-cooked, seasoned meatballs in the biscuit dough with cheese, making a truly unique “bomb” experience, often served with marinara or a creamy sauce.
Here are some other fun burger theme ideas I’ve tried:
| Theme | Key Additions to Beef Mixture | Suggested Cheese |
|---|---|---|
| Bacon BBQ Bombs | Cooked, crumbled bacon bits, a spoonful of your favorite BBQ sauce | Sharp Cheddar, Monterey Jack |
| Mushroom Swiss Bombs | Sautéed finely diced mushrooms | Swiss cheese, Gruyere |
| Jalapeño Popper Bombs | Diced pickled jalapeños, a touch of softened cream cheese | Cream Cheese, Pepper Jack |
| Spicy Tex-Mex | Taco seasoning, a dash of hot sauce | Monterey Jack, Colby Jack |
As for Dough Alternatives, as I mentioned, puff pastry or crescent roll dough can be wonderful. Puff pastry will give you a very flaky, buttery crust, while crescent rolls are tender and slightly sweet.
For Dietary Adaptations, I’ve successfully used gluten-free biscuit dough, and they turned out great. For a lighter version, ground turkey or chicken work well; just be sure to season them generously! According to the University of Illinois Extension, ground beef has 2.4 grams more protein and has slightly less cholesterol and more iron and zinc than ground turkey.
Serving Suggestions: What to Pair with Your Bombs
I think these bombs are fantastic on their own, but pairing them with a few simple sides or a delicious dipping sauce really takes them to the next level. For another great appetizer, you should make these Delicious Cheesy Mashed Potato Puff Bites Recipe!
Best Dipping Sauces:
- Classic Ketchup and Mustard: You can’t go wrong with these burger staples.
- Ranch Dressing: A cool, creamy ranch is always a hit, especially with kids!
- My Quick Homemade “Secret Sauce”: I like to mix ½ cup mayonnaise, 2 tablespoons ketchup, 1 tablespoon sweet pickle relish, 1 teaspoon apple cider vinegar, and a pinch of garlic powder and onion powder. It’s absolutely divine!
Perfect Side Dishes:
- Fresh Green Salad: A simple, crisp green salad with a light vinaigrette is a perfect fresh counterpoint to the richness of the bombs.
- Crispy Potato Wedges: I love making these in the air fryer for an extra easy, satisfying side.
- Sweet Corn on the Cob: Especially in the summer, a perfectly cooked ear of corn is a fantastic pairing.
Make-Ahead, Storage, and Reheating Tips
I’m all about convenience in the kitchen, so I’ve figured out the best ways to prepare these Garlic Parmesan Cheeseburger Bombs for maximum ease!
Meal Prep Strategy: The cooked ground beef and cheese mixture is a fantastic component to prepare ahead of time. I cook the beef and garlic, drain the fat, stir in the cheeses, and then let it cool completely. I then store it in an airtight container in the refrigerator for up to 2-3 days. This makes assembly super quick on a busy weeknight!
Freezing Unbaked Bombs: This is a lifesaver for future meals! After assembling and sealing the bombs, I arrange them in a single layer on a parchment-lined baking sheet and freeze them until solid (about 1-2 hours). Once frozen, I transfer them to a freezer-safe bag or container. They can be frozen for up to 1 month. When I’m ready to bake, I just place them on a baking sheet (no need to thaw) and bake them at the same temperature, adding an extra 5-10 minutes to the cooking time until golden brown and cooked through.
Freezing Baked Bombs: If I have leftovers, I allow the baked bombs to cool completely. Then I place them in a single layer on a baking sheet and freeze until solid, before transferring them to a freezer-safe bag or container. They will keep well for up to 1 month. To reheat, I either pop them in a preheated oven at 350°F (175°C) for 10-15 minutes, or use my air fryer at 325°F (160°C) for 5-7 minutes, until warmed through.
Storage: Cooked Garlic Parmesan Cheeseburger Bombs can be stored in an airtight container in the refrigerator for up to 3-4 days. To reheat, I usually use the microwave for a minute or so, or a toaster oven for a crispier result.
FAQs About Garlic Parmesan Cheeseburger Bombs
I get a lot of questions about these delightful bombs, so I wanted to share some of the most common ones with you!
Can I prepare the beef mixture ahead of time?
Absolutely! I often cook the beef and garlic, stir in the cheeses, and then let it cool completely. Store it in an airtight container in the refrigerator for up to 2-3 days, and it will be ready to go when you are.
How do I prevent the cheese from leaking out?
The key is to make sure your biscuit dough is sealed very tightly around the filling. I pinch the edges together firmly, and sometimes I even moisten my fingertips with a little water to help create a strong seal.
Can I use homemade biscuit dough?
Yes, you certainly can! If you have a favorite homemade biscuit recipe, it will work wonderfully here. Just make sure to roll it out to a thickness similar to canned biscuits, about ¼-inch thick, before cutting circles.
What kind of biscuits work best for cheeseburger bombs?
I usually use a regular refrigerated buttermilk biscuit dough (8-count, 16.3 oz). I find they offer a good balance of flavor and structure. Flaky layers can sometimes make sealing a bit trickier, but they still work.
Can I bake these from frozen?
Yes, you can! Just place the frozen, unbaked bombs on a baking sheet and bake at the same temperature, adding an extra 5-10 minutes to the cooking time, or until they are golden brown and cooked through.
How do I know if the beef is cooked through?
When cooking the ground beef mixture, you’ll know it’s cooked through when it’s entirely browned and no longer pink. You can always check the internal temperature of the beef mixture with a meat thermometer; it should reach 160°F (71°C).
Can I add other ingredients to the filling?
Absolutely! That’s one of my favorite parts about this recipe. I often add finely diced onions, a touch of Worcestershire sauce, or even a tiny bit of pickle relish to the beef mixture for extra flavor. Just make sure not to overfill the biscuits.
Conclusion: Get Ready to Bombard Your Taste Buds!
I genuinely hope you’re as excited about these Garlic Parmesan Cheeseburger Bombs as I am! They’re truly a perfect example of how simple ingredients can come together to create something incredibly delicious and satisfying. Whether you’re whipping them up for a party, a fun weeknight dinner, or just a delightful snack, I know they’re going to be a hit.
The ease of preparation, combined with that irresistible savory, cheesy filling tucked into a buttery biscuit, makes them a recipe I return to again and again. I can’t wait for you to try them! Please, if you make these amazing bombs, come back and tell me all about it in the comments below. I’d love to hear how they turned out, if you tried any fun variations, or if you have any questions for me. Happy cooking, my friends!
Love fun, flavor-packed comfort food like this? Follow us on Pinterest for easy recipes that are perfect for parties, busy nights, or anytime you crave something cheesy and satisfying!
Garlic Parmesan Cheeseburger Bombs Recipe
Ingredients
Equipment
Method
- Preheat the oven to 375°F. This ensures your oven is perfectly hot and ready to go for even baking.
- Line a baking sheet with parchment paper or lightly grease it. I always line my baking sheet; it makes for super easy cleanup and prevents any sticking!
- In a skillet over medium heat, cook the ground beef with the minced garlic until browned. Drain any excess fat. This is where all the wonderful savory flavor starts! Make sure to break up the beef as it cooks. Once it’s nicely browned, draining the fat is key for a less greasy bomb.
- Remove the skillet from heat and stir in the Parmesan and cheddar cheese until evenly combined. The residual heat from the beef will start to melt the cheese just enough to create a wonderfully cohesive filling. I love how gooey it gets!
- Flatten each biscuit into a circle using your hands or a rolling pin. Spoon a generous tablespoon of the beef mixture into the center of each biscuit. Fold the edges over the filling and pinch tightly to seal. This step is like wrapping a little present! I aim for about a 3-4 inch circle for each biscuit. Be sure to pinch those edges really well to keep all that delicious filling inside.
- Place the sealed biscuits seam-side down on the prepared baking sheet. Brush the tops with melted butter. Placing them seam-side down helps keep them from opening up. And oh, that melted butter on top? It’s what gives them that beautiful golden crust and extra flavor!
- Bake for 12–15 minutes, or until the tops are golden brown and the biscuits are cooked through. Keep an eye on them; ovens can vary. I look for that perfect golden hue.
- Let them rest for a few minutes. Garnish with chopped parsley if desired, and serve warm. Allowing them to rest helps the filling settle and makes them easier to handle. The parsley adds a fresh pop of color, which I always appreciate!
Nutrition
Notes
Tried this recipe?
Let us know how it was!Printable Recipe Card
Want just the essential recipe details without scrolling through the article? Get our printable recipe card with just the ingredients and instructions.