Autumn has always been my favorite time of year, a season filled with vibrant colors, cozy sweaters, and the wonderful aroma of pumpkin spice wafting through the air. For me, nothing brings back childhood memories quite like carving pumpkins with my family. While the jack-o’-lanterns were always the main event, the real treat was always transforming those “scraps” into something truly delicious.
That’s why I’m so excited to share my super easy and utterly delightful homemade pumpkin seeds recipe with you today. It’s an effortless way to take a seasonal byproduct and turn it into a perfectly crunchy, seasoned snack in just about 20 minutes from start to finish. I promise, once you try these, you’ll never throw those precious seeds away again! For other equally delightful fall treats, consider trying a sweet, seasonal cookie recipe.
Table of Contents
Why You’ll Love This Homemade Pumpkin Seeds Recipe

I truly believe this recipe will become a go-to for you every fall, and here is why I think you’ll adore it: If you’re looking for more ways to celebrate the flavors of autumn, our spectacular cranberry salsa is another seasonal delight.
- Perfectly Crispy Every Time: I’ve honed this recipe to ensure your pumpkin seeds come out golden brown and irresistibly crunchy, never chewy.
- Zero Waste Delight: It’s such a satisfying feeling to utilize every part of your pumpkin, transforming something that might be discarded into a healthy, delicious snack.
- Flavor Versatility: While my basic recipe is fantastic, I also show you how easy it is to customize with various seasonings to suit any craving.
- Nutritional Boost: You’re not just making a tasty snack; you’re also creating a powerhouse of nutrients for your body.
Gather Your Tools: Essential Kitchen Equipment
You don’t need a lot of fancy equipment to make these amazing roasted pumpkin seeds. Here are the essentials I always keep handy:
- Colander
- Large mixing bowl
- Sheet pan
- Kitchen towels
- Spatula or spoon for stirring
Selecting the Best Pumpkin for Roasting
When it comes to roasting seeds, not all pumpkins are created equal. I’ve learned that the type of pumpkin you choose can really impact your final product. Large carving pumpkins, while perfect for decoration, tend to have bigger, tougher seeds. I find that smaller “pie pumpkins” or “sugar pumpkins” often yield more tender, flavorful seeds with a better texture for roasting.
However, don’t feel limited to just pumpkins! You can absolutely roast seeds from other winter squashes too. Butternut squash, acorn squash, and even spaghetti squash all offer delicious seeds that are wonderful once roasted.
The Art of Cleaning and Drying Your Pumpkin Seeds for Optimal Crispness
This is where the magic truly happens for achieving that coveted crunch! I can’t stress enough how important proper cleaning and drying are.
Rinsing Method
My go-to method is a simple rinse. I place the raw seeds in a colander under cold running water. I use my fingers to gently but firmly rub off all the orange pulp and stringy fibers. It’s important to be thorough; any remaining pulp can lead to a chewy or soggy seed.
Soaking Method
For stubborn bits of pulp, a quick soak can be a lifesaver. After the initial rinse, I sometimes place the seeds in a bowl of cold water for 5-10 minutes. The water helps to further loosen any clingy fibers, making them easier to rub off. I then rinse them again in the colander.
Boiling Method
Some people, myself included on occasion, like to boil their pumpkin seeds briefly before roasting. I find this method can lead to an even saltier, crispier interior. To do this, I boil the cleaned seeds in salted water for about 5-10 minutes. The pros are enhanced flavor and sometimes a crispier texture; the con is an extra step and making sure they are thoroughly dried afterwards.
Thorough Drying Methods
Once cleaned, drying is absolutely crucial. I usually spread the seeds in a single layer on a clean kitchen towel. I then pat them aggressively with another towel until they feel completely dry to the touch. This typically takes about 15-20 minutes.
If I have more time, I might air dry them on a sheet pan for an hour or two, or even overnight. You can also use a very low oven (around 150°F / 65°C) for about 15-20 minutes to aid drying, but I watch them carefully to ensure they don’t start cooking.
The Science Behind the Crunch
I always explain why this meticulous drying process is so important. Moisture is the enemy of crispness! Any water left on or in the seeds will steam rather than toast in the oven, leading to a chewy or soft texture instead of a satisfying crunch. Removing all the pulp also ensures even roasting and prevents any bitter, burnt bits from sticking to your delicious seeds.
Ingredients for Your Perfect Roasted Pumpkin Seeds
This is my basic, incredibly flavorful combination. I always keep these on hand for my go-to snack:
- ¾ cup raw pumpkin seeds
- 1 tablespoon olive oil
- ½ teaspoon kosher salt
- ¼ teaspoon garlic powder
- ¼ teaspoon paprika (optional)
- ⅛ teaspoon black pepper
Step-by-Step: How to Make This Delicious Pumpkin Seeds Recipe
Making these crispy, seasoned pumpkin seeds is incredibly simple. Just follow these steps:
- Preheat oven to 350°F (177ºC).
- Wash pumpkin seeds in a colander to remove the pulp and fibers. Thoroughly dry with a towel.
- In a small bowl combine pumpkin seeds, olive oil, salt, garlic powder, paprika (if using), and black pepper.
- Lightly grease a sheet pan with olive oil. Evenly spread the seasoned pumpkin seeds on the sheet pan.
- Bake until the seeds are toasted and crunchy, about 12 to 15 minutes. Stir every 5 minutes for even toasting, and check for doneness with each stir by tasting a seed for crunchiness.
- Transfer the roasted pumpkin seeds to a bowl to cool down.
Unlocking the Perfect Crunch: Optimal Roasting Temperature & Time
Achieving that perfect crunch isn’t just about cleaning and drying; it’s also about hitting the sweet spot with your oven temperature and roasting time. I find that a moderate temperature like 350°F (177ºC) is ideal. It’s hot enough to toast the seeds and evaporate any residual moisture quickly, but not so hot that they burn before they crisp up.
If you roast at a lower temperature, say 300°F, your seeds will take longer to crisp, and you run a higher risk of them being chewy. On the other hand, a higher temperature, like 375°F or 400°F, can cause them to burn on the outside before the inside is fully toasted. I always recommend keeping a close eye on your seeds, especially during the last few minutes. Seed size matters too; smaller seeds might cook faster, larger ones a bit slower. I always taste a seed after about 10 minutes to gauge its readiness.
Get Creative! Delicious Flavor Variations for Your Pumpkin Seeds Recipe
While my basic recipe is a winner, I love experimenting with different flavors! Here are some of my favorite ways to switch things up:
| Flavor Profile | Additional Ingredients (per ¾ cup seeds) | Instructions for Application |
|---|---|---|
| Sweet Cinnamon Sugar | 1 tbsp sugar, ½ tsp cinnamon | Toss with olive oil, then add sugar and cinnamon. Roast as directed. |
| Smoky Chipotle | ½ tsp chipotle powder, ¼ tsp cumin | Add chipotle powder and cumin to the olive oil and salt mixture. Roast as directed. |
| Garlic Herb Parmesan | 1 tbsp grated Parmesan, ½ tsp dried herbs | Toss with olive oil and original seasonings, then add Parmesan and herbs before roasting. |
| Spicy Chili Lime | ½ tsp chili powder, ¼ tsp lime zest | Add chili powder and lime zest to the olive oil and salt mixture. Roast as directed. |
Troubleshooting Your Roasted Pumpkin Seeds
Even experienced home cooks like me run into issues sometimes. Here are some common problems and my tried-and-true solutions:
- Not Crispy Enough: This is almost always due to residual moisture or too low of a temperature/short cooking time. I recommend ensuring your seeds are bone dry before seasoning. If they come out chewy, you can put them back in the oven at 300°F for another 5-10 minutes, stirring frequently, until they crisp up.
- Seeds are Burning: This often happens if the oven is too hot, they’re left in too long, or they’re unevenly spread. I make sure my oven temperature is accurate and that the seeds are in a single layer on the sheet pan. Stirring every 5 minutes is also key to even toasting.
- Seeds are Chewy/Soft: As I’ve mentioned, thorough drying is the most crucial step here. Any pulp or water left on the seeds will prevent them from getting crispy. Make sure to clean and dry them meticulously, and don’t overcrowd the pan.
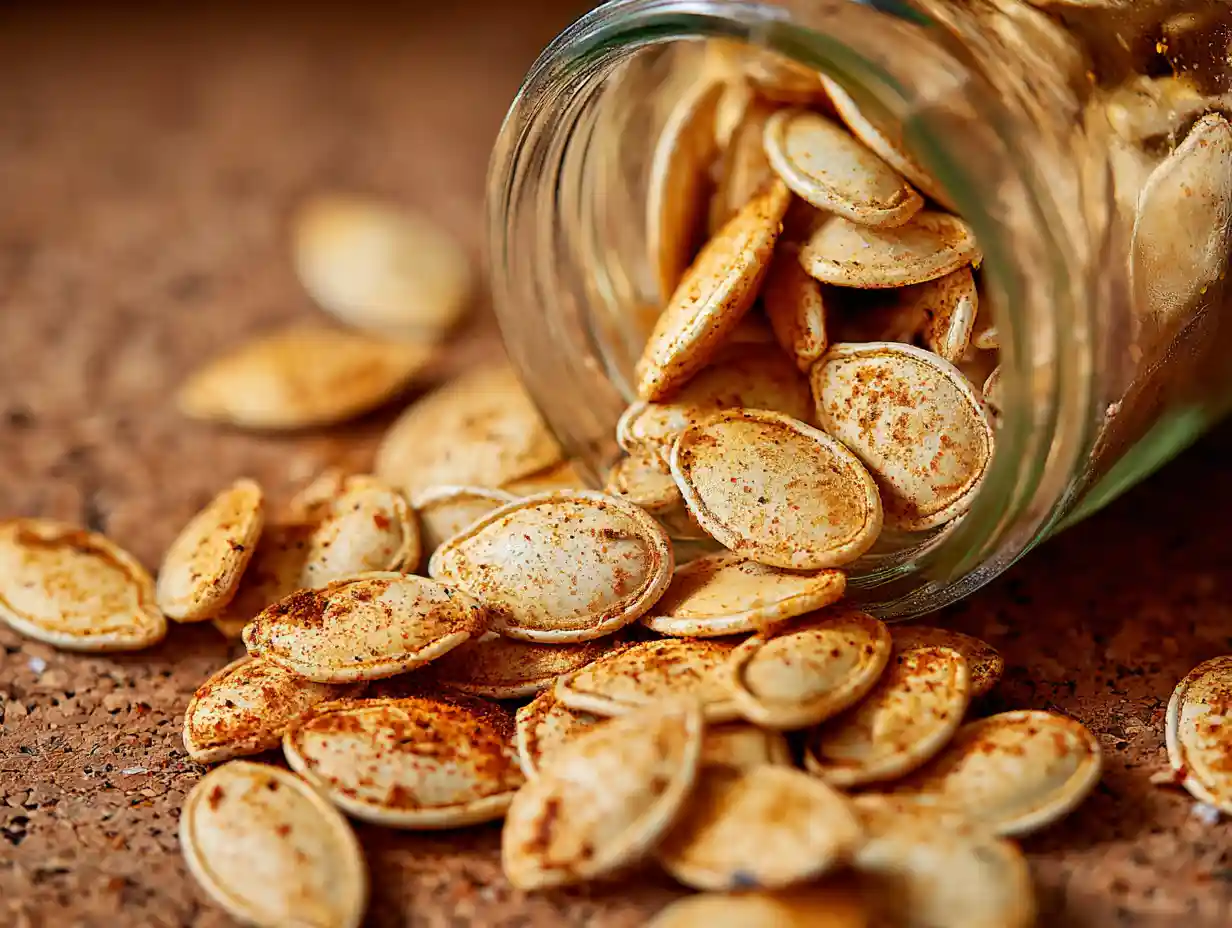
Storing Your Roasted Pumpkin Seeds
Once your delicious roasted pumpkin seeds have cooled completely, proper storage is essential to keep them crisp. I always store mine in an airtight container at room temperature. A glass jar or a sealed plastic container works perfectly. They usually stay fresh and crunchy for up to a week. If I want them to last longer, I sometimes pop them in the refrigerator, where they’ll keep for a couple of weeks. Just make sure they are completely cool before storing to prevent condensation, which can make them soggy.
Beyond Snacking: Creative Ways to Use Your Roasted Seeds
While I absolutely love munching on these straight from the bowl, roasted pumpkin seeds are incredibly versatile! Here are some of my favorite ways to incorporate them into meals:
- Salad Topping: They add a wonderful crunch and nutty flavor to any green salad.
- Soup Garnish: Sprinkle them over creamy soups like butternut squash soup or tomato soup for texture.
- Yogurt or Oatmeal Topper: A great way to add healthy fats and protein to your breakfast. For more morning meal inspiration, explore our breakfast and brunch recipes.
- Homemade Granola Bars: Incorporate them into your favorite granola bar recipe for extra nutrition and crunch.
- Pesto Booster: Blend them into your next batch of pesto for a unique twist.
- Bread & Muffins: Fold them into quick bread or muffin batter for added texture.
Roasting Seeds from Other Winter Squashes
I love that roasting seeds isn’t just for pumpkins! You can apply similar techniques to other winter squash seeds, though I’ve found a few minor differences:
- Butternut Squash Seeds: These are typically smaller and thinner than pumpkin seeds. I clean them similarly, but they often roast a bit faster, so I start checking for doneness around 10 minutes. Their flavor is often slightly sweeter.
- Acorn Squash Seeds: Similar in size to butternut, acorn squash seeds also roast quickly. I find they have a subtle, nutty taste that pairs well with savory seasonings.
- Spaghetti Squash Seeds: These are usually quite thin and can be a bit more delicate. I ensure they are extra dry and tend to roast them for a slightly shorter period to prevent burning.
The Nutritional Powerhouse: Health Benefits of Pumpkin Seeds
I’m always thrilled when a delicious snack also happens to be incredibly good for you! Roasted pumpkin seeds are truly a nutritional powerhouse. I consider them a fantastic source of plant-based protein, making them a great option for an energizing snack.
They are packed with important minerals like magnesium, which is crucial for nerve and muscle function, and zinc, vital for immune health. I also know they contain iron, which helps transport oxygen in my body, and healthy fats, including omega-3s, which are great for heart health. Beyond that, they’re rich in antioxidants, which help protect my cells from damage. It’s comforting to know I’m fueling my body with so much goodness with every crunchy bite!
FAQs About Pumpkin Seeds
I hear these questions a lot, and I’m happy to share my answers:
How do you get the slime off pumpkin seeds?
I find the easiest way is to rinse them thoroughly in a colander under cold running water, using my fingers to rub off any attached pulp and fibers. A quick soak in a bowl of cold water can also help loosen stubborn bits before rinsing.
Do you have to dry pumpkin seeds before roasting?
Yes, absolutely! This is the most critical step for achieving truly crispy seeds. Any moisture left on them will cause them to steam rather than roast, resulting in a chewy texture.
Can you eat pumpkin seed shells?
Yes, you can! The shells are edible and provide extra fiber. My recipe roasts them whole, shells and all.
What are the benefits of eating roasted pumpkin seeds?
They are packed with protein, healthy fats, fiber, and essential minerals like magnesium, zinc, and iron, along with antioxidants. They make for a very nutritious snack!
How long do roasted pumpkin seeds last?
When stored in an airtight container at room temperature, my roasted pumpkin seeds typically stay fresh and crispy for up to a week. They can last longer in the refrigerator.
I hope you feel inspired to turn those pumpkin carving leftovers into this amazing homemade pumpkin seeds recipe! It’s such a simple joy, and I promise the smell of them roasting will fill your kitchen with the most wonderful, autumn-y aroma. I can’t wait for you to try it.
Please, tell me, what are your favorite flavor combinations for roasted seeds? Do you have any tips or tricks that you’ve discovered? I would absolutely love to hear from you in the comments below! Share your creations with the Delish Map community; I’m always so excited to see what you’re cooking up.
Love cozy fall snacks like these? Follow us on Pinterest for more easy autumn recipes!
Amazing Pumpkin Seeds Recipe for Crispy Snacks
Ingredients
Equipment
Method
- Preheat oven to 350°F (177ºC).
- Wash pumpkin seeds in a colander to remove the pulp and fibers. Thoroughly dry with a towel.
- In a small bowl combine pumpkin seeds, olive oil, salt, garlic powder, paprika (if using), and black pepper.
- Lightly grease a sheet pan with olive oil. Evenly spread the seasoned pumpkin seeds on the sheet pan.
- Bake until the seeds are toasted and crunchy, about 12 to 15 minutes. Stir every 5 minutes for even toasting, and check for doneness with each stir by tasting a seed for crunchiness.
- Transfer the roasted pumpkin seeds to a bowl to cool down.
Nutrition
Notes
Sweet Cinnamon Sugar: Toss with 1 tbsp sugar and ½ tsp cinnamon before roasting.
Smoky Chipotle: Add ½ tsp chipotle powder and ¼ tsp cumin to the seasonings.
Garlic Herb Parmesan: Add 1 tbsp grated Parmesan and ½ tsp dried herbs before roasting.
Spicy Chili Lime: Add ½ tsp chili powder and ¼ tsp lime zest to the seasonings. Storage: Once completely cooled, store in an airtight container at room temperature for up to a week. They will last for a couple of weeks in the refrigerator.
Tried this recipe?
Let us know how it was!Printable Recipe Card
Want just the essential recipe details without scrolling through the article? Get our printable recipe card with just the ingredients and instructions.