I still remember the first time I watched Matilda and saw that unbelievably rich chocolate cake. It was pure, unadulterated chocolate fantasy! That scene sparked a lifelong quest to recreate that perfect Matilda cake at home.
After many trials (and many delicious errors), I’ve finally nailed a recipe that I’m so excited to share.

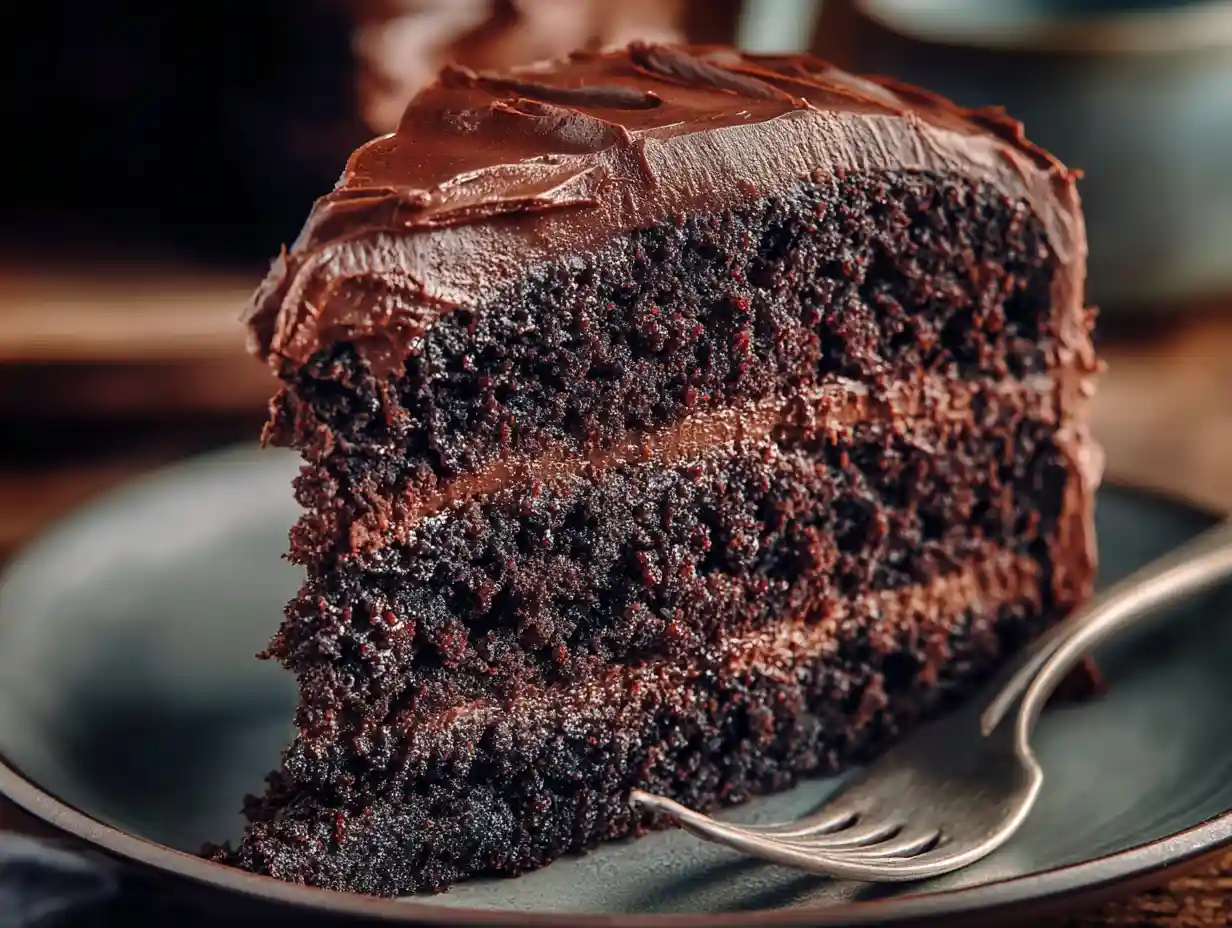
This Matilda cake is a classic: intensely chocolatey, perfectly moist, and topped with a fudgy frosting that will transport you right into the movie. It takes about 3 hours from start to finish (prep, bake, cool, and frosting), but trust me, every minute is worth it!
Jump To
What Makes This the BEST Matilda Cake?
This isn’t just another chocolate cake recipe. I’ve poured my heart (and a lot of chocolate!) into perfecting this Matilda cake. Here’s why I think you’ll love it:
- I use high-quality dark chocolate, which gives the cake an incredibly intense and complex flavor that you just can’t get with regular chocolate.
- My instructions are super detailed, with photos to guide you every step of the way, so you can be confident your cake will turn out perfectly.
- I’ve included tips for adapting the recipe if you have dietary restrictions, because everyone deserves a slice of Matilda cake!
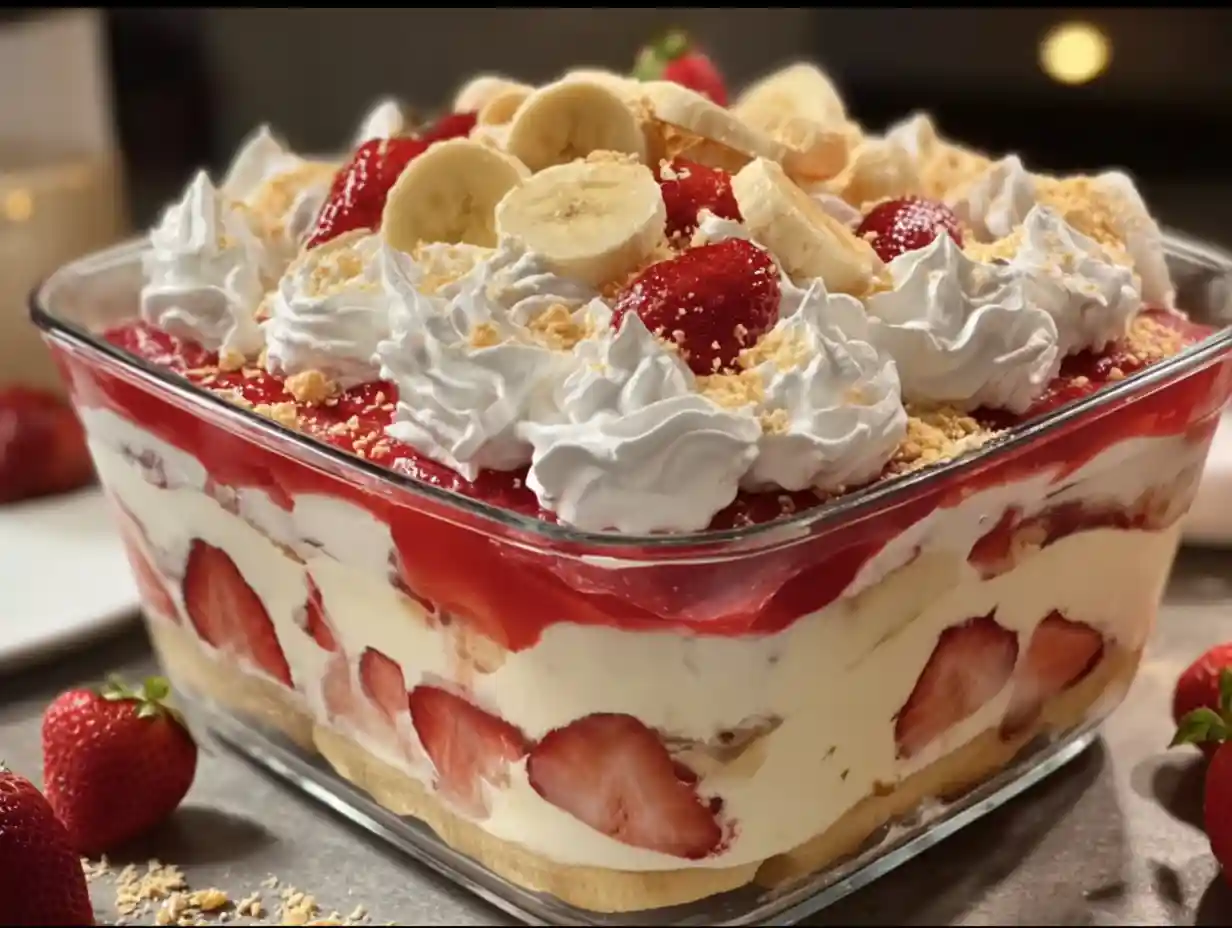
- I also provide troubleshooting advice to help you avoid common baking mistakes, so even if you’re a beginner, you can bake this cake like a pro. If you’re looking for another exciting treat, check out this easy small bento cake recipe!
The Matilda Cake Story: A Pop Culture Phenomenon
The Matilda cake isn’t just a dessert; it’s a cultural icon. Who can forget that legendary scene where Bruce Bogtrotter is forced to eat the entire cake as punishment?
The scene is both horrifying and mesmerizing, forever cementing the cake’s place in our memories. Its over-the-top chocolateyness has inspired countless fan recreations, parodies, and homages.
The Matilda cake represents indulgence, rebellion, and a little bit of childhood magic. It is such a great cake and the scene makes it so iconic!
Ingredients for the Perfect Matilda Cake
Here’s what you’ll need to create your own slice of movie magic. I’ve included notes on why each ingredient is important and some possible substitutions. When thinking about alternative flavor pairings, I also enjoy apple cheesecake buns with crumble topping.
- 2 cups all purpose flour (260g), sifted: Sifting ensures a light and airy cake. If you don’t have a sifter, whisking the flour well will also work.
- 1.5 tsp baking powder: This helps the cake rise, giving it a light and fluffy texture.
- 1.5 tsp baking soda: Baking soda reacts with the acidity of the buttermilk and cocoa powder to create a tender crumb.
- 1 cup granulated sugar (200g): Adds sweetness and helps with browning.
- 2/3 cup light brown sugar (135g): Contributes to the cake’s moistness and adds a subtle caramel flavor.
- 1 tsp salt: Enhances the other flavors and balances the sweetness.
- 3 large eggs, ideally room temp: Eggs provide structure and richness. Room temperature eggs emulsify better, creating a smoother batter.
- ⅔ cup vegetable oil (133g): Keeps the cake moist. You can substitute with melted coconut oil.
- 1/3 cup buttermilk – mix 1/3 cup whole milk (80g) + 1 tsp vinegar: Buttermilk adds a tangy flavor and tenderizes the cake.
- 1 cup sour cream (240g), ideally room temp: Sour cream adds moisture and richness.
- 3/4 cup cocoa powder, Dutch Processed preferred (75g): Dutch-processed cocoa powder is less acidic and has a smoother, more chocolatey flavor.
- 2 tsp instant coffee: This enhances the chocolate flavor without making the cake taste like coffee. Trust me, it’s a game-changer!
- 3/4 cup boiling water (180g): Blooming the cocoa powder with boiling water intensifies its flavor and creates a fudgier texture.
- 300g dark chocolate: I recommend using a high-quality dark chocolate (60-70% cacao) for the best flavor.
- 3 tbsp corn syrup: Adds shine and smoothness to the chocolate glaze.
- 8 oz cream cheese, room temperature (226g): Room temperature cream cheese whips up smoother and prevents lumps in the frosting.
- 1/3 cup cocoa powder (33g): Adds chocolate flavor to the frosting.
- 1 cup powdered sugar (100g): Sweetens the frosting and gives it a smooth texture.
- 1/4 tsp salt: Balances the sweetness in the frosting.
- 1 1/4 cup heavy cream, chilled: Heavy cream creates a light and fluffy frosting. Make sure it’s well-chilled for the best results.
Equipment You’ll Need
Here’s a list of the tools you’ll need to bake your Matilda cake:
- Three 8-inch cake pans
- Parchment paper
- Mixing bowls
- Whisk
- Stand mixer or electric hand mixer
- Saucepan
- Serrated knife
- Wire rack
- Rubber spatula
- Blow dryer (optional, for shiny frosting)
For cake pans, I prefer using light-colored aluminum pans because they heat evenly and help prevent the edges from overbrowning. A stand mixer is great for making the frosting, but an electric hand mixer will work just as well.
Step-by-Step Instructions with Photos
Let’s get baking! Here are the steps to make your own Matilda cake:
- Preheat oven to 350F (no fan) and prepare 3 8″ pans with parchment paper and butter. This will ensure the cakes don’t stick.
- In a bowl, combine the 2 cups all purpose flour (260g, sifted), 1.5 tsp baking powder, 1.5 tsp baking soda, 1 cup granulated sugar (200g), 2/3 cup light brown sugar (135g) and 1 tsp salt. Whisk together until no lumps remain.
- In a separate bowl, whisk together the 3 large eggs (room temp), ⅔ cup vegetable oil (133g), 1/3 cup buttermilk and 1 cup sour cream (240g, room temp) until smooth.
- Add the dry ingredients to the wet in 2 additions, and gently whisk and fold until they are just combined and no big lumps remain. Do not overmix.
- In a separate small bowl, add the 3/4 cup cocoa powder (75g) and 2 tsp instant coffee. Pour over the 3/4 cup boiling water (180g) and whisk until a smooth shiny mixture forms.
- Pour the cocoa mixture onto the remaining batter, and gently fold until a chocolate cake batter forms.
- Divide the batter evenly between the 3 prepared cake pans.
- Bake for ~22-24 minutes until a toothpick inserted in the center comes out with light moist crumbs attached.
- Let the cakes cool in the pans for 20 minutes, then carefully remove them and place on a wire rack. Let cool completely (I recommend refrigerating for 1 hour).
- Add the 300g dark chocolate and 3 tbsp corn syrup to a saucepan and heat over the lowest flame while stirring constantly until the chocolate has fully melted. Set aside.
- In the bowl of your stand mixer, add the 8 oz cream cheese (226g, room temperature) and sift in the 1/3 cup cocoa powder (33g), 1 cup powdered sugar (100g) and 1/4 tsp salt. Use the paddle attachment and whisk on medium speed until the mixture becomes creamy (1-2 minutes). Scrape the bowl.
- Add the 1 1/4 cup heavy cream (chilled) and whisk again on low speed until a fluffy, whipped consistency is reached. Scrape the bowl in the middle. This should not take too long; avoid overmixing.
- At this point, the melted chocolate should be warm and runny but not very hot. Slowly pour it in while whisking on low speed until the chocolate is fully combined into the frosting. Due to the temperature of the chocolate, the frosting will become a more runny consistency.
- Let the frosting cool down until it becomes spreadable. I recommend doing this at room temperature for ~30 minutes but you can also do it in the fridge (it won’t take too long). If it becomes too firm, remove 1 cup, microwave for just a few seconds it until it is warm, and whisk back into the remaining frosting.
- Once the cakes and frosting have cooled down, it’s time to assemble!
- Use a large serrated knife to carefully trim off the domes from the cakes.
- Layer them on top of each other with a generous layer of the frosting in between (don’t be stingy!). Cover the cake with a thin layer of frosting (crumb coat) and refrigerate for 20 minutes. Then slather on the remaining frosting all over.
- Serve & enjoy! This cake is best eaten at room temperature.
- To get a shiny look on the cake, use a blow dryer at the lowest setting and gently wave it 1 foot away from the cake.
Tips for Matilda Cake Success
Here are a few of my personal tips for making the best Matilda cake:
- Use room temperature ingredients. This helps everything mix together more evenly and creates a smoother batter.
- Don’t overmix the batter. Overmixing can lead to a tough cake. Mix until just combined.
- Let the cake cool completely before frosting. This prevents the frosting from melting.
- For an extra fudgy frosting, chill it for a few minutes before frosting the cake.
Troubleshooting: Fixing Common Cake Fails
Even experienced bakers run into problems sometimes. Here’s how to troubleshoot some common cake fails:
- Problem: Cake sinking in the middle. Possible Causes: Oven temperature too low, overmixing, too much liquid, opening the oven door too early. Solutions: Calibrate your oven, avoid overmixing, measure ingredients accurately, don’t open the oven until the cake is nearly done.
- Problem: Dry cake. Possible Causes: Overbaking, not enough liquid, too much flour. Solutions: Use a cake tester to check for doneness, add more liquid, measure flour accurately.
- Problem: Tough crumb. Possible Causes: Overmixing, too much gluten development. Solutions: Avoid overmixing, use cake flour, don’t add too much liquid.
- Problem: Grainy Frosting. Possible Causes: Poor quality chocolate, sugar not fully dissolved. Solutions: Use high-quality chocolate, ensure powdered sugar is finely ground, whisk frosting thoroughly.
Variations and Customizations
Want to put your own spin on this Matilda cake? Here are a few ideas:
- Decorating: Get creative with your decorations! Use chocolate shavings, sprinkles, or fresh berries. This cake is amazing for birthdays, holidays, or any special occasion.
- Dietary Restrictions: You can reduce the sugar by using a sugar substitute like Stevia or Erythritol.
- Chocolate Type: If you want to try using different types of chocolate, milk chocolate will result in a sweeter, milder flavor, while white chocolate will create a completely different flavor profile (but still delicious!).
Here’s a table with some other easy substitutions:
| Ingredient | Substitution | Notes |
|---|---|---|
| Buttermilk | Milk + Vinegar | Let sit for 5 minutes before using. |
| Vegetable Oil | Melted Coconut Oil | May impart a slight coconut flavor. |
| Granulated Sugar | Coconut Sugar | May slightly alter the color and texture. |
Scaling the Recipe
If you want to make a smaller or larger cake, you’ll need to adjust the recipe accordingly. For a single layer cake, halve all the ingredients. For a larger cake, double or triple the recipe, and adjust the baking time as needed. Keep a close eye on the cake while it’s baking to make sure it doesn’t overcook. This could be great for treats and drinks.
Storing Your Matilda Cake
To keep your Matilda cake fresh and delicious, store it in an airtight container at room temperature for up to 3 days. You can also refrigerate it for up to a week. Before serving, let the cake come to room temperature for the best flavor and texture.
Frequently Asked Questions
Here are some common questions about the Matilda cake:
What are the best chocolate brands to use for the cake and frosting?
I love using Ghirardelli or Valrhona for their rich flavor and smooth texture.
Can I make this cake vegan or gluten-free?
Yes! Use a vegan buttermilk substitute and gluten-free flour.
How can I prevent my cake from sinking in the middle?
Make sure your oven temperature is accurate and avoid overmixing the batter.
How do I get a smooth, glossy frosting?
Use high-quality chocolate and whisk the frosting thoroughly.
Can I freeze this cake?
Yes, you can freeze the cake for up to 2 months. Wrap it tightly in plastic wrap and then in foil.
What’s the difference between Matilda cake and a regular chocolate cake?
Matilda cake is known for its intense chocolate flavor and fudgy frosting.
Can I make cupcakes with this recipe?
Yes, just adjust the baking time accordingly.
How do I make my own buttermilk?
Mix 1 tablespoon of vinegar or lemon juice with 1 cup of milk and let it sit for 5 minutes.
Is Dutch-processed cocoa powder necessary?
It’s preferred for its smoother flavor, but you can use regular cocoa powder if you don’t have Dutch-processed.
Conclusion
This Matilda cake recipe is more than just a dessert; it’s a trip down memory lane, a celebration of chocolate, and a chance to create a little movie magic in your own kitchen. With its rich flavor, fudgy frosting, and easy-to-follow instructions, I’m confident that this will be the best Matilda cake you’ve ever made.
Now it’s your turn! I’d love to hear about your experience making this cake. Leave a comment below with your questions, tips, or photos of your creation. Happy baking!
Follow us on Pinterest for decadent chocolate desserts, nostalgic movie-inspired bakes, and easy step-by-step recipes that bring a little magic into your kitchen, just like this Matilda Cake!
Matilda Cake Recipe: Delicious & Iconic
Ingredients
Equipment
Method
- Preheat oven to 350F (no fan) and prepare 3 8″ pans with parchment paper and butter. This will ensure the cakes don’t stick.
- In a bowl, combine the 2 cups all purpose flour (260g, sifted), 1.5 tsp baking powder, 1.5 tsp baking soda, 1 cup granulated sugar (200g), 2/3 cup light brown sugar (135g) and 1 tsp salt. Whisk together until no lumps remain.
- In a separate bowl, whisk together the 3 large eggs (room temp), ⅔ cup vegetable oil (133g), 1/3 cup buttermilk and 1 cup sour cream (240g, room temp) until smooth.
- Add the dry ingredients to the wet in 2 additions, and gently whisk and fold until they are just combined and no big lumps remain. Do not overmix.
- In a separate small bowl, add the 3/4 cup cocoa powder (75g) and 2 tsp instant coffee. Pour over the 3/4 cup boiling water (180g) and whisk until a smooth shiny mixture forms.
- Pour the cocoa mixture onto the remaining batter, and gently fold until a chocolate cake batter forms.
- Divide the batter evenly between the 3 prepared cake pans.
- Bake for ~22-24 minutes until a toothpick inserted in the center comes out with light moist crumbs attached.
- Let the cakes cool in the pans for 20 minutes, then carefully remove them and place on a wire rack. Let cool completely (I recommend refrigerating for 1 hour).
- Add the 300g dark chocolate and 3 tbsp corn syrup to a saucepan and heat over the lowest flame while stirring constantly until the chocolate has fully melted. Set aside.
- In the bowl of your stand mixer, add the 8 oz cream cheese (226g, room temperature) and sift in the 1/3 cup cocoa powder (33g), 1 cup powdered sugar (100g) and 1/4 tsp salt. Use the paddle attachment and whisk on medium speed until the mixture becomes creamy (1-2 minutes). Scrape the bowl.
- Add the 1 1/4 cup heavy cream (chilled) and whisk again on low speed until a fluffy, whipped consistency is reached. Scrape the bowl in the middle. This should not take too long; avoid overmixing.
- At this point, the melted chocolate should be warm and runny but not very hot. Slowly pour it in while whisking on low speed until the chocolate is fully combined into the frosting. Due to the temperature of the chocolate, the frosting will become a more runny consistency.
- Let the frosting cool down until it becomes spreadable. I recommend doing this at room temperature for ~30 minutes but you can also do it in the fridge (it won’t take too long). If it becomes too firm, remove 1 cup, microwave for just a few seconds it until it is warm, and whisk back into the remaining frosting.
- Once the cakes and frosting have cooled down, it’s time to assemble!
- Use a large serrated knife to carefully trim off the domes from the cakes.
- Layer them on top of each other with a generous layer of the frosting in between (don’t be stingy!). Cover the cake with a thin layer of frosting (crumb coat) and refrigerate for 20 minutes. Then slather on the remaining frosting all over.
- Serve & enjoy! This cake is best eaten at room temperature.
- To get a shiny look on the cake, use a blow dryer at the lowest setting and gently wave it 1 foot away from the cake.
Notes
Tried this recipe?
Let us know how it was!Printable Recipe Card
Want just the essential recipe details without scrolling through the article? Get our printable recipe card with just the ingredients and instructions.