Rhubarb Jelly or Jam? Understanding Our Delicious Recipe
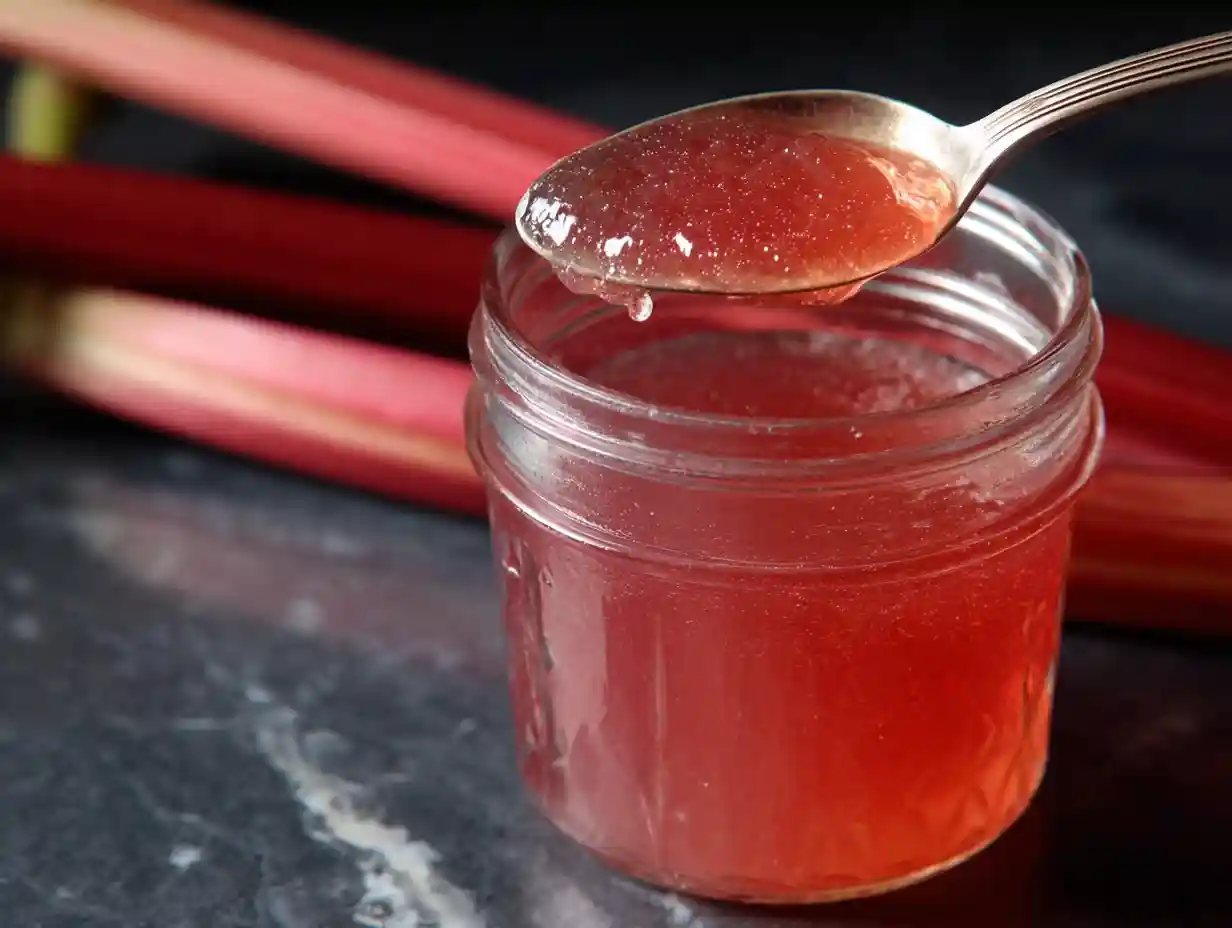
When I think about preserves, I often hear people wondering about the difference between jelly and jam. Traditionally, jelly is made from strained fruit juice, resulting in a clear, smooth spread without any fruit pulp. Jam, on the other hand, includes crushed fruit or fruit pieces, giving it a chunkier texture.
While my recipe uses whole rhubarb chunks during the initial cooking, I’ve designed it so the process, combined with the natural pectin from lemon seeds, yields a beautifully smooth, clear, and perfectly set spread. It really does function and taste just like a true rhubarb jelly, making it the perfect name for this delightful concoction.
Table of Contents

Simple Rhubarb Jelly with Natural Pectin
Ingredients
Equipment
Method
- First, I always sterilize my jars and lids by boiling them in a large pot of water. This is so important for ensuring the safety and shelf life of your beautiful jelly. While those are sterilizing, I place a small plate in the freezer; this will be for our set test later. Then, in a large bowl, I combine the trimmed, rinsed, and chopped rhubarb with the sugar, cold water, fresh lemon juice, and the spent lemon halves with their seeds. The lemon seeds are key here because they provide the necessary pectin for thickening the jelly. I let this mixture rest on the counter for about an hour. If you want to make life a little easier later, tuck those lemon seeds into a tea ball or tie them in cheesecloth for simple retrieval before you start cooking.
- After the rhubarb mixture has rested for an hour, I dump it into my large pot and bring it to a boil over medium-high heat. I make sure to stir the jam constantly for about 15 minutes during this initial boil. Skimming any foam that arises from the surface of the jam is important, as it helps achieve that lovely clear jelly. After 15 minutes, I reduce the heat to medium to keep the jam at a constant simmer. Stirring frequently at this stage is crucial to make sure the jam doesn’t scorch at the bottom of the pot.
- After a total of 30 minutes simmering, it’s time for my favorite test! I take the plate from the freezer and dollop a small spoonful of the hot jam onto it. The jam is set when it holds its shape on the cool plate rather than turning into a blob when I push it gently with my finger. If it seems a little runny, I just continue cooking over medium-low heat, stirring often, until it passes this simple test. Once it’s set, I carefully remove the lemon halves and the seed bag, tossing them into the compost or trash. Their work is done!
- If I plan to use the rhubarb jam within a week or two, I simply ladle it into the sterilized jars, filling them to the bottom-most ring at the top of the jar, which is usually about 1/4 inch headspace. I gently tap the bottom of each jar on the counter to release any trapped air bubbles. Then, using a damp, clean towel, I wipe the rims of the jars and secure the lids and rings. These jars go straight into the refrigerator for immediate enjoyment.
- If I’m canning the rhubarb jam to enjoy over the next year, I follow the same jar-filling steps: ladle into sterilized jars, filling them to the bottom-most ring. I tap the jars to release air bubbles and wipe the rims clean before securing the lids and rings. Then, I process the jars of rhubarb jam in a water bath. For pint jars, this means 5 minutes in boiling water; for quart jars, it’s 10 minutes. For more detailed information on canning, I always recommend looking at reliable guides. After processing, I use tongs to carefully remove the jars from the pot and let them cool undisturbed on the counter. When the jam reaches room temperature, I remove the metal rings, check for proper seals (the lid should be concave and not flex when pressed), and label them with the date and contents. I then store these sealed jars in a cool, dark pantry for up to 1 year.
Nutrition
Tried this recipe?
Let us know how it was!Why You’ll Love Making This Rhubarb Jelly
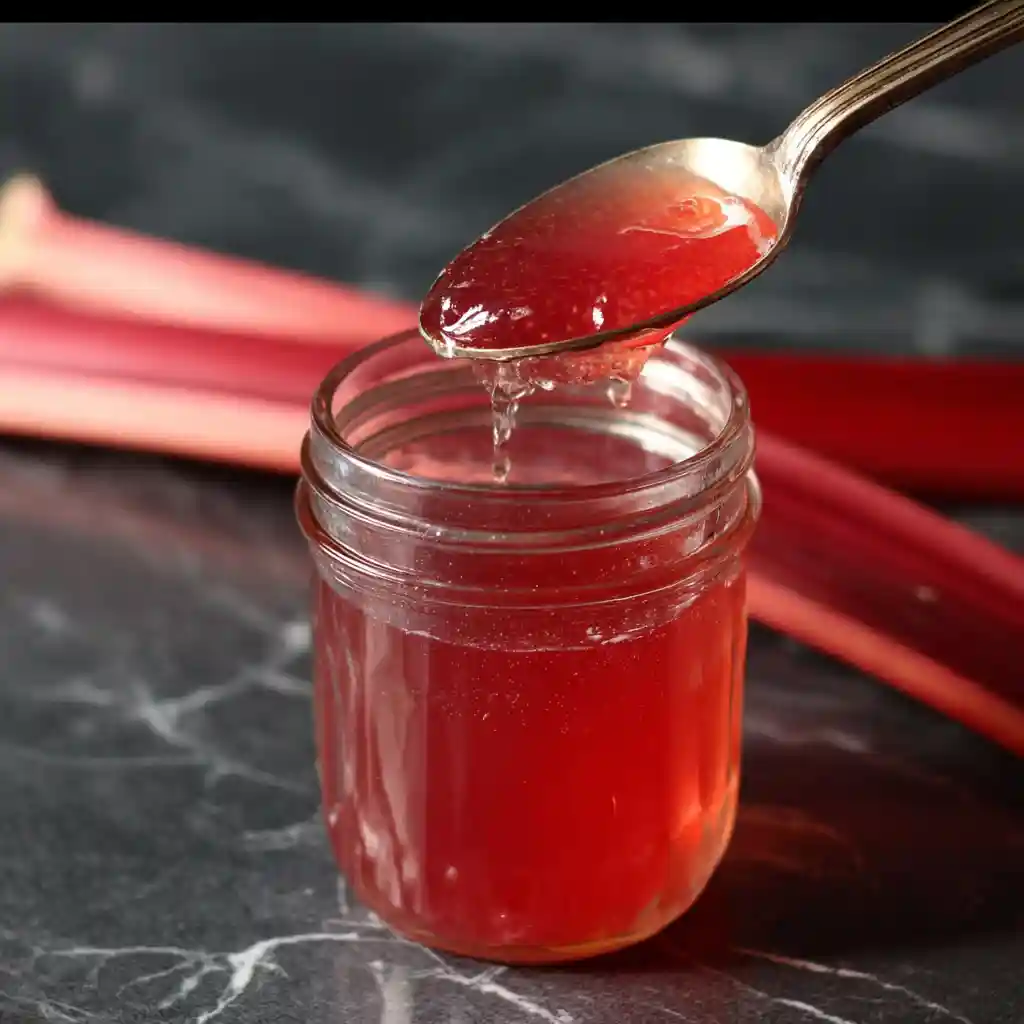
I’ve tested countless recipes, and I truly believe this rhubarb jelly stands out. Here are a few reasons why I know you’ll fall in love with making it in your own kitchen:
- Natural Pectin Power: You won’t need to reach for commercial pectin with this recipe. I cleverly use lemon seeds, which are naturally rich in pectin, to ensure a perfect set every time.
- Vibrant Spring Flavor: This jelly truly captures the quintessential tart-sweet essence of fresh, seasonal rhubarb. It’s a taste of sunshine in every spoonful.
- Effortlessly Clear: Achieving a beautiful, translucent spread is simple. My method allows you to get that gorgeous clarity without tedious pre-straining of the juice.
- Perfectly Set Every Time: I guide you through simple visual cues and a foolproof freezer plate test. This ensures you achieve that ideal, wobble-perfect consistency without any guesswork.
The Magic of Pectin: Ensuring Your Rhubarb Jelly Sets
Pectin is an incredible natural carbohydrate found in the cell walls of fruits, and it’s what makes jams and jellies set. When heated with sugar and acid, pectin forms a gel, giving your preserves that lovely, firm texture. In this rhubarb jelly recipe, I rely on the pectin naturally present in rhubarb itself, but the real star is the added lemon seeds.
Lemon seeds are a fantastic source of natural pectin, and by including them in the cooking process, I ensure my jelly achieves a beautiful, firm set without needing any store-bought pectin. While commercial pectins come in high-sugar and low-sugar varieties, my natural approach means you’re using simple, real ingredients to get that perfect consistency, just like my grandmother used to do.
Essential Equipment for Successful Rhubarb Jelly Making
Having the right tools makes all the difference when you’re making preserves. Here’s what I recommend for my rhubarb jelly, ensuring success, safety, and ease in your kitchen:
- Large Non-Reactive Pot: A heavy-bottomed stainless steel or enamel-coated pot is essential. It prevents the fruit acids from reacting with the metal, which can impart an off-flavor to your jelly.
- Fine-Mesh Strainer: While I don’t pre-strain, a strainer is handy for skimming foam and removing solids after cooking, ensuring a clear jelly.
- Canning Jars and Lids: Sterilized jars are crucial for food safety and shelf stability. I always have plenty on hand, along with new lids for a proper seal.
- Canning Funnel: This tool is a lifesaver for neat pouring, preventing spills and keeping jar rims clean, which is vital for a good seal.
- Jar Lifter: A jar lifter allows you to safely move hot jars in and out of boiling water without burning your hands. It’s a non-negotiable for canning.
- Candy Thermometer (if desired): While I prefer the freezer plate test, a candy thermometer can offer an objective measure of doneness (around 220°F/104°C).
- Freezer Plate: This is my favorite low-tech method for checking the set of your jelly. Chilling a small plate helps you see if the jam wrinkles and holds its shape, indicating it’s ready.
Ingredients for Your Best Rhubarb Jelly
I believe in using real, simple ingredients for the best flavor. Here is exactly what you will need for this recipe:
- 4 pounds rhubarb, preferably red (trimmed, rinsed, and cut into small chunks (about 16 cups))
- 4 cups granulated sugar
- 1 1/2 cups cold water
- 1 lemon (halved and juiced, seeds reserved)
Step-by-Step: How to Make Rhubarb Jelly from Scratch
I’ve broken down this process into easy-to-follow steps. Remember, cooking should be joyful, not stressful!
Preparing Your Jars and Rhubarb
First, I always sterilize my jars and lids by boiling them in a large pot of water. This is so important for ensuring the safety and shelf life of your beautiful jelly. While those are sterilizing, I place a small plate in the freezer; this will be for our set test later.
Then, in a large bowl, I combine the trimmed, rinsed, and chopped rhubarb with the sugar, cold water, fresh lemon juice, and the spent lemon halves with their seeds. The lemon seeds are key here because they provide the necessary pectin for thickening the jelly. I let this mixture rest on the counter for about an hour. If you want to make life a little easier later, tuck those lemon seeds into a tea ball or tie them in cheesecloth for simple retrieval before you start cooking.
Cooking Your Rhubarb Jelly Mixture to Perfection
After the rhubarb mixture has rested for an hour, I dump it into my large pot and bring it to a boil over medium-high heat. I make sure to stir the jam constantly for about 15 minutes during this initial boil. Skimming any foam that arises from the surface of the jam is important, as it helps achieve that lovely clear jelly. After 15 minutes, I reduce the heat to medium to keep the jam at a constant simmer. Stirring frequently at this stage is crucial to make sure the jam doesn’t scorch at the bottom of the pot.
Testing for the Perfect Jelly Set
After a total of 30 minutes simmering, it’s time for my favorite test! I take the plate from the freezer and dollop a small spoonful of the hot jam onto it. The jam is set when it holds its shape on the cool plate rather than turning into a blob when I push it gently with my finger. If it seems a little runny, I just continue cooking over medium-low heat, stirring often, until it passes this simple test. Once it’s set, I carefully remove the lemon halves and the seed bag, tossing them into the compost or trash. Their work is done!
Filling and Sealing Your Jars
If I plan to use the rhubarb jam within a week or two, I simply ladle it into the sterilized jars, filling them to the bottom-most ring at the top of the jar, which is usually about 1/4 inch headspace. I gently tap the bottom of each jar on the counter to release any trapped air bubbles. Then, using a damp, clean towel, I wipe the rims of the jars and secure the lids and rings. These jars go straight into the refrigerator for immediate enjoyment.
Water Bath Canning for Long-Term Storage
If I’m canning the rhubarb jam to enjoy over the next year, I follow the same jar-filling steps: ladle into sterilized jars, filling them to the bottom-most ring. I tap the jars to release air bubbles and wipe the rims clean before securing the lids and rings. Then, I process the jars of rhubarb jam in a water bath. For pint jars, this means 5 minutes in boiling water; for quart jars, it’s 10 minutes.
For more detailed information on canning, I always recommend looking at reliable guides. After processing, I use tongs to carefully remove the jars from the pot and let them cool undisturbed on the counter. When the jam reaches room temperature, I remove the metal rings, check for proper seals (the lid should be concave and not flex when pressed), and label them with the date and contents. I then store these sealed jars in a cool, dark pantry for up to 1 year.
Achieving Clarity: Our Rhubarb Jelly Method Explained
I know many home cooks worry about cloudy jelly, especially when they’re not pre-straining fruit juice. But with my rhubarb jelly recipe, I’ve found a wonderful way to achieve beautiful clarity, even though I cook whole rhubarb chunks. The secret is in my method: I avoid squeezing the mixture during or after cooking. Instead, I allow the solids to cook down with the liquid, infusing maximum flavor.
Once the jelly is cooked and set, I simply remove the larger pieces of lemon and the seeds. This approach ensures that the tiny particles that might make a jelly cloudy aren’t forced into the liquid, contributing to a smoother, remarkably clear, and truly jelly-like final product without the fuss of pre-straining juice through cheesecloth. It’s a simple trick that makes a big difference!
Selecting and Preparing the Best Rhubarb for Jelly
Choosing the best rhubarb is the first step to a truly delicious jelly. I always look for stalks that are vibrant in color, whether they’re deep ruby red or a lighter rosy pink. The stalks should feel firm and crisp, not limp or rubbery, which indicates freshness. For preparation, I start by trimming off any tough or woody ends, especially if they look dry.
Then, I give the stalks a thorough rinse under cool water to remove any dirt or debris. While some people wonder if the color of rhubarb affects its flavor, in my experience, both red and green-stalked varieties offer that wonderful tartness. However, red rhubarb will certainly give your jelly a more beautiful, rosy hue, which I always prefer for its visual appeal.
Creative Variations for Your Rhubarb Jelly
While my classic rhubarb jelly is absolutely divine, I love experimenting with flavors and other tangy rhubarb desserts. Here are some inspiring ideas to add a little something extra to your next batch:
| Variation | Suggested Quantity/Method |
|---|---|
| Ginger Rhubarb | Add 1-2 teaspoons of grated fresh ginger or 1/2 teaspoon ground ginger during cooking. |
| Orange Blossom | Incorporate the zest of 1 orange or 1/2 teaspoon orange blossom water during cooking. |
| Strawberry Rhubarb | Replace 1 pound of rhubarb with 1 pound of hulled and chopped strawberries. |
| Vanilla Bean | Add 1 vanilla bean, split and scraped, to the pot during cooking, removing before jarring. |
Preserving Your Rhubarb Jelly: Canning and Storage Tips
Properly preserving your homemade rhubarb jelly means you can enjoy that taste of spring all year long. Water bath canning is a fantastic and safe method for shelf-stable preserves, and it’s quite simple! The boiling water bath creates a vacuum seal by driving air out of the jar. When the jars cool, the lids seal, preventing spoilage. It’s crucial to leave about 1/4 inch of headspace in your jars, which is the space between the top of the jelly and the lid. This allows for proper vacuum sealing. If a jar doesn’t seal (the lid will pop up easily when pressed), simply store it in the refrigerator and use it within 2-3 weeks.
For jars I’ve water bath canned and properly sealed, I store them in a cool, dark pantry, and they will keep beautifully for up to 1 year. Once opened, any jar, whether canned or simply refrigerated from the start, should be stored in the refrigerator and enjoyed within 2-3 weeks. For smaller batches, freezing is also an option! I like to freeze jelly in small, freezer-safe containers, leaving a little headspace for expansion, for up to 6 months.
Delicious Ways to Enjoy Your Homemade Rhubarb Jelly
This homemade rhubarb jelly is so much more versatile than just a spread for toast, although it’s absolutely fantastic there! Here are some of my favorite ways to enjoy its vibrant flavor:
- Elevate Your Breakfast: Beyond toast, I love it stirred into plain yogurt, swirled into oatmeal, or dolloped onto pancakes and waffles. It also pairs well with many savory breakfast dishes.
- Sweet Treats: Use it as a filling for tarts, thumbprint cookies, or delicate crepes. I sometimes warm it slightly and use it as a glaze for lemon cakes or pound cakes.
- Savory Pairings: Don’t shy away from savory! It’s incredible paired with a sharp cheddar cheese or creamy goat cheese on crackers. I’ve also used it as a tangy glaze for roasted pork or chicken.
- Cocktail Hour: Stir a spoonful into a gin fizz or a sparkling wine for a refreshing, tart twist.
- Quick Bites: Spread it on warm biscuits and scones, or even as a unique topping for vanilla ice cream.
FAQs About Rhubarb Jelly
I often get questions about making preserves, and I love helping fellow home cooks navigate the process. Here are some common inquiries about rhubarb jelly:
Do you need to peel rhubarb for jelly?
No, I don’t peel rhubarb for this jelly recipe. The skins contribute to both the beautiful color and the natural pectin content. As the rhubarb cooks down, the skins soften and are easily strained out or become imperceptible in the final product.
Can I make rhubarb jelly without added pectin?
Absolutely! This recipe is designed specifically to make rhubarb jelly without commercial pectin. I rely on the natural pectin present in the rhubarb itself, significantly boosted by including lemon seeds, which are a fantastic source of natural pectin.
Why is my rhubarb jelly not setting, and how can I fix it?
A runny jelly usually means it hasn’t cooked long enough to reach the gelling point. If your jelly isn’t setting, I recommend returning it to the pot and simmering it gently for another 5-10 minutes, checking with the freezer plate test every few minutes until it sets. Make sure you’re using fresh lemon seeds for their pectin power.
How long does homemade rhubarb jelly last?
Properly water bath canned and sealed rhubarb jelly can last for up to 1 year in a cool, dark pantry. Once opened, or if simply refrigerated without canning, it should be stored in the refrigerator and consumed within 2-3 weeks.
What if my rhubarb jelly is too firm?
If your jelly turns out too firm, it likely means it was cooked a bit too long or perhaps the batch had an unusually high pectin content. While you can’t really “undo” a firm set, you can often gently warm a small amount with a splash of water or lemon juice to loosen it before serving, especially if you’re using it as a glaze or sauce.
What’s the best way to store rhubarb before making jelly?
I always store fresh rhubarb in the refrigerator. To keep it crisp, I wrap the stalks loosely in a damp paper towel and place them in a plastic bag in the crisper drawer. It will usually stay fresh for about 1-2 weeks this way. If I have more than I can use right away, I chop and freeze it for later use.
Printable Recipe Card
Want just the essential recipe details without scrolling through the article? Get our printable recipe card with just the ingredients and instructions.