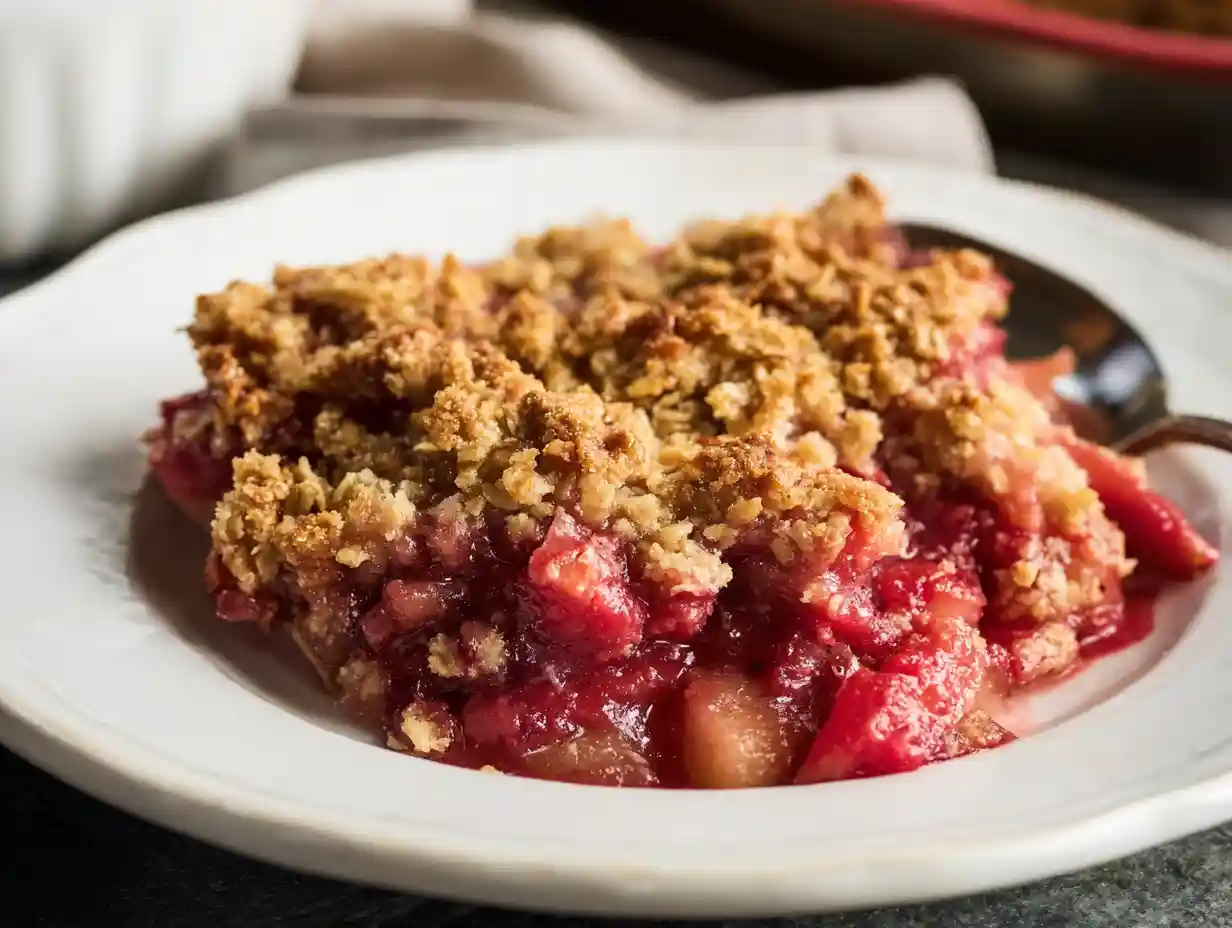
Oh, sweet spring! It’s the time of year when my kitchen fills with the scent of something truly special, something that whispers of cozy moments and sunshine. For me, that something is rhubarb. I just adore its vibrant color and that wonderfully unique tartness. Today, I am so excited to share one of my absolute favorite ways to enjoy this seasonal gem: my classic recipe for Homemade Rhubarb Bars.
These bars are truly a delightful balance of sweet and tangy, nestled on a buttery shortbread crust that just melts in your mouth. You can have these beauties ready from start to finish in approximately 60-70 minutes, which makes them perfect for any day.
Table of Contents

Ultimate Homemade Rhubarb Bars: Sweet & Tangy Delight
Ingredients
Equipment
Method
- Preheat oven to 350F. Line the bottom of an 8×8″ pan with parchment, bringing it up the sides so that it will be easy to remove the squares after. Whirl the crust ingredients in a food processor and then press into the prepared pan. Bake for 15 min.; the crust will still remain very pale in color.
- While crust is baking, mix together eggs, sugar, flour and salt and whisk well about 1 min. but no longer. Stir in rhubarb. Pour onto the hot crust and continue to bake for 40-45min.
- Let the bars cool and remove with the parchment paper. Cut into squares.
Nutrition
Notes
Tried this recipe?
Let us know how it was!Why You’ll Adore These Homemade Rhubarb Bars

I promise you, these rhubarb bars are going to become a staple in your recipe collection. I love how simple they are to throw together, yet they taste incredibly sophisticated. The buttery, tender shortbread crust provides the perfect counterpoint to the bright, tangy, and custardy rhubarb filling. Every bite brings a lovely wave of nostalgia, reminding me of all the old-fashioned treats my grandma used to bake. They’re truly a taste of spring, bottled up in a delicious square.
Rhubarb 101: Your Guide to This Tangy Treat
Rhubarb is such a fascinating ingredient. Its flavor profile is intensely tart, almost like a sour apple, but with a unique vegetal note that makes it perfect for sweet applications. When I am at the market, I always look for stalks that are firm and crisp, with a vibrant red or pink color. While green stalks are perfectly fine to eat, I find the redder ones often signal a slightly sweeter flavor. Preparing rhubarb is super easy: I simply wash the stalks, trim off the very ends, and then dice it into small, uniform pieces. Rhubarb is one of those wonderful early spring and early summer delights, making these homemade rhubarb bars a perfect seasonal treat.
Gathering Your Ingredients for Homemade Rhubarb Bars
Having all my ingredients ready before I start baking always makes the process so much smoother. Here’s what you’ll need for these delightful bars.
Crust Ingredients:
- 1 cup all-purpose flour: This provides the tender, structured base for our shortbread crust.
- 1/2 cup sugar: I add just enough sugar to the crust for a hint of sweetness without overpowering the rhubarb.
- 1/2 cup butter (room temperature): Using room temperature butter is crucial for achieving that perfectly light and crumbly shortbread texture.
Filling Ingredients:
- 2 large eggs: The eggs are essential for creating the rich, custardy texture of the rhubarb filling.
- 1 cup sugar: This balances the rhubarb’s tartness beautifully, ensuring a sweet, yet bright flavor.
- 1/4 cup flour: A small amount of flour in the filling helps to thicken it, preventing a watery result.
- 1/4 tsp. salt: Just a pinch of salt enhances all the other flavors in the filling.
- 2 cups diced rhubarb: This is our star ingredient, providing all that wonderful spring flavor.
Step-by-Step: How to Make Perfect Homemade Rhubarb Bars
Let’s get baking! I’ve broken down the process so it’s easy to follow along.
- Prepare the Pan & Crust: Preheat oven to 350F. Line the bottom of an 8×8″ pan with parchment, bringing it up the sides so that it will be easy to remove the squares after. Whirl the crust ingredients in a food processor and then press into the prepared pan. Bake for 15 min.; the crust will still remain very pale in color. (This is a great spot where a quick photo or video of pressing the crust into the pan could be really helpful!)
- Prepare the Filling: While crust is baking, mix together eggs, sugar, flour and salt and whisk well about 1 min. but no longer. Stir in rhubarb.
- Bake the Bars: Pour onto the hot crust and continue to bake for 40-45min. (Seeing the filling poured onto the hot crust would be fantastic in a video!)
- Cool & Serve: Let the bars cool and remove with the parchment paper. Cut into squares.
Expert Tips for Flawless Rhubarb Bars
After years of baking, I’ve picked up a few tricks that make all the difference. I love sharing these with you!
- Don’t Over-Whisk: When you’re whisking the filling, be careful not to overdo it. Whisking for longer than a minute can incorporate too much air, which might make your filling puff up too much and then fall, or even create a slightly more cake-like texture than the custardy one we’re aiming for.
- Perfect Tartness Balance: This recipe is designed to hit that sweet-tart sweet spot, which I think is just perfect. If your rhubarb is particularly tart, or if you prefer a slightly sweeter bar, you could add an extra tablespoon or two of sugar to the filling mixture. Just taste a tiny bit of your diced rhubarb first to gauge its intensity!
- The Importance of Cooling: I know it’s hard to wait, but allowing the bars to cool completely is absolutely crucial. This lets the filling fully set, which means you’ll get nice, clean cuts and a much better texture. I even like to chill them in the fridge for an hour or two before slicing; it makes a huge difference.
- Avoiding a Soggy Crust: Nobody wants a soggy crust! I prevent this by pre-baking the crust, as we do in this recipe, which helps create a barrier. Also, make sure you don’t overload your pan with too much filling; sticking to the recipe quantities is key here.
Serving Suggestions for Your Delicious Rhubarb Bars
These homemade rhubarb bars are utterly divine on their own, but I always love adding a little something extra. A dollop of freshly whipped cream makes them feel incredibly luxurious. For a truly decadent treat, a scoop of good quality vanilla ice cream melting alongside a warm bar is pure heaven. Sometimes, I simply dust them with a little powdered sugar for an elegant finish. They also make a beautiful and vibrant addition to any spring dessert platter, especially for gatherings.
Troubleshooting Common Issues with Homemade Rhubarb Bars
Baking can sometimes present little challenges, but don’t worry, I’ve got solutions for you!
- Watery Filling: If your filling ends up watery, it’s usually because it needed a bit more time in the oven, or perhaps the rhubarb released a lot of moisture. Make sure your flour measurements are accurate, as it acts as a thickener. Continue baking until the center is set, even if the edges are bubbly.
- Soggy Crust: A soggy crust can be frustrating. This often happens if the crust isn’t pre-baked enough, or if the bars aren’t cooled completely, allowing moisture from the filling to seep in. Pre-baking is key, and patience with cooling is your best friend here.
- Uneven Baking/Not Set: Ovens can have hot spots, so rotating your pan halfway through baking can help. To check for doneness, I give the pan a gentle jiggle; the center should be mostly set with only a slight wobble, not liquidy.
- Rhubarb Too Tart: If you found your rhubarb excessively tart, next time consider increasing the sugar in the filling by an extra tablespoon or two. You could also try macerating the diced rhubarb with a little sugar for about 15-20 minutes before adding it to the filling, then draining off any excess liquid.
Creative Variations & Substitutions for Your Rhubarb Bars
I love to get creative in the kitchen, and these homemade rhubarb bars are a fantastic canvas for experimentation!
| Variation/Substitution | How to Incorporate |
|---|---|
| Flavor Boosts | Add 1 teaspoon of lemon or orange zest to the filling for a brighter flavor. A pinch of cinnamon or ground ginger (1/4 to 1/2 tsp) can add a wonderful warmth. |
| Fruit Combinations | Pair rhubarb with other fruits! I love combining it with 1 cup of diced strawberries or raspberries, reducing the rhubarb slightly to keep the overall fruit quantity similar. |
| Crust Adaptations | For a nuttier flavor, you could try substituting some of the all-purpose flour in the crust with whole wheat pastry flour. Adding 1/4 cup of rolled oats to the crust mixture can also provide a delightful chew and texture. |
| Using Frozen Rhubarb | You can absolutely use frozen rhubarb! I recommend thawing it first and then draining off any excess moisture to prevent a watery filling. Press it gently with a paper towel. No other adjustments to baking time should be necessary. |
Storing Your Homemade Rhubarb Bars for Freshness
I find that these homemade rhubarb bars keep wonderfully, which is great because they rarely last long in my house! Once they are completely cooled, I store them in an airtight container in the refrigerator for up to 4-5 days.
If you want to enjoy them later, these bars are perfectly suitable for freezing after baking. I simply cut them into individual squares, wrap each tightly in plastic wrap, and then place them in a freezer-safe bag or container. They will keep well in the freezer for up to 3 months. When I am ready to enjoy one, I just let it thaw in the refrigerator overnight or at room temperature for a few hours.
FAQs About Homemade Rhubarb Bars
I hear so many wonderful questions from you all, and I love answering them!
Can I use frozen rhubarb in this recipe?
Yes, you certainly can! I recommend thawing it first and gently pressing out any excess moisture before adding it to the filling.
How do I know when my rhubarb bars are done baking?
The bars are done when the filling is set in the center. I give the pan a gentle jiggle, and if there’s only a slight wobble in the middle, they’re ready. The crust should also be lightly golden.
Why is my filling runny?
A runny filling is often a sign of underbaking or too much moisture from the rhubarb. Make sure to bake until the center is set, and if using frozen rhubarb, drain it well.
Can I make these bars gluten-free?
I haven’t personally tested a gluten-free version of this specific recipe, but generally, you could try substituting the all-purpose flour in both the crust and the filling with a 1:1 gluten-free baking blend that contains xanthan gum.
How long do homemade rhubarb bars last?
Stored in an airtight container in the refrigerator, my homemade rhubarb bars typically last for 4-5 days.
Enjoy Your Homemade Rhubarb Bars!
I truly hope you feel inspired to bring the joy of spring into your kitchen with these wonderful homemade rhubarb bars. There’s something so incredibly satisfying about creating a treat that perfectly balances sweet and tart, and sharing it with the people you love. Every time I make them, I’m reminded of why I started Delish Map in the first place, to share comforting, approachable recipes made with real ingredients.
I can’t wait to hear how your bars turn out! Please leave a comment below with your baking experience, any questions you might have, or even your favorite way to enjoy rhubarb. If you share your delicious creations on social media, don’t forget to tag me using #DelishMapRhubarbBars. Happy baking, my friends!
Printable Recipe Card
Want just the essential recipe details without scrolling through the article? Get our printable recipe card with just the ingredients and instructions.