There’s something truly magical about the aroma of a homemade dessert baking in the oven, isn’t there? It fills your kitchen with warmth and instantly brings a smile to my face. Today, I’m sharing a classic that does just that: my irresistible Apple Cobbler Recipe.
This dessert is a testament to simple comforts. Imagine tender, warmly spiced apples bubbling under a golden, cake-like topping. It’s the kind of treat that practically begs for a scoop of vanilla ice cream. This easy Apple Cobbler Recipe comes together in about an hour and a half, making it perfect for a cozy weeknight or a special weekend gathering.

Jump To
Why You’ll Love This Apple Cobbler Recipe
I truly believe this Apple Cobbler Recipe will become a staple in your home, just as it is in mine. For starters, I find the balance of sweet and tart apples nestled beneath that tender topping absolutely perfect. It’s not overly sweet, allowing the natural apple flavors to shine through.
The topping itself is a dream; it bakes up golden and biscuit-like, offering a delightful contrast to the soft apple filling. I also adore how straightforward this recipe is. It uses common pantry ingredients and simple steps, making it approachable for any home cook.
Plus, the way it fills my kitchen with the most comforting scents of cinnamon and nutmeg is pure joy.
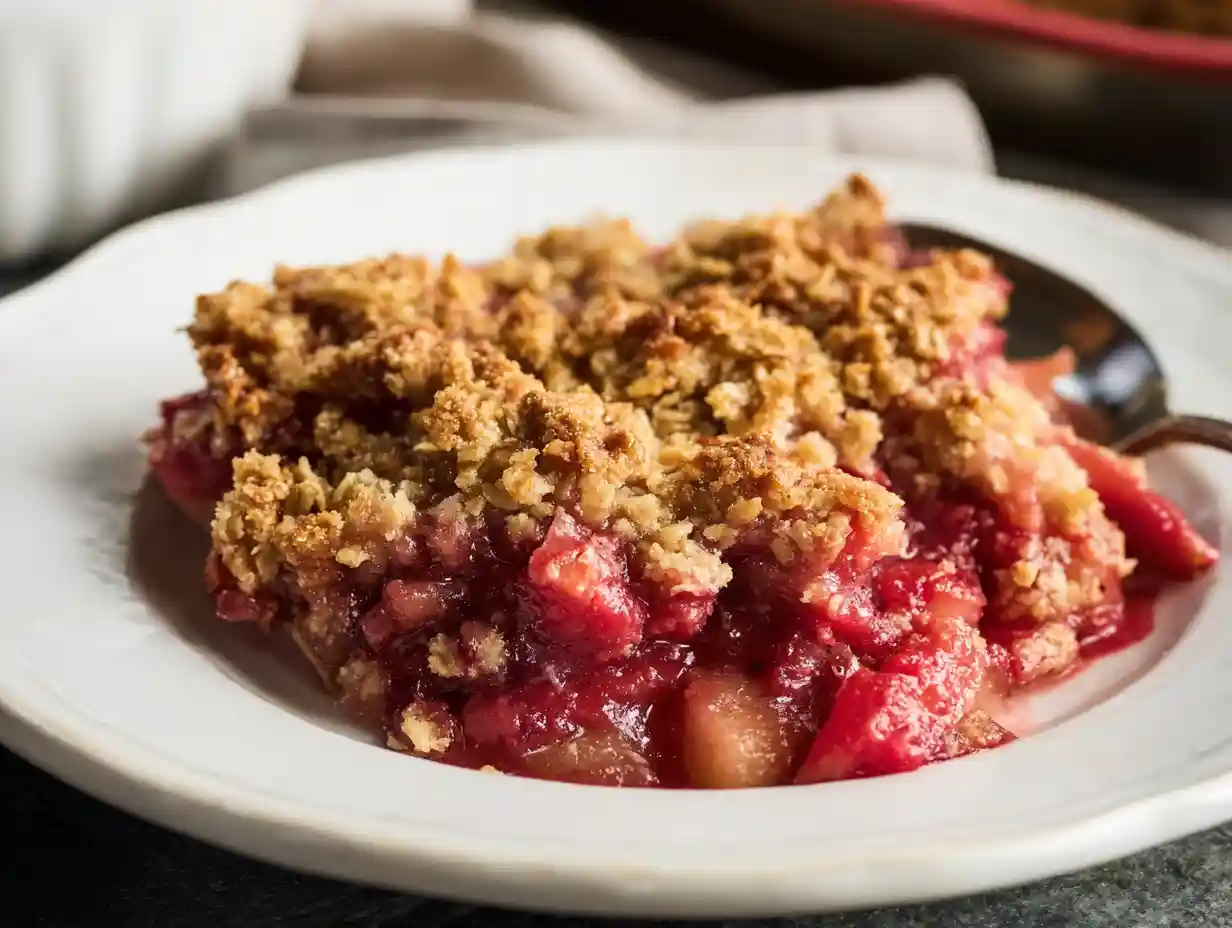
Apple Cobbler vs. Apple Crisp: What’s the Delicious Difference?
I often get asked about the difference between a cobbler and a crisp, and I’m happy to clarify! The main distinction lies in their toppings. For this Apple Cobbler Recipe, I use a sweet, cake-like batter that bakes up almost like a fluffy biscuit, forming a smooth, golden crust over the fruit.
An apple crisp, on the other hand, typically features a streusel-like topping made from oats, flour, sugar, and butter, which bakes to a crunchy, crumbly finish. Both are absolutely delicious, but I find the cobbler’s soft, tender topping particularly comforting.
You can find more recipes like this in our treats and drinks category.
Choosing the Best Apples for Your Apple Cobbler Recipe
Selecting the right apples is key to a fantastic Apple Cobbler Recipe. I always recommend using firm, crisp apples that hold their shape well during baking and offer a good balance of sweetness and tartness. Granny Smith apples are a classic choice for me because their tartness provides a wonderful counterpoint to the sweet topping.
Golden Delicious are another favorite; they soften beautifully and add a lovely mild sweetness. I often use a mix of both, or experiment with other good baking apples, to achieve a more complex flavor and texture. Just be sure to pick apples that won’t turn to mush in the oven.
To Peel or Not to Peel: My Take on Apples for This Cobbler
For this particular Apple Cobbler Recipe, I definitely recommend peeling your apples. I find that the skin can become a bit tough and chewy after baking, which distracts from the tender texture of the apple filling. Peeling ensures a uniformly soft and enjoyable bite every time.
While leaving the skins on can add a rustic look and some extra fiber, for the ultimate comforting cobbler experience, I always take the extra step to peel them. It truly makes a difference in the final texture.
Essential Tools for Baking This Apple Cobbler Recipe
Gathering your tools before you start makes the baking process so much smoother. For this Apple Cobbler Recipe, you’ll need a few basics that I’m sure you already have in your kitchen. I always make sure I have a 9×13 inch baking pan, which is the perfect size for this recipe.
You’ll also need a medium saucepan for preparing the apple filling, and a large mixing bowl for the cobbler topping. A whisk is essential for combining the dry ingredients, and a good sturdy spoon or spatula helps with stirring the apples.
Ingredients You’ll Need for This Easy Apple Cobbler Recipe
I love that this Apple Cobbler Recipe uses such simple, wholesome ingredients, most of which you probably have on hand. I’ve divided them into two easy sections for the filling and the topping. For another delicious apple dessert, check out this Apple Spice Cake Using Box Cake.
For the Irresistible Apple Filling
Here are the ingredients I use for the sweet and spicy apple base:
- 6 medium apples ((Granny Smith, Golden Delicious, or other good baking apple), peeled and sliced ¼ inch thick)
- 1 cup water (or apple juice)
- 1/3 cup brown sugar (, packed)
- 1 Tablespoon cornstarch
- 1 Tablespoon lemon juice
- 1/2 teaspoon vanilla extract
- 1 teaspoon ground cinnamon
- 1/2 teaspoon ground nutmeg
- 1/8 teaspoon salt
I find that the cornstarch is so important here; it’s my secret to a perfectly thickened, not watery, filling. The lemon juice adds a wonderful brightness and also helps prevent the apples from browning too quickly, keeping them looking fresh and appetizing. And, of course, the cinnamon and nutmeg are essential for that classic apple pie flavor!
For the Golden Cobbler Topping
This is what creates that delightful, tender crust over the apples:
- 1 cup all-purpose flour
- 1 cup granulated sugar
- 2 teaspoons baking powder
- 1/4 teaspoon salt
- 3/4 cup milk
- 5 Tablespoons butter (, melted)
- ground cinnamon for topping
The baking powder is key to giving the topping its lovely lift and cake-like texture. I use milk to ensure a tender crumb, and the melted butter adds a beautiful richness and helps create that golden-brown finish I love so much. A final sprinkle of cinnamon on top adds an extra touch of spice and a pretty visual.
How to Make the Best Apple Cobbler Recipe – Step-by-Step
Making this Apple Cobbler Recipe is incredibly straightforward, and I’m going to walk you through each step. You’ll be amazed at how easily you can achieve a perfect, comforting dessert every time.
Step 1: Crafting the Flavorful Apple Filling
First, I always preheat my oven to 350°F and lightly grease a 9×13 inch pan with cooking spray. This ensures nothing sticks and cleanup is a breeze. In a saucepan, I stir together the brown sugar, water, cornstarch, lemon juice, vanilla, cinnamon, nutmeg, and salt.
Once those are well combined, I stir in my peeled and sliced apples. I cook this mixture over medium heat for about 3-5 minutes, stirring gently but consistently. You’ll notice the sauce starting to thicken slightly and the apples just beginning to soften. This pre-cooking step is crucial for ensuring your apples are perfectly tender in the final cobbler.
Then, I pour this fragrant apple mixture into my prepared pan.
Step 2: Whipping Up the Perfect Cobbler Topping
Next, I turn my attention to the topping. In a large bowl, I mix together the flour, sugar, baking powder, and salt. Once the dry ingredients are combined, I stir in the milk and melted butter. The key here is to mix it just until combined.
I’m careful not to overmix; a few lumps are perfectly fine and will lead to a more tender topping. Overmixing can result in a tough cobbler, and I definitely don’t want that for you!
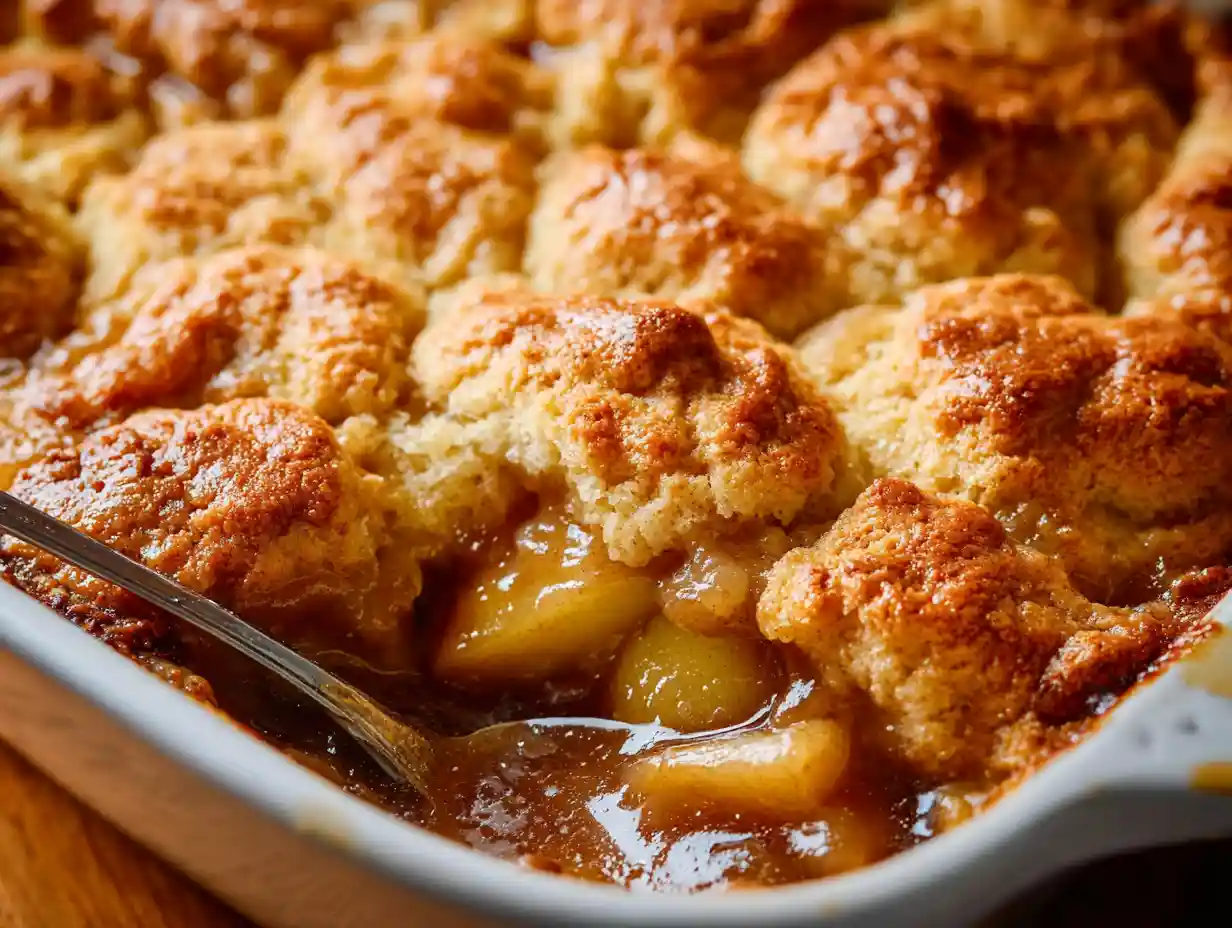
Step 3: Assemble and Bake Your Golden Apple Cobbler
With the filling in the pan and the topping ready, it’s time to bring it all together. I carefully pour the topping mixture over the apples in the pan, spreading it gently to cover as much as possible. Then, I sprinkle the top lightly with a little extra ground cinnamon for that beautiful finish and added aroma. I bake the cobbler for about 38-40 minutes, or until a toothpick inserted into the topping comes out clean.
You’ll know it’s done when the topping is golden brown, the apple filling is bubbling around the edges, and your kitchen smells absolutely incredible! After baking, I allow it to cool for at least 15 minutes before serving. This cooling time lets the filling set slightly and prevents any burns from the hot, bubbly apples. I love serving it warm, especially with a scoop of vanilla ice cream.
Expert Tips for Apple Cobbler Success
Over the years, I’ve picked up a few tricks that truly make this Apple Cobbler Recipe shine. First, I always make sure to pre-cook the apples as directed. This step is vital for ensuring your apples are tender, not crunchy, after baking. Second, remember what I said about the topping: don’t overmix it! Mix just until the wet and dry ingredients are combined; a slightly lumpy batter is actually ideal for a tender crumb.
Also, I encourage you to trust your senses when it comes to doneness. Look for a deeply golden-brown topping, listen for gentle bubbling from the filling, and definitely do the toothpick test. Finally, using the recommended 9×13 inch pan is important. If you use a different size, you might need to adjust your baking time; a smaller, deeper pan could take a bit longer.
Troubleshooting Common Apple Cobbler Issues
I know baking can sometimes throw a curveball, so I want to help you troubleshoot any issues you might encounter with your Apple Cobbler Recipe.
- Why is my apple cobbler watery? This often happens if the apples release too much moisture or there isn’t enough thickener. I make sure to use crisp baking apples and measure the cornstarch accurately. If your apples are particularly juicy, you could try adding another half-tablespoon of cornstarch to the filling.
- Why is the topping not browning or cooking through? If your topping isn’t getting that beautiful golden color, it might be due to a too-low oven temperature or placing the cobbler too far from the top heating element. I always double-check my oven temperature and position the pan on the middle rack. Also, ensure your batter isn’t too thick, which can hinder even cooking.
- Why are my apples still hard after baking? This usually comes down to apple type, slice thickness, or insufficient pre-cooking. Make sure you’re using good baking apples that soften well. Slice your apples to about ¼ inch thick to ensure even cooking, and don’t skip that initial stovetop cooking step; it’s crucial for tender apples.
Delicious Variations & Customizations for Your Apple Cobbler
One of the things I love most about this Apple Cobbler Recipe is how easily you can adapt it to your preferences. Here are some of my favorite ways to customize it:
| Customization | My Suggestion |
|---|---|
| Adding Nuts | I love sprinkling ½ cup of chopped pecans or walnuts into the apple filling or over the topping before baking for extra crunch and flavor. |
| Different Spices | Feel free to experiment with other warm spices! I sometimes add ½ teaspoon of ground ginger or ¼ teaspoon of cardamom to the apple filling for a unique twist. |
| Other Fruits | This cobbler is wonderful with other fruits. I’ve mixed in a cup of fresh berries (like blueberries or raspberries) or sliced pears along with the apples. |
| Dietary Adaptations | For a dairy-free version, I swap out the milk for a plant-based milk (like almond or oat) and use a dairy-free butter substitute. For gluten-free, a good 1:1 gluten-free flour blend works well for the topping. |
Make Ahead & Freezing Instructions for Your Apple Cobbler
Life gets busy, and I’m all about making things easier! Here are my tips for preparing this Apple Cobbler Recipe ahead of time or freezing it for later enjoyment.
Make Ahead Options: I often prepare the apple filling a day in advance. After cooking the apples as directed, I let it cool completely, then transfer it to an airtight container and refrigerate for up to 2 days. When I’m ready to bake, I pour it into the pan and proceed with making the topping. I don’t recommend assembling the entire cobbler (topping over filling) and refrigerating it unbaked, as the topping can become soggy.
Freezing Baked Cobbler: To freeze a fully baked cobbler, I let it cool completely. Then, I wrap the pan tightly with plastic wrap, followed by aluminum foil. It can be frozen for up to 3 months. When I’m ready to enjoy, I thaw it in the refrigerator overnight, then reheat it in a 350°F oven until warmed through.
Freezing Just the Filling: I also love freezing just the prepared apple filling. Once cooked and cooled, I transfer it to a freezer-safe bag or container and freeze for up to 3 months. Thaw it in the refrigerator overnight before pouring it into your baking pan and adding the fresh topping.
Storing & Reheating Leftover Apple Cobbler
If you happen to have any leftovers of this delicious Apple Cobbler Recipe, I want to make sure you know how to keep it fresh and enjoy it again. This method also works with this Blueberry French Toast Casserole.
Storage of Baked Cobbler: I always cover and store any leftovers in the refrigerator for up to 4 days. I make sure to use an airtight container or cover the pan tightly with plastic wrap to keep it from drying out. This helps maintain its wonderful flavor and texture.
Reheating Instructions: To reheat, I find that the oven is best for restoring that delicious, tender topping. I warm individual slices in a 300°F oven for about 10-15 minutes, or until heated through. If I’m short on time, the microwave works too, but the topping won’t be as crisp. I just microwave individual servings for 30-60 seconds, or until warm.
Serving Suggestions for a Warm Apple Cobbler
A warm slice of this Apple Cobbler Recipe is a treat on its own, but I do have some favorite ways to serve it that elevate the experience even further. My absolute go-to is serving it with a generous scoop of good quality vanilla ice cream. The cold, creamy ice cream melting into the warm, spiced apples is pure heaven!
I also love a drizzle of warm caramel sauce over the top, or a dollop of freshly whipped cream. For an extra touch of cozy, sometimes I sprinkle a few chopped toasted nuts on top for a little texture.
FAQs About Apple Cobbler Recipe
I’ve gathered some common questions I hear about making apple cobbler to help you feel confident in your kitchen.
What size pan is best for this apple cobbler recipe?
I recommend a 9×13 inch baking pan for this recipe. If you use a smaller, deeper pan, it might take a bit longer to bake through, so keep an eye on it.
Can I halve this apple cobbler recipe? Absolutely!
You can easily halve all the ingredients and bake it in an 8×8 inch square pan or a 9-inch round pan. The baking time might be slightly reduced, so start checking for doneness a few minutes earlier.
How long does homemade apple cobbler last?
When stored properly in an airtight container in the refrigerator, my homemade apple cobbler will last for up to 4 days.
Do I need to pre-cook the apples for this recipe?
Yes, I definitely recommend pre-cooking the apples for this recipe. It ensures they soften beautifully and are perfectly tender in the finished cobbler, preventing any hard apple surprises!
Nutrition Information
I’ll have detailed nutrition information per serving available for you in the printable recipe card, which you’ll find right below this post.
And there you have it, my friends! This Apple Cobbler Recipe is truly a little piece of comfort, baked right in your own kitchen. I adore how simple it is to prepare and how it fills my home with such inviting, warm aromas. It’s a dessert that speaks to the heart, perfect for sharing with loved ones or savoring on a quiet evening.
I really hope you give this recipe a try; I promise you won’t be disappointed! Please, leave a comment below and let me know what you think, or share your own favorite cobbler memories. I can’t wait to hear from you. Happy baking!
Craving warm, nostalgic desserts straight from the oven? Follow us on Pinterest for easy, comforting recipes like this Apple Cobbler. Perfect for fall baking or year-round indulgence!
Apple Cobbler Recipe You’ll Adore
Ingredients
Equipment
Method
- First, I always preheat my oven to 350°F and lightly grease a 9×13 inch pan with cooking spray. This ensures nothing sticks and cleanup is a breeze. In a saucepan, I stir together the brown sugar, water, cornstarch, lemon juice, vanilla, cinnamon, nutmeg, and salt. Once those are well combined, I stir in my peeled and sliced apples. I cook this mixture over medium heat for about 3-5 minutes, stirring gently but consistently. You’ll notice the sauce starting to thicken slightly and the apples just beginning to soften. This pre-cooking step is crucial for ensuring your apples are perfectly tender in the final cobbler. Then, I pour this fragrant apple mixture into my prepared pan.
- Next, I turn my attention to the topping. In a large bowl, I mix together the flour, sugar, baking powder, and salt. Once the dry ingredients are combined, I stir in the milk and melted butter. The key here is to mix it just until combined. I’m careful not to overmix; a few lumps are perfectly fine and will lead to a more tender topping. Overmixing can result in a tough cobbler, and I definitely don’t want that for you!
- With the filling in the pan and the topping ready, it’s time to bring it all together. I carefully pour the topping mixture over the apples in the pan, spreading it gently to cover as much as possible. Then, I sprinkle the top lightly with a little extra ground cinnamon for that beautiful finish and added aroma. I bake the cobbler for about 38-40 minutes, or until a toothpick inserted into the topping comes out clean. You’ll know it’s done when the topping is golden brown, the apple filling is bubbling around the edges, and your kitchen smells absolutely incredible! After baking, I allow it to cool for at least 15 minutes before serving. This cooling time lets the filling set slightly and prevents any burns from the hot, bubbly apples. I love serving it warm, especially with a scoop of vanilla ice cream.
Nutrition
Notes
Tried this recipe?
Let us know how it was!Printable Recipe Card
Want just the essential recipe details without scrolling through the article? Get our printable recipe card with just the ingredients and instructions.