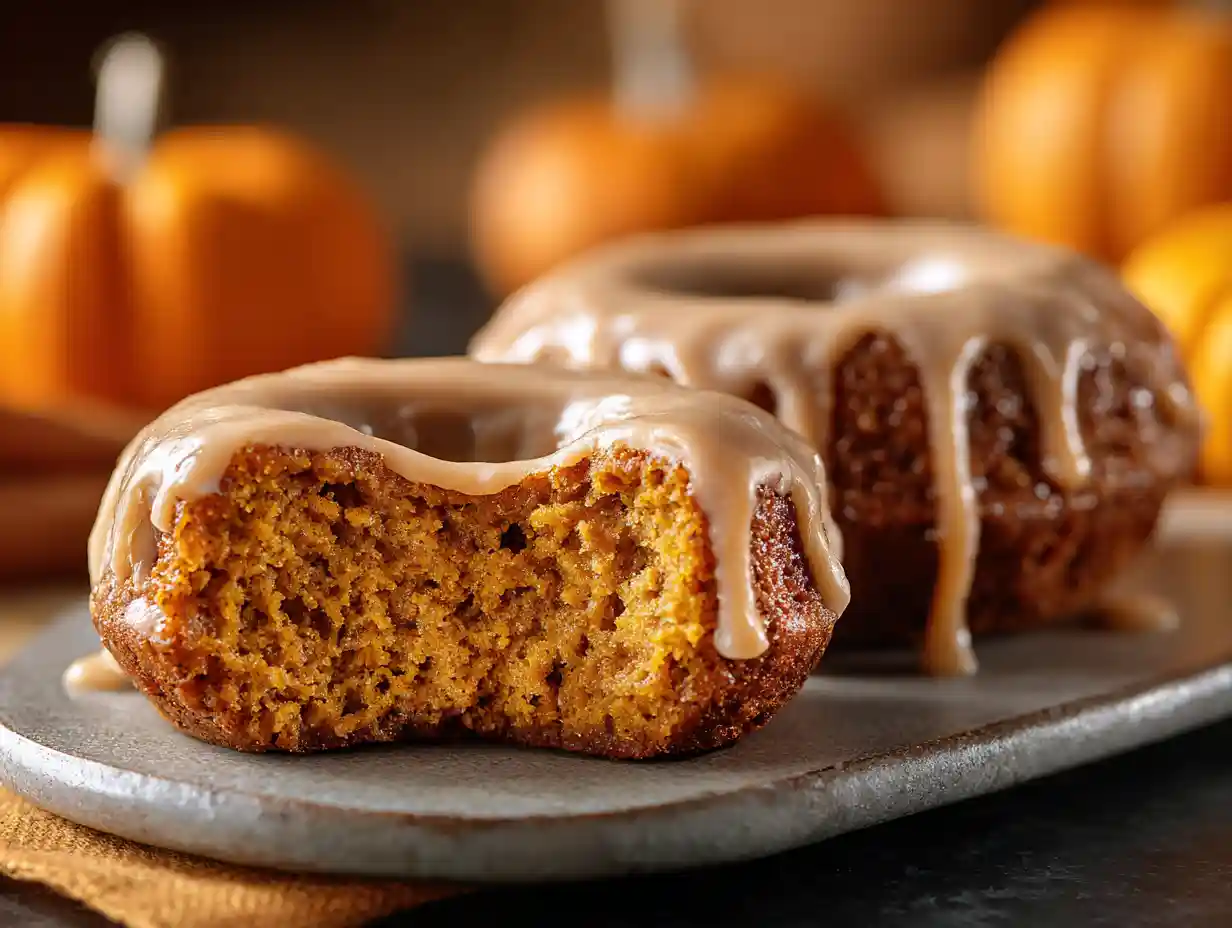
Fall is my absolute favorite time to bake! The cozy flavors of cinnamon, nutmeg, and, of course, pumpkin, just fill my kitchen with warmth. And what better way to enjoy those flavors than in a batch of homemade Baked Pumpkin Donuts?
This recipe is so simple; you can whip up a batch in about 30 minutes.

Get ready for a treat that’s perfect for breakfast, brunch, or a sweet afternoon snack.
Jump To
Why You’ll Love These Baked Pumpkin Donuts
These aren’t just any donuts; they’re incredibly moist and tender, thanks to the pumpkin puree and vegetable oil.
The combination of cinnamon and pumpkin pie spice creates a warm, comforting flavor that’s perfect for fall.
The baking powder and baking soda give them a light and airy texture that’s irresistible. Trust me, these Baked Pumpkin Donuts are a must-try!
The Secret to the Best Baked Pumpkin Donuts
The real star of this recipe is the brown sugar icing. It adds a rich, caramel-like sweetness that perfectly complements the pumpkin spice flavor.
Unlike traditional glazes made with powdered sugar, the brown sugar gives it a depth of flavor that’s simply divine. It’s the perfect finishing touch!

Ingredients for Baked Pumpkin Donuts
Here’s everything you’ll need to create these little bites of autumn joy:
- 1 and 3/4 cups (219g) all-purpose flour (spooned & leveled)
- 1 teaspoon baking powder
- 1 teaspoon baking soda
- 1/2 teaspoon salt
- 1 and 1/2 teaspoons ground cinnamon
- 1 teaspoon store-bought or homemade pumpkin pie spice
- 1/2 cup (120ml) vegetable oil (or canola oil or melted coconut oil)
- 3/4 cup (150g) packed light or dark brown sugar
- 2 large eggs, at room temperature
- 1 cup (226g) fresh or canned pumpkin puree
- 1/3 cup (80ml) milk, at room temperature
- 1 teaspoon pure vanilla extract
- 3/4 cup (150g) packed light or dark brown sugar
- 1/4 cup (60ml) milk (whole milk is best)
- 1 Tablespoon (14g) vegetable shortening
- 1 teaspoon pure vanilla extract
- 1 and 1/2 cups (170g) sifted confectioners’ sugar
- pinch of salt, to taste
- optional topping: crushed walnuts (see Note for other options)
Using high-quality ingredients can truly elevate your baking.
For the pumpkin puree, I prefer Libby’s; it has a consistent texture and flavor that works beautifully in this recipe. But feel free to use your favorite brand.
Different brands can vary in moisture content, so keep that in mind.
According to WebMD, one cup of pumpkin puree contains 83 calories, 2.7 grams of protein, and 0.7 grams of fat, and is loaded with other nutrients.
For an extra layer of flavor, lightly toast your cinnamon and pumpkin pie spice in a dry pan over low heat for a minute or two before adding them to the batter.
If you’re looking for other treats and drinks for the fall, consider some warm apple cider!
How to Make Baked Pumpkin Donuts: Step-by-Step
- Preheat the oven to 350°F (177°C). Grease donut pan(s) with nonstick spray. Set aside.
- In a large bowl, whisk together the flour, baking powder, baking soda, salt, cinnamon, and pumpkin pie spice until combined. Set aside.
- In a medium bowl, whisk together the oil, brown sugar, eggs, pumpkin puree, milk, and vanilla extract until combined.
- Pour the wet ingredients into the dry ingredients, then, using a silicone spatula or wooden spoon, fold everything together gently just until combined and no flour pockets remain.
- Spoon the batter into the donut cavities or, for ease, I recommend transferring the batter into a large zipped-top bag. Cut a corner off the bottom of the bag and pipe the batter into each donut cavity, filling each about halfway.
- Bake for 10–11 minutes or until the edges and tops are lightly browned. To test, poke your finger into the top of the donut. If the donut bounces back, they’re done.
- Cool donuts in the pan for 2 minutes then transfer to a cooling rack. Re-grease the pan and bake the remaining donut batter. For mini donuts, bake in a mini donut pan for 8–9 minutes. Cool donuts for at least 10 minutes before icing them.
- Combine the brown sugar, milk, and vegetable shortening in a medium saucepan over medium heat. Stir until the vegetable shortening has melted and the mixture is smooth. Bring to a simmer.
Allow to simmer for 1 minute, then remove from heat and whisk in the vanilla extract and sifted confectioners’ sugar until smooth and combined.
Taste, then add a pinch of salt if desired, I always add a tiny pinch. Let the icing cool for 5 minutes to slightly thicken. - Dip the tops of the pumpkin donuts into the warm icing. If the icing is getting too thick as you’re dipping, whisk in a little more milk, or warm back up in the microwave or on the stove to thin it out.
- Place dipped donuts on a cooling rack placed on a baking sheet to allow excess icing to drip off. Top with chopped nuts or other toppings if desired. If applied lightly, the icing will eventually set (in about 1 hour) so you can stack or transport the donuts.
- Cover leftover donuts tightly and store at room temperature for 1–2 days or in the refrigerator for up to 1 week.
Troubleshooting Your Baked Pumpkin Donuts
- Donuts are dry: Make sure you’re measuring your flour correctly (spooned and leveled). Overbaking can also cause dryness, so check for doneness at the 10-minute mark.
- Donuts are not rising: Ensure your baking powder and baking soda are fresh. If they’re old, they may not provide enough leavening power.
- Glaze is too thin: Let the glaze cool for a few more minutes to thicken, or add a bit more sifted confectioners’ sugar.
- Glaze is too thick: Whisk in a little more milk to thin it out. You can also gently warm it on the stove or in the microwave.
Delicious Glaze Variations for Your Pumpkin Donuts
While the brown sugar glaze is my personal favorite, here are some other delicious options to try:
- Vanilla Glaze: Simply replace the brown sugar with confectioners’ sugar and add a splash of vanilla extract.
- Chocolate Glaze: Add cocoa powder to the brown sugar glaze for a rich, chocolatey twist. Start with 1-2 tablespoons and adjust to taste.
- Brown Butter Glaze: Brown the butter before making the glaze for a nutty, complex flavor. Be careful not to burn the butter.
- Maple Glaze: Replace the milk with maple syrup for a warm, autumn-inspired glaze.
You can also customize your glazes by adding different flavor extracts, such as almond, or using juice instead of milk.
Ingredient Substitutions and Variations
| Ingredient | Substitution/Variation |
|---|---|
| All-purpose flour | Gluten-free all-purpose flour blend (ensure it contains xanthan gum) |
| Vegetable oil | Canola oil, melted coconut oil |
| Brown sugar | Coconut sugar |
| Pumpkin puree | Homemade pumpkin puree (make sure to remove excess moisture) |
| Milk | Almond milk, soy milk, or any other non-dairy milk |
| Vegetable shortening | Butter (unsalted), coconut oil |
Make-Ahead Instructions
Yes, you can make the batter ahead of time! Store it in an airtight container in the refrigerator for up to 24 hours. When ready to bake, let it sit at room temperature for about 30 minutes before filling the donut pan. This will help ensure the donuts bake evenly.
For a heartier brunch option, check out these twice baked sweet potatoes.
Choosing the Right Donut Pan
Donut pans come in various materials, including nonstick, silicone, and metal. Nonstick pans are the easiest to use, as they prevent the donuts from sticking.
Silicone pans are flexible and make it easy to remove the donuts, but they may not brown as evenly as metal pans. Metal pans provide the best browning but require thorough greasing. I recommend a nonstick donut pan for best results.
High Altitude Baking Adjustments for Pumpkin Donuts
At high altitudes, you may need to make a few adjustments to prevent your donuts from being too dry or rising too quickly.
Try reducing the amount of baking powder by 1/4 teaspoon and increasing the milk by 1-2 tablespoons. This helps to balance the moisture content and prevent the donuts from collapsing.
How to Store Baked Pumpkin Donuts
To maintain freshness, store your baked pumpkin donuts in an airtight container at room temperature for 1-2 days or in the refrigerator for up to 1 week.
If storing in the refrigerator, let them come to room temperature before serving for the best flavor and texture.
Serving Suggestions for Pumpkin Donuts
While these donuts are delicious on their own, here are some serving suggestions to elevate your experience:
- Pair them with a warm cup of coffee or tea.
- Serve them with a side of vanilla ice cream.
- Create a fall-themed dessert platter with other seasonal treats.
- Enjoy them as a sweet addition to your brunch spread.
Frequently Asked Questions
What donut pan do you use?
I prefer a nonstick donut pan for easy release and even baking.
What if I don’t have a donut pan?
You can bake the batter in muffin tins, but the texture will be slightly different.
Can I coat the donuts in cinnamon sugar instead of glazing them?
Absolutely! Simply toss the warm donuts in a mixture of cinnamon and sugar.
Can I make these gluten-free?
Yes, use a gluten-free all-purpose flour blend that contains xanthan gum.
Conclusion
These Baked Pumpkin Donuts are a delightful treat that’s perfect for any fall occasion. With their moist texture, warm spices, and irresistible brown sugar glaze, they’re sure to become a new favorite. Now it’s your turn to whip up a batch and experience the magic for yourself!
I’d love to see your creations! Leave a comment below to share your results or ask any questions. Don’t forget to tag me on social media so I can see your beautiful Baked Pumpkin Donuts! Happy baking!
Love fall baking? Follow us on Pinterest for more pumpkin desserts and cozy seasonal recipes!
Easy Baked Pumpkin Donuts: A Wonderful Fall Treat
Ingredients
Equipment
Method
- Preheat the oven to 350°F (177°C). Grease donut pan(s) with nonstick spray. Set aside.
- In a large bowl, whisk together the flour, baking powder, baking soda, salt, cinnamon, and pumpkin pie spice until combined. Set aside.
- In a medium bowl, whisk together the oil, brown sugar, eggs, pumpkin puree, milk, and vanilla extract until combined.
- Pour the wet ingredients into the dry ingredients, then, using a silicone spatula or wooden spoon, fold everything together gently just until combined and no flour pockets remain.
- Spoon the batter into the donut cavities or, for ease, I recommend transferring the batter into a large zipped-top bag. Cut a corner off the bottom of the bag and pipe the batter into each donut cavity, filling each about halfway.
- Bake for 10–11 minutes or until the edges and tops are lightly browned. To test, poke your finger into the top of the donut. If the donut bounces back, they’re done.
- Cool donuts in the pan for 2 minutes then transfer to a cooling rack. Re-grease the pan and bake the remaining donut batter. *For mini donuts, bake in a mini donut pan for 8–9 minutes. Cool donuts for at least 10 minutes before icing them.*
- Combine the brown sugar, milk, and vegetable shortening in a medium saucepan over medium heat. Stir until the vegetable shortening has melted and the mixture is smooth. Bring to a simmer. Allow to simmer for 1 minute, then remove from heat and whisk in the vanilla extract and sifted confectioners’ sugar until smooth and combined. Taste, then add a pinch of salt if desired—I always add a tiny pinch. Let the icing cool for 5 minutes to slightly thicken.
- Dip the tops of the pumpkin donuts into the warm icing. If the icing is getting too thick as you’re dipping, whisk in a little more milk, or warm back up in the microwave or on the stove to thin it out.
- Place dipped donuts on a cooling rack placed on a baking sheet to allow excess icing to drip off. Top with chopped nuts or other toppings if desired. If applied lightly, the icing will eventually set (in about 1 hour) so you can stack or transport the donuts.
- Cover leftover donuts tightly and store at room temperature for 1–2 days or in the refrigerator for up to 1 week.
Notes
Tried this recipe?
Let us know how it was!Printable Recipe Card
Want just the essential recipe details without scrolling through the article? Get our printable recipe card with just the ingredients and instructions.