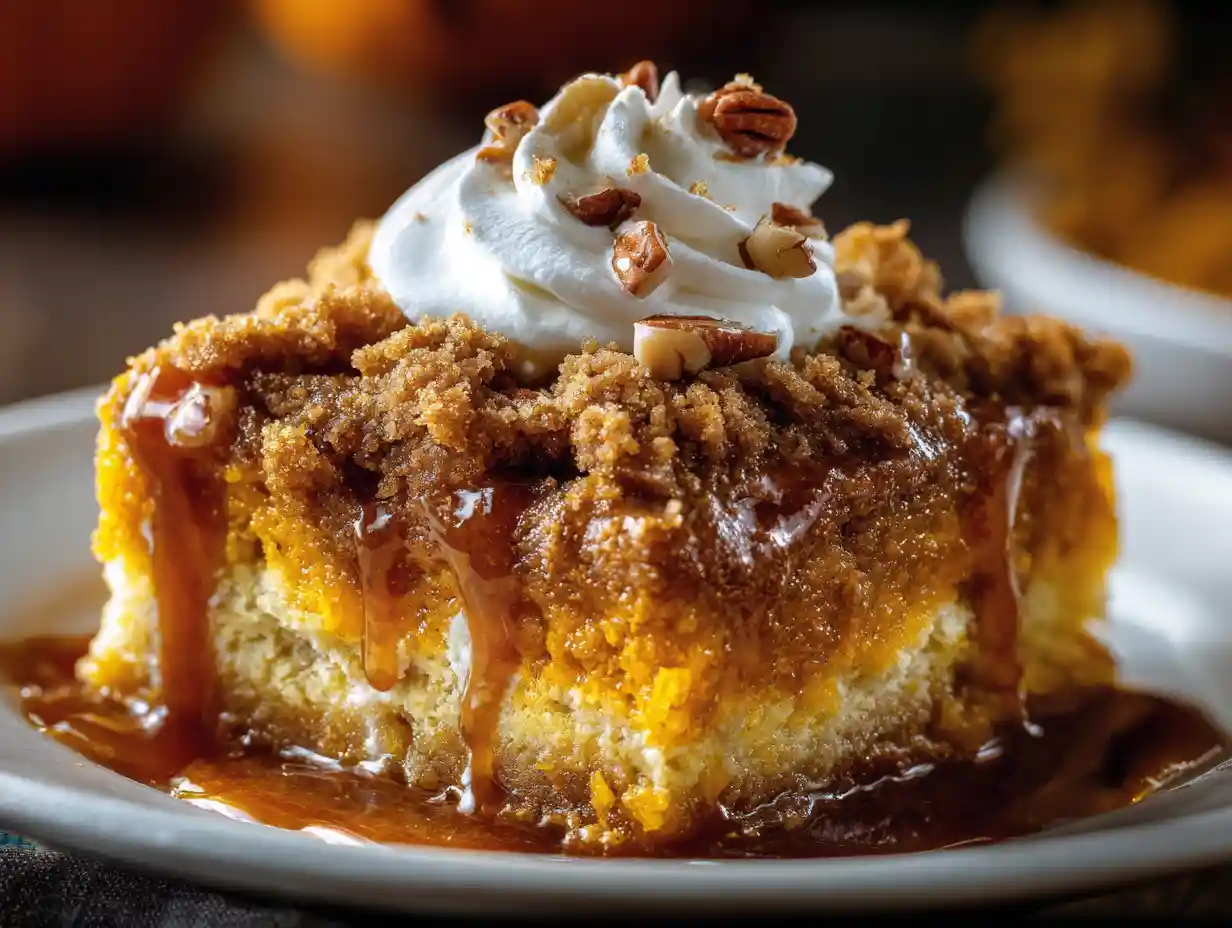
Oh, the crisp air and colorful leaves of fall always bring me straight to the kitchen, dreaming of warm, comforting desserts. There’s just something magical about this season, and for me, it’s often about creating easy treats that feel incredibly special. This Pumpkin Dump Cake Recipe is exactly that: a quintessential fall dessert that’s ridiculously simple to make, yet delivers huge on flavor.
I love how effortless this cake is. From start to finish, you’re looking at approximately 60-70 minutes, including prep and bake time, which means more time enjoying the cozy moments of fall and less time stressing in the kitchen. It truly is the perfect sweet ending to any autumn meal.
Jump To
Why This Pumpkin Dump Cake Recipe Is Your New Fall Favorite

I truly believe this specific pumpkin dump cake recipe will become a cherished part of your fall traditions. It’s incredibly simple, relying on common pantry ingredients that you might already have on hand.
This makes it a fantastic go-to dessert for those spontaneous cravings or unexpected guests. Beyond its ease, this cake is perfect for gatherings, much like an [amazing caramel apple upside down cake]. It bakes up beautifully in a 9×13-inch pan, making it ideal for sharing with friends and family.
Plus, the minimal cleanup involved is a huge win in my book, leaving you more time to savor the moment. The results are consistently delicious every time, delivering that perfect blend of creamy pumpkin and a buttery, crisp topping.
What Exactly is a Dump Cake? (And Its Sweet History!)
If you’ve never made a dump cake before, prepare to be amazed by its simplicity and the little bit of kitchen magic involved! Essentially, a dump cake is a dessert where you “dump” all your ingredients, often canned fruit, cake mix, and butter, directly into a pan without much mixing. The beauty lies in its fuss-free nature. This method makes it as easy to prepare as a classic [apple fritter cake], but with a unique texture.
The fun origin story behind dump cakes dates back to the 1950s, a time when convenience foods were gaining popularity. The magic happens in the oven: as the butter melts and mingles with the dry cake mix and moist fruit layer, it transforms into a delicious, cake-like crust that’s wonderfully tender yet crisp. It’s a surprisingly sophisticated outcome for such an easy process!
Ingredients You’ll Need for This Easy Pumpkin Dump Cake Recipe
Gathering your ingredients is the first step to creating this delightful fall treat. I love that most of these are pantry staples!
- 15 oz canned pumpkin puree
- 12 oz evaporated milk
- 1 cup (213g) packed brown sugar
- 3 large eggs
- 2 tsp pumpkin pie spice
- 15.25 oz yellow cake mix
- 1 cup (114g) chopped pecans
- 1 cup (226g) unsalted butter (melted)
Make Your Own Pumpkin Pie Spice (Optional)
While store-bought pumpkin pie spice is perfectly convenient, I know some of you love the idea of mixing your own! If you prefer to customize your blend or simply don’t have a jar on hand, you can absolutely create your own.
This blend typically involves common spices like cinnamon, ginger, nutmeg, and cloves. Crafting your own allows you to adjust the ratios to your personal taste, making your pumpkin dump cake uniquely yours.
Step-by-Step Instructions: How to Make the Perfect Pumpkin Dump Cake
I promise, making this pumpkin dump cake is as easy as it sounds! Just follow these simple steps, and you’ll have a warm, fragrant dessert ready in no time.
- Preheat the oven to 350ºF.
- Grease the bottom and sides of a 9×13 inch cake pan with non-stick cooking spray.
- In a large bowl combine the pumpkin, evaporated milk, brown sugar, eggs and pumpkin pie spice.
- Whisk until combined. Pour this mixture into the greased pan.
- Sprinkle the cake mix powder on top of the batter as evenly as possible.
- Sprinkle the pecans evenly over the batter.
- Pour the melted butter evenly over the top of the cake.
- Bake for 45-50 minutes, until the edges are browned and the center is set. A knife inserted in the middle should come out clean.
Expert Tips for a Flawless Pumpkin Dump Cake Every Time
I want you to have the most delicious pumpkin dump cake, so I’m sharing some of my best tips for ensuring success! These little tricks can make all the difference.
Getting the Perfect Crumble Topping
The topping is truly what makes a dump cake shine! To achieve that consistently crunchy, non-powdery top, an even butter distribution is key. I like to slowly drizzle the melted butter over the entire surface of the dry cake mix and pecans, making sure to cover as much as possible. You want to see the butter soaking into the mix, creating little pockets of deliciousness.
Another approach, if you prefer a more defined crumble, is to use very cold butter. You can grate it over the cake mix or slice it thinly into small pieces and distribute them evenly. Whichever method you choose, the goal is uniform coverage, which will melt and create that irresistible golden crust.
How to Know When Your Pumpkin Dump Cake is Done
Knowing when your cake is perfectly baked can be tricky, but I’ve got you covered with some simple cues. Visually, you’ll notice the edges of the cake turning a beautiful golden brown and appearing firm. The center should look set and no longer jiggly.
For a definitive test, I always rely on the classic knife trick. Insert a thin knife or a wooden skewer into the very center of the cake. If it comes out clean, with no wet batter attached, your pumpkin dump cake is ready to come out of the oven!
Common Mistakes to Avoid
I’ve learned from my own baking adventures, and these are a few pitfalls I want you to sidestep for the best results. First, always remember to grease your pan thoroughly; this prevents sticking and makes serving so much easier.
Second, strive for an even distribution of the dry cake mix powder and the butter; unevenness can lead to patches that are too dry or too wet.
Lastly, don’t skimp on the butter, as it’s crucial for achieving that delightful crumble texture. Similar tips apply to many other baked goods, like when preparing [buttery apple cobbler] or delightful apple muffins.
Pan Size Adjustments
This recipe is designed for a 9×13 inch pan, which is a fantastic standard size for feeding a crowd. If you plan to use an alternative pan size, like an 8×8 inch square pan or even a Bundt pan, you would typically need to adjust the baking time.
Smaller pans might require a little less time, while a Bundt pan could need a similar duration but should be monitored closely for doneness. I always recommend keeping an eye on your cake, using the visual cues and knife test, regardless of the pan size.
Variations & Ingredient Substitutions for Your Pumpkin Dump Cake
I love how versatile this pumpkin dump cake recipe is! It’s easy to customize it to your taste or what you have on hand. Here are some ideas for making it your own.
Cake Mix Flavors
You can easily change the entire profile of this cake by swapping out the yellow cake mix. Here are some of my favorite alternatives:
| Cake Mix Flavor | Flavor Profile Change |
|---|---|
| Spice Cake Mix | Enhances the fall spices, giving it a more robust, aromatic flavor. |
| Chocolate Cake Mix | Adds a rich, decadent chocolate note, creating a “pumpkin patch dirt cake” feel. |
| White Cake Mix | Provides a milder, sweeter canvas, letting the pumpkin spice flavor shine even brighter. |
| Butter Pecan Mix | Intensifies the nutty flavor of the pecans and adds a buttery depth. |
Other Ingredient Swaps
Sometimes you need to make a quick swap, and that’s perfectly fine! Here are some common substitutions I’ve tried:
| Ingredient | Substitution | Notes |
|---|---|---|
| Evaporated Milk | Heavy cream or half-and-half | These will provide a similar richness, though the texture might be slightly different. Use the same quantity. |
| Pecans | Chopped walnuts, almonds, or cashews; for nut-free, omit or use sunflower seeds/pepitas. | Feel free to use any nuts you prefer, or omit them entirely if you have allergies or preferences. If omitting, the topping might be slightly less crunchy, but still delicious. |
| Canned Pumpkin | Fresh pumpkin puree | If using fresh, ensure it’s properly cooked and pureed to a very smooth consistency. Make sure it’s pure pumpkin, not pumpkin pie filling. |
| Brown Sugar | Granulated sugar (adjust to taste), or a sugar substitute | Brown sugar adds a lovely molasses note, but granulated sugar works in a pinch. If using a sugar substitute, follow package directions for equivalency. |
| Pumpkin Pie Spice | Individual spices like cinnamon, nutmeg, ginger, and cloves (see “Make Your Own Pumpkin Pie Spice” section) | If you don’t have the blend, you can use individual spices. A common ratio is 2 parts cinnamon to 1 part each of ginger, nutmeg, and allspice (with a pinch of cloves). |
Dietary Modifications
While this recipe is quite adaptable, I want to mention that making significant dietary modifications, like for gluten-free or dairy-free diets, would typically involve specific ingredient replacements and potentially adjustments to baking times or textures.
For instance, you could try a gluten-free yellow cake mix and dairy-free butter and evaporated milk alternatives. For reduced sugar, you might experiment with less brown sugar or a sugar substitute. Always remember that these changes can impact the final texture and taste, and I would provide specific recipe adaptations if I had tested them.
Troubleshooting Your Pumpkin Dump Cake
I understand that sometimes things don’t go exactly as planned in the kitchen. Here are solutions to a couple of common issues you might encounter with your pumpkin dump cake.
- Too Runny Bottom Layer: If your pumpkin layer turns out too runny, it usually means it didn’t bake quite long enough or perhaps your eggs weren’t fully incorporated. Ensure you whisk the pumpkin mixture thoroughly before pouring it into the pan. If it seems too loose after the recommended baking time, pop it back in the oven for another 5-10 minutes, checking it frequently until it’s set.
- Soggy/Powdery Top Layer: This often happens if the butter wasn’t distributed evenly or if there wasn’t enough of it. My best advice here is to really take your time with step 7, pouring the melted butter evenly over the entire surface of the cake mix and pecans. You want to see a good, glistening coverage. This ensures the cake mix has enough fat to toast up into that perfect crisp, golden crumble.
Serving & Presentation Ideas for Your Pumpkin Dump Cake
This pumpkin dump cake is delicious on its own, but I always love a good excuse to make dessert feel extra special. Here are some ideas for serving and presentation.
Classic Toppings
For a simple yet satisfying finish, I love pairing this warm cake with a dollop of fresh whipped cream. A scoop of good quality vanilla ice cream, melting slightly into the warm cake, is also incredibly delightful. And a light dusting of cinnamon or a tiny sprinkle of pumpkin pie spice always adds a lovely aromatic touch.
Creative Garnishes for Any Occasion
To elevate your presentation, consider a drizzle of warm caramel sauce over each slice. Candied nuts, like candied pecans or walnuts, would add another layer of texture and sweetness.
For a subtle aromatic touch, a sprinkle of freshly grated nutmeg is wonderful. During the holidays, you could even use small cookie cutters to create festive shapes out of pie crust or puff pastry, bake them, and then arrange them around the cake for a charming display.
Best Serving Temperature & Reheating Tips
I find this pumpkin dump cake is absolutely divine served warm, perhaps 15-20 minutes after it comes out of the oven. This allows it to set slightly while still being wonderfully gooey. If you have leftovers, store them covered in the refrigerator.
To reheat slices, a quick zap in the microwave for 30-60 seconds usually does the trick. If reheating a larger portion or the whole cake, cover it loosely with foil and warm it in a 300°F oven until heated through, usually around 15-20 minutes. This helps maintain its lovely texture without drying it out.
Storing & Making Ahead Your Pumpkin Dump Cake
I love a dessert that can be prepared in advance or stored easily, and this pumpkin dump cake definitely fits the bill!
Room Temperature, Refrigeration, Freezing
For maximum freshness, I recommend storing any leftover pumpkin dump cake covered tightly with plastic wrap or in an airtight container. It will keep well at room temperature for up to 2 days, though I personally prefer to refrigerate it after it has fully cooled.
In the refrigerator, it will stay fresh for up to 4-5 days. If you want to prepare it far in advance or save some for later, you can freeze individual slices or the whole cake, tightly wrapped in plastic wrap and then foil, for up to 2-3 months. Thaw in the refrigerator overnight before reheating.
Can You Make This Ahead?
Absolutely! This pumpkin dump cake is an excellent make-ahead dessert, which is perfect for holiday gatherings or when you just want to get a head start. You can bake the cake a day or two in advance and simply reheat it when you’re ready to serve.
This allows all those wonderful flavors to meld together even more, making it taste even better the next day!
Nutrition Information
I always encourage mindful eating, and understanding what’s in your food is part of that. Typically, in this space, you would find a detailed nutrition label for the recipe, generated by a recipe card plugin.
This would include information like calories, fat, carbohydrates, and protein per serving, helping you track your dietary intake.
FAQs About Pumpkin Dump Cake
I often get questions about specific recipe details, and I’m happy to address some common ones about this pumpkin dump cake!
Can I use a different size pan?
Yes, you can. While this recipe is for a 9×13 inch pan, you can use other sizes. Just be aware that baking times will need to be adjusted; smaller pans may bake quicker, and larger pans might take slightly longer. Always rely on the visual cues and the knife test for doneness.
Do I have to use evaporated milk?
The recipe specifically calls for evaporated milk to give the pumpkin layer its signature creamy texture and richness. While you could technically substitute it with heavy cream or half-and-half, the flavor and consistency might be slightly different. I always recommend sticking with evaporated milk for the best results in this recipe.
What if I don’t like pecans?
No problem at all! If you’re not a fan of pecans, you can easily omit them entirely or substitute them with other chopped nuts like walnuts or almonds. For a nut-free option, you could use sunflower seeds or pepitas, or simply leave them out for a simpler topping.
Can I use fresh pumpkin instead of canned?
Yes, you can use fresh pumpkin puree, but ensure it’s cooked and pureed very smoothly. Make sure it’s 100% pure pumpkin puree, not pumpkin pie filling, as the pie filling contains added spices and sweeteners that would alter the recipe’s balance.
Conclusion: Your Go-To Fall Dessert!
I hope you’re as excited as I am to try this incredibly easy and utterly delicious Pumpkin Dump Cake Recipe! It truly embodies everything I love about fall baking: comfort, simplicity, and incredible flavor. It’s the kind of dessert that brings smiles, fills your home with the most wonderful aromas, and makes everyone feel cozy. I really think this will become your go-to dessert for autumn gatherings, weeknight treats, or whenever you just need a taste of fall comfort.
I can’t wait to hear what you think! Please leave a comment below and let me know if you tried it, if you have any questions, or if you discovered a favorite variation. Happy baking, my friends!
Follow us on Pinterest for easy fall treats, from Pumpkin Dump Cake to apple fritter favorites!
Pumpkin Dump Cake Recipe for Fall
Ingredients
Equipment
Method
- Preheat the oven to 350ºF.
- Grease the bottom and sides of a 9×13 inch cake pan with non-stick cooking spray.
- In a large bowl combine the pumpkin, evaporated milk, brown sugar, eggs and pumpkin pie spice.
- Whisk until combined. Pour this mixture into the greased pan.
- Sprinkle the cake mix powder on top of the batter as evenly as possible.
- Sprinkle the pecans evenly over the batter.
- Pour the melted butter evenly over the top of the cake.
- Bake for 45-50 minutes, until the edges are browned and the center is set. A knife inserted in the middle should come out clean.
Nutrition
Notes
Tried this recipe?
Let us know how it was!Printable Recipe Card
Want just the essential recipe details without scrolling through the article? Get our printable recipe card with just the ingredients and instructions.