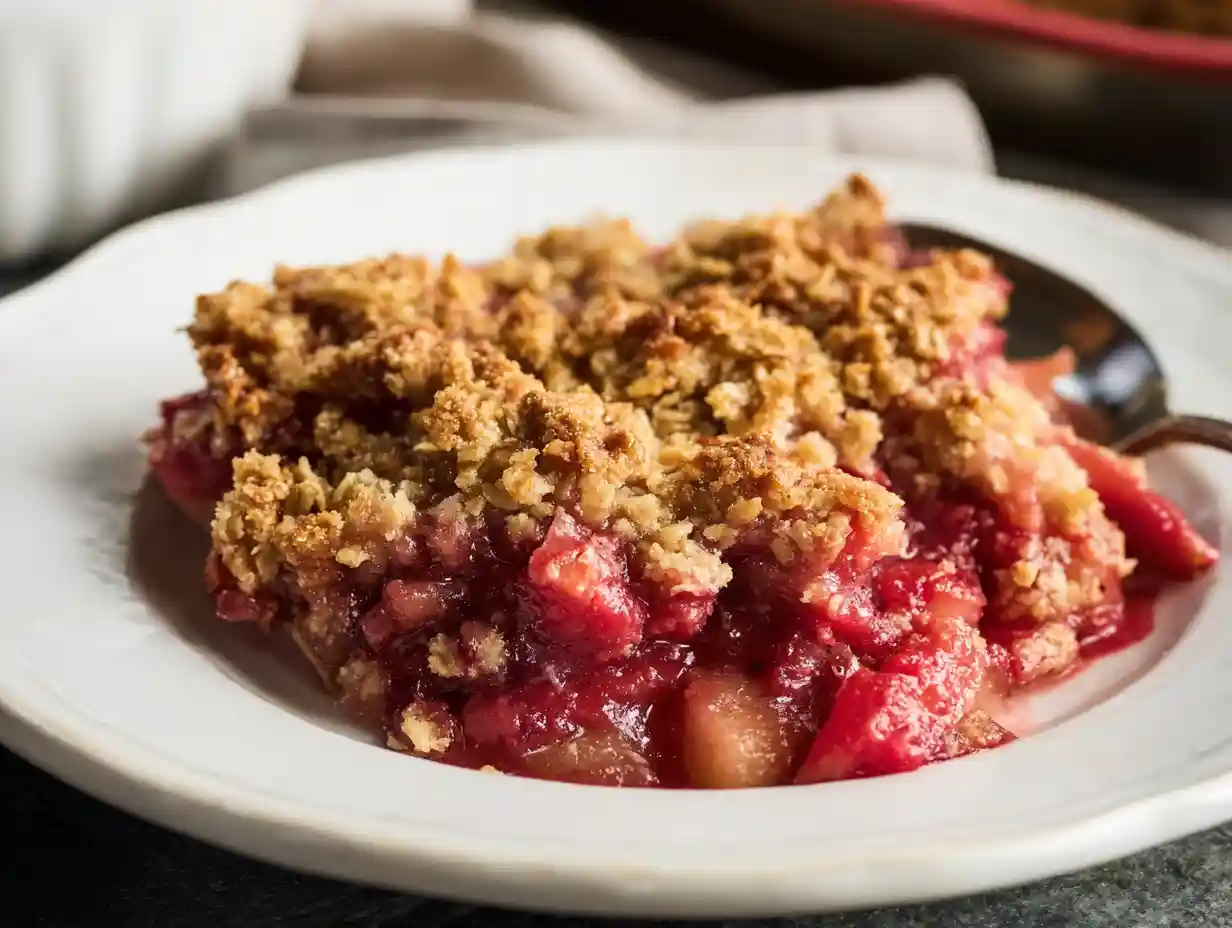
Oh, there’s nothing quite like the comforting aroma of a hearty meal simmering away, especially when it requires minimal effort from me. I find so much joy in creating dishes that bring warmth and flavor to my table, and this Crockpot Chili recipe is truly one of my absolute favorites. It’s the kind of meal that wraps you in a cozy hug, perfect for chilly evenings or a casual gathering.
This recipe is incredibly easy to put together, with most of the work done by your trusty slow cooker. With just about 15 minutes of prep time and then a relaxing 3-4 hours on high or 6-8 hours on low, you get a pot full of rich, deeply flavored chili that tastes like it’s been simmering all day. I promise, this is a game-changer for busy weeknights or lazy weekends!
Jump To
Why This Crockpot Chili Recipe is Your New Favorite (Beyond Just Easy!)

While the ease of a slow cooker is undeniably appealing, the magic of this Crockpot Chili goes far beyond just convenience. Using a crockpot allows the flavors to meld and deepen over hours, creating a richness that’s hard to achieve with quicker stovetop methods. The low, steady heat gently breaks down the ground beef, making it incredibly tender, while the spices slowly infuse into every bite, making it one of my favorite hearty and convenient main dishes.
I find that this method transforms simple ingredients into something truly extraordinary. The tomatoes develop a natural sweetness, the beans absorb all those wonderful seasonings, and the entire dish becomes incredibly cohesive.
It’s a scientific marvel, really: the prolonged, gentle cooking allows complex chemical reactions to occur, building layers of flavor and a wonderfully thick, luscious texture that makes this chili absolutely irresistible.
Essential Equipment for Crockpot Chili Success
Having the right tools in my kitchen always makes the cooking process smoother and more enjoyable. For this Crockpot Chili recipe, I recommend a few key pieces of equipment that will ensure the best results every time.
First and foremost, a 6-quart slow cooker is ideal for this recipe. It’s the perfect size to hold all the ingredients without overcrowding, allowing everything to cook evenly. I also find a sturdy large skillet indispensable for browning the ground beef and sautéing the aromatics.
Cast iron or a heavy-bottomed stainless steel skillet works wonderfully here, as they provide even heat and help develop a delicious fond (those browned bits at the bottom) that adds so much flavor. Beyond that, a good cutting board, a sharp knife for dicing the onion, and a garlic press or small grater for mincing garlic will make your prep a breeze.
Ingredients for the Best Crockpot Chili Recipe
For a truly delicious Crockpot Chili, starting with quality ingredients is key. Here’s exactly what I use to get that perfect balance of flavor and texture:
- 2 lb lean Ground Beef (90/10 or 93/7): I opt for lean ground beef to reduce excess grease, which keeps the chili from becoming too oily. The small amount of fat left still adds plenty of flavor.
- 1 large onion (diced): A large onion provides a fantastic aromatic base, adding natural sweetness and depth. Dicing it finely ensures it melts into the chili.
- 3 garlic cloves (minced): Fresh garlic is irreplaceable for its pungent, savory notes. Mincing it helps distribute its flavor throughout the dish.
- 2 tsp cumin powder: Cumin is a cornerstone of chili flavor, providing an earthy, warm spice.
- 2 Tbsp chili powder: This is where much of the classic chili flavor comes from. I use a good quality blend for the best taste.
- 1 tsp garlic powder: While I use fresh garlic, a little garlic powder enhances the overall garlic essence and adds a different layer of flavor.
- 1 tsp dried oregano: Dried oregano, especially Mexican oregano, adds an essential herbaceous note that complements the other spices beautifully.
- 1 1/2 tsp salt (or to taste): Salt is crucial for balancing and enhancing all the flavors. I start with 1 1/2 teaspoons and adjust at the end.
- 1/2 tsp black pepper: Freshly ground black pepper adds a subtle warmth and a touch of sharpness.
- 15 oz can black beans (drained and rinsed): Black beans add a lovely creamy texture and earthy flavor. Rinsing removes excess sodium and starch.
- 30 oz kidney beans (two 15oz cans, drained and rinsed): Kidney beans are a chili classic, offering a firm texture and mild flavor. Rinsing is important here too.
- 30 oz diced tomatoes (with their juice): These provide the primary tomato base, adding sweetness and acidity, and breaking down beautifully during slow cooking.
- 10 oz diced tomatoes and green chilis (with their juice): I love adding these for an extra layer of flavor and a subtle kick. They really brighten up the chili.
- 30 oz tomato sauce: This helps create a rich, thick consistency and a robust tomato flavor throughout the chili.
Step-by-Step Instructions: How to Make Crockpot Chili
Making this Crockpot Chili is incredibly straightforward, and I’m going to walk you through each step to ensure your success. The secret to deep flavor often starts on the stovetop, even for a slow cooker meal! To ensure a safe and delicious meal, always remember food safety tips for the slow cooker.
- Place a large skillet over medium-high heat and sauté beef until it releases fat (4-5 minutes), breaking it up with a spatula.
I always start by browning my ground beef. This step is crucial because it develops a rich, savory depth that you simply can’t achieve by adding raw meat directly to the slow cooker. Make sure to break the beef into small crumbles as it cooks.
Once it’s nicely browned and has released its fat, I usually drain off any excess, especially if I’m using fattier beef, but with lean ground beef, there’s usually not much to drain. - Add onion to the skillet and sauté until tender (4-5 minutes). Add minced garlic and seasonings: cumin, chili powder, garlic powder, dried oregano, salt and pepper. Cook another 30 seconds stirring constantly. Transfer to a 6 Qt slow cooker.
After the beef is browned, I add the diced onion to the same skillet. Let it cook until it softens and becomes translucent, about 4-5 minutes. Then, I stir in the minced garlic and all the wonderful spices: cumin, chili powder, garlic powder, dried oregano, salt, and pepper. Cooking these spices for just about 30 seconds, while stirring constantly, “blooms” them.
This simple technique intensifies their flavors and aromas, making your chili incredibly fragrant and delicious. Immediately transfer this flavor-packed mixture into your 6-quart slow cooker. - Add remaining ingredients into the slow cooker: rinsed and drained beans, diced tomatoes with their juice, diced tomatoes and green chilis with juice and tomato sauce. Stir to combine and cook on high for 3-4 hours or on low for 6-8 hours. Season to taste if desired and serve warm.
Now for the easy part! Into the slow cooker, I add the rinsed and drained black beans and kidney beans. Next, I pour in the diced tomatoes with their juice, the diced tomatoes and green chilis with their juice, and the rich tomato sauce. Give everything a good stir to ensure all the ingredients are well combined and the spices are distributed. Set your slow cooker to high for 3-4 hours or low for 6-8 hours.
The longer it simmers, the more the flavors will meld. Before serving, give it a taste and adjust the salt or other seasonings if you feel it needs a little something extra. Serve warm and enjoy!
Customizing Your Crockpot Chili: Adjusting the Spice Level
I know everyone has their own ideal spice level for chili, and the beauty of this Crockpot Chili recipe is how easily you can customize it! Here’s how I adjust the heat to my liking or for guests:
For a mild chili, I simply stick to the recipe as written. The chili powder and diced tomatoes with green chilis provide a lovely warmth without being overtly spicy.
If you prefer a medium kick, I suggest adding 1/4 to 1/2 teaspoon of cayenne pepper along with the other dry spices in step 2. You could also include one finely diced jalapeño, seeded and deveined (or leave a few seeds in for more heat), adding it with the onion.
For those who love a truly spicy chili, I recommend increasing the cayenne pepper to 3/4 to 1 teaspoon, adding it with the other spices. For an extra punch, you could also add one or two finely diced serrano peppers (seeds and all, if you dare!) along with the onion. Another option is to stir in a dash or two of your favorite hot sauce, like Cholula or Tabasco, in the last hour of cooking or even just before serving.
Ingredient Substitutions & Recipe Variations
One of the things I love about cooking is the flexibility to make a recipe your own, and this Crockpot Chili is no exception. If you need to swap out an ingredient or want to try a new twist, I’ve got you covered with some fantastic options.
| Ingredient | Substitution Options | Notes on Impact |
|---|---|---|
| Ground Beef | Ground Turkey, Beef | Changes flavor and fat content |
| Black Beans | Pinto beans, Cannellini beans | Alters texture and subtle flavor |
| Kidney Beans | Garbanzo beans, Great Northern beans | Changes texture and mildness |
| Diced Tomatoes | Crushed tomatoes, Fire-roasted tomatoes | Crushed makes it smoother; fire-roasted adds smokiness |
| Tomato Sauce | Passata, Pureed tomatoes | Similar consistency, possibly less sweet |
| Ground Beef (for Vegetarian) | Lentils, Extra mushrooms, Plant-based crumbles | Requires adjustment of cooking liquid/time |
| Beef Broth (if adding) | Vegetable broth, Chicken broth | Changes depth of flavor |
To make this a vegetarian chili, I would omit the ground beef and instead use 1-2 cups of cooked lentils, extra sliced mushrooms, or a package of plant-based crumbles. You might need to reduce the cook time slightly and adjust liquid, adding vegetable broth if it seems too thick.
For chicken chili, I’d swap the ground beef for ground chicken or diced cooked chicken breast, adjusting the cooking time as needed.
Alternative Cooking Methods
While my heart belongs to the slow cooker for this chili, I know that sometimes you need other options. This Crockpot Chili recipe is wonderfully versatile and can be adapted for both an Instant Pot or a traditional Dutch oven on the stovetop.
Instant Pot Crockpot Chili
If I’m in a hurry, my Instant Pot is a lifesaver for this chili! Here’s how I adapt it:
- Sauté the Beef and Aromatics: Set your Instant Pot to the “Sauté” function. Brown the ground beef, breaking it up with a spatula, for 4-5 minutes until it releases its fat. Drain any excess fat if necessary. Add the diced onion and cook until tender, about 4-5 minutes. Stir in the minced garlic and all the seasonings (cumin, chili powder, garlic powder, dried oregano, salt, pepper) and cook for another 30 seconds, stirring constantly. Cancel the “Sauté” function.
- Deglaze (Important!): Pour in about 1/2 cup of water or vegetable broth and scrape the bottom of the pot with a wooden spoon to loosen any browned bits. This prevents a “burn” error.
- Add Remaining Ingredients: Add the rinsed and drained black beans, kidney beans, diced tomatoes with their juice, diced tomatoes and green chilis with juice, and tomato sauce. Give it a gentle stir to combine, but try not to stir too vigorously once the tomatoes are in to avoid the “burn” notice.
- Pressure Cook: Secure the lid and make sure the venting knob is set to “Sealing.” Select “Manual” or “Pressure Cook” on High Pressure for 20 minutes.
- Natural Release: Once cooking is complete, allow for a Natural Pressure Release for at least 10 minutes before carefully switching the venting knob to “Venting” to release any remaining pressure.
- Serve: Stir well, season to taste, and serve warm!
Dutch Oven Crockpot Chili (Stovetop)
For a classic, hands-on approach that still allows for deep flavor development, I love using my Dutch oven on the stovetop.
- Brown Beef and Aromatics: Place your Dutch oven over medium-high heat. Brown the ground beef until it releases its fat (4-5 minutes), breaking it up with a spatula. Drain any excess fat. Add the diced onion and sauté until tender (4-5 minutes). Stir in the minced garlic and seasonings (cumin, chili powder, garlic powder, dried oregano, salt, pepper) and cook for another 30 seconds, stirring constantly.
- Add Remaining Ingredients: Add the rinsed and drained black beans, kidney beans, diced tomatoes with their juice, diced tomatoes and green chilis with juice, and tomato sauce. Stir everything together thoroughly to combine.
- Simmer: Bring the chili to a gentle simmer. Once simmering, reduce the heat to low, cover the Dutch oven, and let it simmer for at least 1.5 to 2 hours, or up to 3 hours, stirring occasionally to prevent sticking. The longer it simmers, the more the flavors will meld.
- Serve: Taste and adjust seasonings as desired, then serve warm.
Make-Ahead, Meal Prep, and Scaling Your Crockpot Chili
I truly believe that some dishes, especially chili, taste even better the next day after the flavors have had a chance to fully mingle and deepen. This Crockpot Chili is absolutely perfect for making ahead, meal prepping, or scaling to feed any crowd!
To make ahead, I often cook a full batch of this chili the day before I plan to serve it. After it’s cooked, I let it cool completely, then transfer it to airtight containers and refrigerate overnight. The chilling process allows the spices and ingredients to meld even further, creating an incredibly rich and cohesive flavor profile. Simply reheat gently on the stovetop or in the slow cooker when you’re ready to serve.
For meal prep, this chili is a dream! Once cooled, I portion it out into individual meal prep containers. It makes for quick, delicious, and healthy lunches or dinners throughout the week. I love pairing it with some whole grain crackers or a side salad for a complete meal.
Scaling the recipe is also very straightforward. If I’m cooking for a smaller household or just myself, I can easily halve all the ingredients. Just be sure to use a smaller slow cooker (a 3-4 quart would be ideal) and monitor the cooking time, as it might be slightly reduced.
Conversely, if I’m feeding a large crowd or want to stock my freezer, I can double or even triple the recipe. I’ll need a larger slow cooker (an 8-quart or even two 6-quart slow cookers might be necessary for a tripled batch) and I’ll keep the cooking times the same, just ensuring the slow cooker isn’t overfilled past the max fill line.
The Ultimate Chili Bar: Serving Suggestions & Toppings
Serving this Crockpot Chili is an event in itself, especially when I set up a “Chili Bar” for guests! It’s such a fun way to let everyone customize their bowl and offers a great opportunity to pair with tasty savory snacks. Here are some of my favorite serving suggestions and toppings:
Classic Toppings:
- Shredded cheddar cheese
- Sour cream or plain Greek yogurt
- Freshly chopped green onions or chives
- Diced red onion
- Fresh cilantro, chopped
Creative & Hearty Toppings:
- Crushed tortilla chips or Fritos
- Crispy bacon bits
- Diced avocado or a dollop of guacamole
- Pickled jalapeños (for an extra kick!)
- A sprinkle of hot sauce
- Toasted pumpkin seeds (pepitas)
- Cornbread croutons
Setting up a Chili Bar: I like to arrange my chili bar buffet-style. I keep the Crockpot Chili warm in the slow cooker, then surround it with small bowls of all the toppings. This way, everyone can help themselves. For complementary side dishes, I always offer:
- Warm, buttery cornbread or cornbread muffins
- A crisp green salad with a light vinaigrette
- Fluffy white or brown rice (perfect for serving chili over)
- Baked potatoes or sweet potatoes (for a chili-stuffed potato!)
Presentation is key for a chili bar. I use small serving spoons for each topping and label them if I have particularly unique options. It’s a fantastic way to turn a simple meal into a delightful, interactive experience.
Reheating & Storage Tips for Your Crockpot Chili
I often make a big batch of this Crockpot Chili, not just for dinner, but also for delicious leftovers throughout the week! Knowing how to properly store and reheat it is key to enjoying its fantastic flavor every time.
Refrigerator Storage: Once your Crockpot Chili has cooled completely, I transfer it to airtight containers. It will keep beautifully in the refrigerator for up to 3-4 days. The flavors actually continue to develop and meld, making it taste even better on day two or three!
Freezing Cooked Chili: This chili freezes wonderfully. After it has cooled, I divide it into freezer-safe airtight containers or heavy-duty freezer bags (laying them flat for easier storage). It can be stored in the freezer for up to 3 months. When I’m ready to enjoy it, I simply thaw it in the refrigerator overnight before reheating.
Freezer Meal Prep (Uncooked): You can also prepare this chili as an uncooked freezer meal! After browning the beef and sautéing the onion and spices, let the mixture cool. Then, combine all the cooled ingredients (beef mixture, beans, tomatoes, tomato sauce) in a large freezer-safe bag. Label and freeze for up to 3 months. When you’re ready to cook, thaw the bag in the refrigerator overnight, then transfer all contents to your slow cooker and cook as directed.
Reheating Instructions:
- Stovetop: My preferred method for reheating. I transfer the chili to a saucepan or Dutch oven over medium-low heat, stirring occasionally, until it’s heated through. If it seems a little thick, I might add a splash of water or broth.
- Microwave: For individual portions, this is the quickest way. I place the chili in a microwave-safe bowl, cover it, and microwave on high for 1-2 minutes, stirring halfway through, until thoroughly heated.
- Slow Cooker: If I have a large quantity of refrigerated chili, I’ll put it back into the slow cooker and heat it on low for 1-2 hours, or until it’s hot and bubbling. This is great for keeping it warm for a party!
Troubleshooting Common Crockpot Chili Issues
Even with the easiest recipes, sometimes little questions or issues pop up. I’ve definitely run into a few over my years of cooking, so I want to share my best tips for troubleshooting common Crockpot Chili problems.
- Chili is Too Watery: This can happen if your tomatoes or beans release a lot of liquid. To fix this, I simply remove the lid from the slow cooker for the last hour or so of cooking, allowing some of the moisture to evaporate. Alternatively, you can mix 1 tablespoon of cornstarch with 2 tablespoons of cold water to form a slurry, then stir it into the hot chili and cook for another 15-30 minutes until it thickens.
- Chili is Too Thick: If your chili ends up thicker than you prefer, it’s an easy fix! I just stir in a splash of beef broth, vegetable broth, or even water, a quarter cup at a time, until it reaches my desired consistency.
- Chili is Bland: This is usually a sign it needs more salt, acid, or a bit more spice. I’ll taste it first and often add another pinch of salt. Sometimes a dash of hot sauce, a squeeze of lime juice at the end, or an extra sprinkle of chili powder can wake up the flavors instantly. Don’t be afraid to adjust!
- Chili is Too Spicy: Oh, I’ve done this before! To mellow out the heat, I stir in a dollop or two of sour cream, plain Greek yogurt, or even a splash of milk or cream. Adding a bit more diced canned tomatoes or another rinsed can of beans can also help dilute the spice. Another trick is to serve it with plenty of mild toppings like cheese and sour cream.
FAQs About Crockpot Chili Recipe
I get a lot of great questions about my chili recipes, so I’ve put together some of the most common ones here to help you out!
Can I add more vegetables?
Absolutely! I often toss in diced bell peppers (any color), corn kernels, or even diced zucchini during the last hour of cooking. Just keep in mind that adding more veggies might make the chili a bit more watery, so you might need to leave the lid ajar to help it thicken.
Do I have to brown the meat?
While you can technically add raw ground beef directly to the slow cooker, I really recommend taking the extra few minutes to brown it first. Browning adds so much depth of flavor and texture, which elevates the chili from good to truly incredible. It’s a step I never skip!
How long does chili last in the fridge?
Cooked Crockpot Chili will last safely in an airtight container in the refrigerator for 3-4 days. It’s often even better the next day as the flavors have had more time to meld!
Can I use dried beans instead of canned?
Yes, you certainly can! If you’re using dried beans, you’ll need to prepare them beforehand. I typically soak them overnight and then cook them separately until tender before adding them to the slow cooker with the other ingredients. This ensures they are fully cooked and prevents them from soaking up too much liquid from the chili itself.
Conclusion
I hope this Crockpot Chili becomes a beloved staple in your kitchen, just as it has in mine. There’s something so truly satisfying about a meal that brings so much warmth and flavor with such little fuss. This recipe truly embodies what I love about home cooking: it’s comforting, versatile, and incredibly delicious, making those moments around the table truly special.
I can’t wait for you to try it! What are your favorite chili toppings? Do you have any questions, or perhaps a chili story to share? Please leave a comment below; I love hearing from you and seeing what you’re cooking up! Happy cooking, friends!
Love cozy slow-cooker dinners? Follow us on Pinterest for more set-it-and-forget-it comfort meals!
Crockpot Chili Recipe: Flavorful & Easy
Ingredients
Equipment
Method
- Place a large skillet over medium-high heat and sauté beef until it releases fat (4-5 minutes), breaking it up with a spatula. This step is crucial because it develops a rich, savory depth. Drain off any excess fat if needed.
- Add onion to the skillet and sauté until tender (4-5 minutes). Add minced garlic and seasonings: cumin, chili powder, garlic powder, dried oregano, salt and pepper. Cook another 30 seconds stirring constantly to ‘bloom’ the spices. Transfer to a 6 Qt slow cooker.
- Add remaining ingredients into the slow cooker: rinsed and drained beans, diced tomatoes with their juice, diced tomatoes and green chilis with juice and tomato sauce. Stir to combine and cook on high for 3-4 hours or on low for 6-8 hours. Season to taste if desired and serve warm.
Nutrition
Notes
Tried this recipe?
Let us know how it was!Printable Recipe Card
Want just the essential recipe details without scrolling through the article? Get our printable recipe card with just the ingredients and instructions.